Easter is almost here so I figured it was time I get my act together, and get a post together on the kids' baskets. I'm going to start off by remaindering everyone that this is Easter and not Christmas. I see these photos of kids getting a table full of presents for Easter and it really makes me scratch my head. When did Easter become such a big, commercial holiday? What happened to colored chicken eggs and some chocolate?
This summer we are planning on take the kids on a few camping trips, so I thought this would be a good time to buy them some fun things that they can take with them. Our first trip is going to be almost a 5 hour drive one way, so we're going to need some mobile entertainment. A great way to save money on holidays like this is to disguise things that the kids actually need as gifts. Because let's face it, they just like opening new things and don't really care what they are, especially at this age.
Let's start with the youngest first. For Bianca I picked up a two piece rash guard set from Old Navy, which just happened to be 50% off when I was in the store! I'm sure these flamingos will see a ton of use this summer. The rest of Bianca's basket came from Dollar Tree. The black container is actually for holding beads but I plan on using it to hold Bianca's massive supply of hair elastics. For our trips, I found an expandable wash cloth, bubbles, an Easter board book and a coloring book. The markers it comes with are those fancy shmancy ones that only write on paper; super handy for a toddler! Instead of a basket I decided to use a sand pail, double use!
Roman is currently still wearing swim suits that he's had for a few years so I figured it was probably time for an upgrade, again it was 50% off at Old Navy; whoop! Poor kid has pasty white skin like me so he can use all the sun protection he can get. I picked up the same expandable washcloth, bubbles and coloring book, and sand pail for Roman as I did for Bianca. I also found some small notebooks that I think Roman will get a ton of use out of. He loves drawing treasure maps and going exploring, and while he's exploring he can collect some bugs with his new bug collecting kit. Tell me that last sentence doesn't sound like something you'd hear in a Price is Right description haha. I had picked up a bug kit like this a few months back for a friend of Roman's birthday, and Roman hasn't stopped telling me how he wished he had one too. Man kids learn how to guilt trip quickly!
I also found some joint gifts for the kids; another coloring book and some egg shaped chalk. The egg and bunny game was actually intended for Roman's basket last year (or maybe even the year before...) but it got forgotten in the closet.
Obviously there isn't any chocolate in these baskets. I'm going to put a few chocolates into plastics eggs for the kids to hunt on Easter morning. There also might be one more small thing that we have for the kids....and by small I mean a 1kg hollow chocolate bunny. I never in a million years would buy the kids a chocolate bunny the size of them, but it was the freebie a couple weeks ago at Superstore. I couldn't add a photo of it because I was not risking getting caught by the kids with a giant chocolate rabbit.....
Some of the most beautiful, delicious, and useful things can be discovered while being spontaneously creative!
Showing posts with label Easter. Show all posts
Wednesday, April 5, 2017
Wednesday, March 30, 2016
Peeps Cupcakes
Now I'm well aware that Easter has come and gone but I still want to share these super cute cupcakes with you. It's never too early to start planning for next year right?
I came across a photo of these cupcakes on Pinterest and I really wanted to give them a shot. Of course I didn't actually read the post that went along with the photo, I just figured I could make it work. While the cupcakes did turn out great and tasted amazing (which is really the important part), there are a few things I would do differently the next time I make them. Hopefully these tips will make your Peeps cupcakes even more successful!
I started out by baking my cupcakes. You could use any recipe you like but this time I decided to use this recipe for a vanilla cake. This is probably one of the better vanilla cake recipes I have tried and highly recommend it! Once the cupcakes were baked and completely cooled I used a knife to cut a hole in the middle of each cupcake. I found the easiest way to do this was to cut out a cone shape and then widen the hole with a small spoon. I dropped a few mini M&Ms into the hole along with a mini candy covered chocolate egg. If I could go back and redo the cupcakes I would have added a lot more M&Ms to the hole. The few that I had dropped in ended up stuck to the icing and didn't exactly spill out of the cupcake like in the original photo. My advice to you, fill the hole with as much candy as you can pile in there; it's the obvious solution!
I was going to use buttercream for the frosting but decided to go with a Whipped Cream Frosting since it is a little less sweet. Heavens knows there is already enough sugar packed into these bad boys. I piped the frosting around the edge of the cupcake and then worked my way in, completely covering the candy filled hole. Lastly, each cupcake was topped with a Peep. I'm personally not a fan of Peeps so I won't be eating mine but I think they are adorable; plus they scream Easter!
The only down side to the Peeps is that you get the exposed marshmallow on the sides where you separate them from each other. If it really bothers you you could push some colored sugar into the exposed marshmallow to cover it up. If you are making these cupcakes in advance I would suggest putting the Peeps on at the very last minute. Not only will it make it easier to transport then, but you'll avoid having the color of your Peep bleed into the color of your frosting.
Just because Easter is over doesn't mean you can't make these cupcakes. Actually now is the perfect time to make them! Why? Because stores will be blowing the Peeps out now that Easter is over! Go out and grab some and make some delicious spring cupcakes to share!
I came across a photo of these cupcakes on Pinterest and I really wanted to give them a shot. Of course I didn't actually read the post that went along with the photo, I just figured I could make it work. While the cupcakes did turn out great and tasted amazing (which is really the important part), there are a few things I would do differently the next time I make them. Hopefully these tips will make your Peeps cupcakes even more successful!
I started out by baking my cupcakes. You could use any recipe you like but this time I decided to use this recipe for a vanilla cake. This is probably one of the better vanilla cake recipes I have tried and highly recommend it! Once the cupcakes were baked and completely cooled I used a knife to cut a hole in the middle of each cupcake. I found the easiest way to do this was to cut out a cone shape and then widen the hole with a small spoon. I dropped a few mini M&Ms into the hole along with a mini candy covered chocolate egg. If I could go back and redo the cupcakes I would have added a lot more M&Ms to the hole. The few that I had dropped in ended up stuck to the icing and didn't exactly spill out of the cupcake like in the original photo. My advice to you, fill the hole with as much candy as you can pile in there; it's the obvious solution!
I was going to use buttercream for the frosting but decided to go with a Whipped Cream Frosting since it is a little less sweet. Heavens knows there is already enough sugar packed into these bad boys. I piped the frosting around the edge of the cupcake and then worked my way in, completely covering the candy filled hole. Lastly, each cupcake was topped with a Peep. I'm personally not a fan of Peeps so I won't be eating mine but I think they are adorable; plus they scream Easter!
The only down side to the Peeps is that you get the exposed marshmallow on the sides where you separate them from each other. If it really bothers you you could push some colored sugar into the exposed marshmallow to cover it up. If you are making these cupcakes in advance I would suggest putting the Peeps on at the very last minute. Not only will it make it easier to transport then, but you'll avoid having the color of your Peep bleed into the color of your frosting.
Just because Easter is over doesn't mean you can't make these cupcakes. Actually now is the perfect time to make them! Why? Because stores will be blowing the Peeps out now that Easter is over! Go out and grab some and make some delicious spring cupcakes to share!
Tuesday, April 14, 2015
Easter 2015
Better late than never with my Easter post! Easter was definitely a lot more fun for everyone this year since Roman is older and has a little bit more of an idea about what is going on. Roman started his morning by following the Easter Bunny's footprints to his Easter basket. I fully expected him to pick up and take off with the first bunny foot but I was pleasantly surprised that he actually followed them along. Once he found the basket he wasted no time busting into the plastic eggs to retrieve the treats! We made sure to set the ones with chocolate aside so he only had some yogurt drops. Can't be starting the sugar high this early!
Once everyone was fed, we loaded up into the truck and headed to Grandma and Grandpa's house! As soon as we walked in the door we were herded back out for an Easter egg hunt! This was the first large scale Easter egg hunt Roman has ever taken part in and luckily he didn't have to dig through snow to find the eggs! Actually it was the first Easter egg hunt I had ever taken part in; what gives Mom!? Anywho, Roman really enjoyed running around the yard and collecting his eggs with his basket. It got so heavy the poor guy had to drag it along behind him! Selby had mentioned an interesting twist on the old fashion egg hunt. Apparently a person he knows suggested that the parents maybe polish off a bottle of wine before hiding the eggs; then it's a hunt for everyone! Haha
Once we found all the eggs (which were all filled with chocolate eggs) we headed back into. the house to tackle the basket the Easter Bunny had left at Grandma and Grandpa's house! By far the biggest hit in the basket (pail) was the bunny sippy cup. After he tore open all his plastic eggs, and ate a few chocolate eggs, everything was thrown aside so he could play with his train set.
Shortly thereafter the rest of our extended family showed up. Roman hasn't seen his second cousins since his first birthday so I was really excited for him to get to play with them. While the kids play, us adults sat around talking and watching the Aquarium channel. It's like the fireplace channel that comes on at Christmas but instead you watch the fish swim around in an aquarium. Everyone thought I was crazy for picking it but it wasn't long before everyone was spaced out watching the fish. If you watch long enough you might even get to see a tiny shrimp!
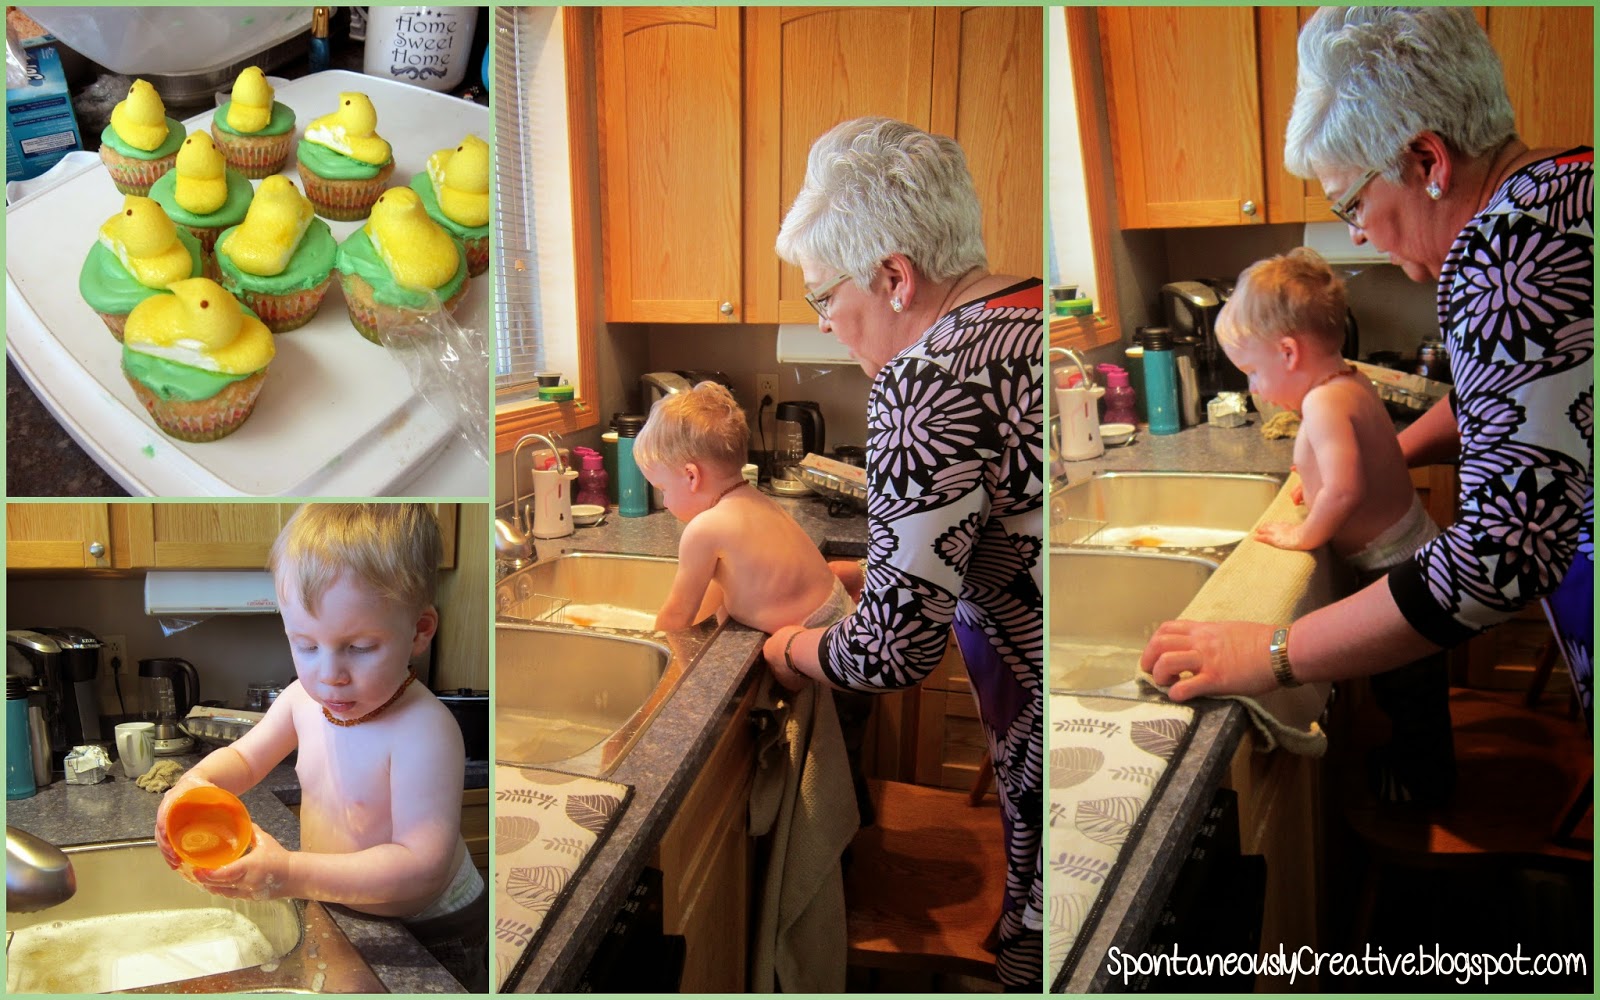
For dessert I made some Peep cupcakes, which turned out great, and everyone seemed to enjoy them! Once everyone was done eating it was time to clean up, and if you know Roman then you know that this is his favorite part. I think he loves doing dishes more than anyone I know. I really hope this keeps up for a few more years! Grandma tried to keep him dry but it was a losing battle (as always) so finally she just gave up. Those 4 dishes that he washed for a good 20 minutes were probably the cleanest in the house!
It was a long, tiring day, but it was a great Easter spent with our family. We went home a few pounds heavier with a pail full of chocolate and a wired up kid, and we couldn't have been happier!
Once everyone was fed, we loaded up into the truck and headed to Grandma and Grandpa's house! As soon as we walked in the door we were herded back out for an Easter egg hunt! This was the first large scale Easter egg hunt Roman has ever taken part in and luckily he didn't have to dig through snow to find the eggs! Actually it was the first Easter egg hunt I had ever taken part in; what gives Mom!? Anywho, Roman really enjoyed running around the yard and collecting his eggs with his basket. It got so heavy the poor guy had to drag it along behind him! Selby had mentioned an interesting twist on the old fashion egg hunt. Apparently a person he knows suggested that the parents maybe polish off a bottle of wine before hiding the eggs; then it's a hunt for everyone! Haha
Once we found all the eggs (which were all filled with chocolate eggs) we headed back into. the house to tackle the basket the Easter Bunny had left at Grandma and Grandpa's house! By far the biggest hit in the basket (pail) was the bunny sippy cup. After he tore open all his plastic eggs, and ate a few chocolate eggs, everything was thrown aside so he could play with his train set.
Shortly thereafter the rest of our extended family showed up. Roman hasn't seen his second cousins since his first birthday so I was really excited for him to get to play with them. While the kids play, us adults sat around talking and watching the Aquarium channel. It's like the fireplace channel that comes on at Christmas but instead you watch the fish swim around in an aquarium. Everyone thought I was crazy for picking it but it wasn't long before everyone was spaced out watching the fish. If you watch long enough you might even get to see a tiny shrimp!
Then it was time for food! Mom always makes ham and scalloped potatoes for Easter. To go along with that there was corn, Ukrainian Easter bread, cheese, corn bread and a Ukrainian dish that I don't know the name of but its a baked pasta/square dish that has raisins in it, and of course hard boiled eggs. Here began the egg wars! It's simple, one person holds their egg on the bottom and the other person on the top. The person with the top egg hits the bottom and whichever egg cracks loses. This has been a tradition in our family for as long as I can remember. I always thought it was a game of chance but John seems to think he has mastered the art of being the bottom egg and he never loses!
For dessert I made some Peep cupcakes, which turned out great, and everyone seemed to enjoy them! Once everyone was done eating it was time to clean up, and if you know Roman then you know that this is his favorite part. I think he loves doing dishes more than anyone I know. I really hope this keeps up for a few more years! Grandma tried to keep him dry but it was a losing battle (as always) so finally she just gave up. Those 4 dishes that he washed for a good 20 minutes were probably the cleanest in the house!
It was a long, tiring day, but it was a great Easter spent with our family. We went home a few pounds heavier with a pail full of chocolate and a wired up kid, and we couldn't have been happier!
Thursday, April 9, 2015
Decorating Eggs 2015
This is by far my favorite Easter tradition! I don't even really like eating hard boiled eggs but I LOVE decorating them! Last year Roman could only sit in his high chair and watch while I colored the eggs, but this year he is right in the game and he had a blast! I picked up this decorating kit at Superstore for a whopping $2. It came with 6 colors (yellow, orange, pink, green, blue & purple), stickers, wrappers, stands, and a memory game. Obviously we aren't going to use the memory game but I thought it was a great value for $2.
Poor Roman was convinced that I had just set out several cups of tea on the table and he was a little disappointed that he couldn't drink them. However, once I showed him how to put eggs into the mugs he quickly decided this was much more fun. With a little help he had those mugs filled with eggs in no time flat!
I was pretty impressed with this dye because it didn't take long for the eggs to become saturated with color, or at least the ones that were completely submerged. I was also impressed with how gentle Roman was being with the eggs. Lately he doesn't like having help doing anything but he loved scooping the eggs out of the dye and seeing how they had changed color, so I guess he decided it was worth putting up with his parents helping him. I'm sure it's a hard concept for a little guy to wrap his head around so he probably thought John and I were pulling some magic tricks on him, with our color changing eggs. The box the decorating kit came in turned into a drying rack but my Mom always had us dry the eggs off on a paper towel lined cookie sheet so that's what I did as well.
Once the eggs were dry I introduced Roman to the world of stickers! At first he had a bit of a hard time figuring out how to get them to stick to the eggs, but after a few tries e figured it out. As you can see from some of the pictures he was pretty pleased with himself. This is literally the reaction he had each and every time he stuck a sticker on an egg. I dare you to look at that middle picture with a mouth full of liquid and not spit it all over the screen. How can you not love this kid?!
Unfortunately Roman did get a little too excited with one of his eggs. The poor pink egg was almost cut in half when his meat mitts crushed down on it. He seemed a little upset by what happened and didn't squish another egg; the beauty of cause and effect!
We ended up with 8 beautiful eggs (including the cracked one) that will live in our fridge for the next few days, or until they are gobbled up by John and Roman. I may even indulge in one or two just so I can have an egg war with John. Want to know what an egg war is? Check out my upcoming Easter Sunday post and learn all about this super fun tradition!
For as long as I can remember my Mom always mixed up our egg dye in coffee mugs and lined them up on the kitchen table for Selby and I to color eggs. I figured if it worked for her it would work for me. What I didn't take into account is that all my mugs are difference sizes and shapes and most are large and the dye wouldn't cover the entire egg. I guess next year I'll have to use plastic cups, or maybe I should get a set of mugs... Poor Roman was convinced that I had just set out several cups of tea on the table and he was a little disappointed that he couldn't drink them. However, once I showed him how to put eggs into the mugs he quickly decided this was much more fun. With a little help he had those mugs filled with eggs in no time flat!
I was pretty impressed with this dye because it didn't take long for the eggs to become saturated with color, or at least the ones that were completely submerged. I was also impressed with how gentle Roman was being with the eggs. Lately he doesn't like having help doing anything but he loved scooping the eggs out of the dye and seeing how they had changed color, so I guess he decided it was worth putting up with his parents helping him. I'm sure it's a hard concept for a little guy to wrap his head around so he probably thought John and I were pulling some magic tricks on him, with our color changing eggs. The box the decorating kit came in turned into a drying rack but my Mom always had us dry the eggs off on a paper towel lined cookie sheet so that's what I did as well.
Once the eggs were dry I introduced Roman to the world of stickers! At first he had a bit of a hard time figuring out how to get them to stick to the eggs, but after a few tries e figured it out. As you can see from some of the pictures he was pretty pleased with himself. This is literally the reaction he had each and every time he stuck a sticker on an egg. I dare you to look at that middle picture with a mouth full of liquid and not spit it all over the screen. How can you not love this kid?!
Unfortunately Roman did get a little too excited with one of his eggs. The poor pink egg was almost cut in half when his meat mitts crushed down on it. He seemed a little upset by what happened and didn't squish another egg; the beauty of cause and effect!
We ended up with 8 beautiful eggs (including the cracked one) that will live in our fridge for the next few days, or until they are gobbled up by John and Roman. I may even indulge in one or two just so I can have an egg war with John. Want to know what an egg war is? Check out my upcoming Easter Sunday post and learn all about this super fun tradition!
Thursday, April 2, 2015
Bunny Sandwich Cookies with Marshmallow Cream Frosting
I'm not normally excited by Easter when it comes to baking and crafts, like I am by other holidays like Christmas, but the warmer weather inspired me to start thinking about spring and Easter. When I'm looking for some inspiration, the first place I always go is Pinterest! I came across this post for the most adorable cookies I had ever seen. They seemed pretty simple so I figured I could replicate them.
To be honest I never even read the recipe for the cookies, I just decided to use my go to sugar cookie recipe. I mixed up a batch of dough, divided it in half, then kneaded Wilton's Golden Yellow color gel into one half and Rose color gel into the other half. Of course as soon as Roman saw what was going on he would not leave the mixer alone until he got to lick the beater. This boy has sure learnt fast that the mixer is for making treats! Once the color was evenly distributed, I wrapped the dough in plastic wrap and refrigerated it over night.
When Roman went down for a nap after lunch, I took the dough out of the fridge and let it sit on the counter for a few minutes to warm slightly; this makes it a bit easier to roll out. I rolled out one color at a time to 1/4" thick on a well floured surface, and cut out heart shaped cookies using a cookie cutter that I picked up at Bulk Barn. To form the bunny head, cut one heart in half and lay it on a parchment lined baking sheet with the halves slightly separated to form the ears. Then lay a heart on top of the two halves with the point between the ears to form the head. All three pieces will adhere to each other while they bake. Make sure you have one regular heart cookie for each bunny head to complete the sandwich.
To be honest I never even read the recipe for the cookies, I just decided to use my go to sugar cookie recipe. I mixed up a batch of dough, divided it in half, then kneaded Wilton's Golden Yellow color gel into one half and Rose color gel into the other half. Of course as soon as Roman saw what was going on he would not leave the mixer alone until he got to lick the beater. This boy has sure learnt fast that the mixer is for making treats! Once the color was evenly distributed, I wrapped the dough in plastic wrap and refrigerated it over night.
When Roman went down for a nap after lunch, I took the dough out of the fridge and let it sit on the counter for a few minutes to warm slightly; this makes it a bit easier to roll out. I rolled out one color at a time to 1/4" thick on a well floured surface, and cut out heart shaped cookies using a cookie cutter that I picked up at Bulk Barn. To form the bunny head, cut one heart in half and lay it on a parchment lined baking sheet with the halves slightly separated to form the ears. Then lay a heart on top of the two halves with the point between the ears to form the head. All three pieces will adhere to each other while they bake. Make sure you have one regular heart cookie for each bunny head to complete the sandwich.
Bake the cookies at 350° for 5-8 minutes until the cookies are cooked through but aren't too brown around the edges. Allow cookies to cool completely on a wire rack. Be VERY gentle when moving the cookies from the baking sheet to the wire rack, or you might end up with some one eared bunnies, like me.
Marshmallow Cream Frosting
7 oz. marshmallow cream
1/2 cup butter
1 1/2 cups icing sugar
1/2t vanilla
Cream butter until smooth. Add marshmallow cream and mix well. Slowly add in icing sugar followed by vanilla and whip until smooth.
Spread a decent amount of the frosting onto the back of the bunny head and sandwich on a heart cookie, making sure to have the good side of each cookie facing out. Place a small amount of the frosting on one side of a Smartie and stick it on the back of the sandwich as the bunny's tail.
When it comes to the bunny's face you have a few options. You could use royal icing as it would set nice and hard, or you could go the route I did and use chocolate. I melted down some chocolate wafers in a double boiler then placed it in a homemade parchment paper piping bag. To make the piping bag simply cut a large circle out of parchment paper. Fold the circle in half and then in half again to make a cone. Cut the tip off the cone, open up the pocket in the cone and spoon in the chocolate. Pipe eyes and a nose on to each of the bunny faces. Set the cookies aside until the chocolate sets and they are able to be stacked.
I absolutely love the way these cookies turned out! Not only are they adorable but they are seriously tasty! The marshmallow cream frosting is gooey and just sweet enough without being over powering. Once the frosting sets it also takes on a marshmallow like texture which is perfect for Easter. These cookies would be great for a kids Easter party or as part of a dessert table at your Easter meal. I actually packaged a couple of these up in a cute Easter cellophane bag with a little carrot tag (all from Bulk Barn) and handed them out at play group. I'm sure all the other mom's appreciated my sugaring up their kids...
Tuesday, March 31, 2015
Toddler Easter Basket
It's hard to believe that Easter is already sneaking up on us! Don't get me wrong, I'm grateful because that means warmer weather is somewhere in our future! On a side note, if you read my spring post you'll be disappointed to know that I was just a forced to bring my boots back out for a few days; not cool spring, not cool.
Back to the Easter basket! Last year I didn't do anything too exciting for Roman's Easter basket, just a stuffed animal and a ball, since he was too little to even care about most things. This year is a whole different story. I feel like I went a little overboard but at the same time I managed to keep the dollar value under control by shopping in the dollar sections of Superstore and Wal Mart. If you are still looking for some basket ideas for the little one in your life, hopefully this will give you some ideas!
When John and I were shopping in Bismarck and looking at Easter baskets I was stunned by the ginormous size of them these days! Maybe I'm just old because I never remember seeing a basket that was large enough to hold a puppy or a small child when I was growing up. After looking at the Ninja Turtle, Cars, and bunny baskets, we settled on the old, flimsy, normal sized, wicker type basket. I like the idea of getting a pretty, durable basket to reuse every year but there are two problems I see with that. 1. I don't want to have to store it and then try to remember where it is, or that I even have it, by next year. 2. I guarantee Roman won't like the same things next year that he does this year and soon enough he'll be able to voice these opinions and request that the Easter Bunny get a new basket.
Back to the Easter basket! Last year I didn't do anything too exciting for Roman's Easter basket, just a stuffed animal and a ball, since he was too little to even care about most things. This year is a whole different story. I feel like I went a little overboard but at the same time I managed to keep the dollar value under control by shopping in the dollar sections of Superstore and Wal Mart. If you are still looking for some basket ideas for the little one in your life, hopefully this will give you some ideas!
When John and I were shopping in Bismarck and looking at Easter baskets I was stunned by the ginormous size of them these days! Maybe I'm just old because I never remember seeing a basket that was large enough to hold a puppy or a small child when I was growing up. After looking at the Ninja Turtle, Cars, and bunny baskets, we settled on the old, flimsy, normal sized, wicker type basket. I like the idea of getting a pretty, durable basket to reuse every year but there are two problems I see with that. 1. I don't want to have to store it and then try to remember where it is, or that I even have it, by next year. 2. I guarantee Roman won't like the same things next year that he does this year and soon enough he'll be able to voice these opinions and request that the Easter Bunny get a new basket.
Of course the plastic egg is a staple of Easter baskets so I picked up this package when we were in Bismarck. I needed something to put in the eggs so I picked up a package of Planes stickers at Superstore. I actually didn't end up putting them in the eggs because I decided to add some mini eggs instead because Roman has become horribly addicted to them. We've actually had to move them into our top cupboards because Roman was constantly into them. He really is my son! I also found this shaker stick in the dollar section at Superstore. They have a larger version at the place we have play group and Roman loves it so I knew this would be a hit. Can we just talk about this whistle for a minute! For $1 at Wal Mart I found a whistle shaped like a duck bill and it even sounds like a duck!! I just about died when I tested it out before I put it in the basket. I'm sure I'll want to snap it after Roman blows on it for 20 minutes but it's a good idea until then.
Sticking this the toys I'm probably going to want to smash, I also found a harmonica and another bell noise maker in the dollar section at Superstore. Roman already has a pretty good collection of chalk but when I spotted these eggs I just had to get them. Luckily he's still at the age where I can have him pick the colors and he won't remember that he ever saw them. He has always had a thing for brink pink chalk so I wasn't too surprised when he picked this package. Next year is going to be so much harder when Roman can't pick out his own things!!
Selby and I LOVED these things when we were little. They are little capsules that have sponge shapes inside them. When placed in water the capsule dissolves and the sponge shape expands. I picked up two packages because I knew they would be perfect to stuff inside some of the plastic eggs. Roman loves having new and interesting things to play with in the tub at night so I'm sure these will be a huge hit with him!
Last but not least, bunnies, bunnies, everywhere! These gems I found at Wal Mart and they were a total score. The package of 12 rabbits are all gummy and stretchy; exactly the kind of thing I hate but all little boys seem to love. Because they are gummy I manage to shove all these rabbits into 4 plastic eggs. I'm hoping they will burst out of the egg when Roman tries to open them and give him a bit of a surprise. The two larger rabbits have wire inside them so you can position them however you want. I decided to wrap the yellow rabbit around the basket handle but unfortunately I had to toss the blue rabbit. He had a piece of wire sticking out of his hand that was pretty sharp, so into the garbage he went. Last but not least, who doesn't want a hopping bunny in their Easter basket. Roman loves these type of toys and usually destroys them within a few days because he plays with them so much. For $3 I won't be crushed if it doesn't make it past noon.
When I think of Easter the first thing I think of is chocolate. While I don't want Roman eating his weight in chocolate, I did want to put some treats in his basket, so I filled a few eggs with some banana vanilla Gerber yogurt drops that I picked up in Bismarck. I was going to wrap Roman's basket, and I still might, but as it stands right now, this is what his basket will look like on Easter morning. I have a few other tricks up my sleeve for Easter morning so be sure to watch for that blog post!
Tuesday, April 15, 2014
Carrot Swag
What's big, orange, and is sure to make you smile? A giant carrot swag for Easter of course! Would you rather have a store bought wreath or bunny face OR a giant carrot? To me it's a no brainer! But then again I tend to like decorations that are a little outside the box, and why not with a fun holiday like Easter! The idea of a giant rabbit delivering candy and leaving behind jelly bean poops isn't exactly an "in the box" idea in itself.
When Mom asked me if I could make her a carrot for her door I jumped at the chance. It's not every day someone asks you to make a enormous carrot for them. It took a bit on thinking but I finally found a way to make her carrot.
Supplies
1 wire cone (6" in diameter, 1 foot long)
1 - 12"x35 foot orange deco mesh
1 - 6"x15 yards green deco mesh
1 stem artificial grass
twist ties
Using the green mesh, make a loop that is approximately 4 inches high and attach it to the top wire on the cone using a twist tie. Make another 4 inch loop and attach it to the second wire on the cone. Continue this process until there is no space left on the first and second wires. At the end, trim the excess mesh close to the base of the last loop.
The grass stem will act as the carrot greens. To attach it to the cone, slide it into the back of the cone and attached it to the vertical wire using the twist ties.
To hang your carrot you will need to make loops from the twist ties and attach them to the top corners of the cone. Now all that is left to do is fluff up the loops. Don't be afraid to be rough with the mesh. It is incredibly strong, and when you're a little rough on it you end up with a better shape.
When Mom asked me if I could make her a carrot for her door I jumped at the chance. It's not every day someone asks you to make a enormous carrot for them. It took a bit on thinking but I finally found a way to make her carrot.
Supplies
1 wire cone (6" in diameter, 1 foot long)
1 - 12"x35 foot orange deco mesh
1 - 6"x15 yards green deco mesh
1 stem artificial grass
twist ties
Using the green mesh, make a loop that is approximately 4 inches high and attach it to the top wire on the cone using a twist tie. Make another 4 inch loop and attach it to the second wire on the cone. Continue this process until there is no space left on the first and second wires. At the end, trim the excess mesh close to the base of the last loop.
With the orange mesh, make a loop that is approximately 4 inches high and attach it to the third wire on the cone. Make another 4 inch loop and attach it to the fourth wire on the cone. Continue this process until there is no space left on the third and fourth wire, and until the balance of the cone is filled. As you work your way down the cone reduce the size of the loops 1/2" per tier. This will give your carrot a cone look rather than a column.
The grass stem will act as the carrot greens. To attach it to the cone, slide it into the back of the cone and attached it to the vertical wire using the twist ties.
To hang your carrot you will need to make loops from the twist ties and attach them to the top corners of the cone. Now all that is left to do is fluff up the loops. Don't be afraid to be rough with the mesh. It is incredibly strong, and when you're a little rough on it you end up with a better shape.
Mom also asked that I attach a wood "D" to the carrot. If you are attaching anything to the carrot you want to use a very long length of twist tie. You want to attach your embellishment without loosing it in the loops or squishing them down.
Wednesday, April 9, 2014
Haystack Easter Nests
Haystacks, or uncooked cookies as Mom calls them, have always been a staple in our family. I'm not sure where the recipe originated, but as far back as I can remember there have always been haystack cookies. The perfect combination of chewy oats, sweet coconut and delicious chocolate make for an irresistible cookie.
I decided to give this family favorite a twist and turn it into a festive Easter treat. With the addition of candy covered chocolate eggs, these simple cookies are instantly transformed into the perfect Easter treat!
Haystack Cookies - Makes 4 dozen
3 cups oats
1/2 cup cocoa powder
1 cup shredded coconut
1/2 cup butter
2 cups sugar
1/2 cup milk
1t vanilla
candy covered chocolate eggs (just buy a lot because you know you will eat the leftovers anyway)
Combine butter, sugar, milk and vanilla in a small pot over medium high heat. Bring to a boil and boil for 5 minutes. In a large bowl mix together oats, cocoa powder and shredded coconut.
Pour syrup over the oat mixture and stir until well combined.
Using a teaspoon, drop the mixture onto a parchment lined baking sheet. While still warm, press a candy covered chocolate egg into the centre of each cookie. Allow the cookies to cool before removing from the parchment paper. To speed up the process you can place the trays in the freezer.
These cookies would make a great treat to take to work, or send to school with your kids, for Easter. These cookies also freeze incredibly well, not that you'll have any left to freeze. You don't even need to thaw them to eat them. Just open the bag and stuff them in your mouth. They are the perfect cookie for hiding in the back of the freezer and snacking on when nobody is looking. Not that I would know anything about that...
Wednesday, April 2, 2014
Mesh Easter Wreath
Bring on the color! The sun is shining, the snow is melting, and it's time to bring back color! Easter is a great chance to throw caution to the wind and go all out with bright, fresh colors when it comes to decorating your home. I love the whimsy of spring decor, and you can't get much more whimsical than a rabbit running around house to house to deliver gifts now can you?
My Mom requested an Easter wreath, but I don't think she knew what she was in for. This wreath is jam packed with bright spring colors and sparkle. The only way to add more Easter to this wreath would be to wire the Easter Bunny himself to it. **Note: I do not condone wiring rabbits to wreath frames unless they are stuffed!
Deco mesh seems to be all the rage when it comes to wreaths lately, and its a great material to work with. Now that deco mesh is available in a wide range of colors, sizes, and even fabric types, you can create a wreath for any occasion quickly and easily. Once you get to basic steps down you will be a wreath making force to be reckoned with!
Supplies
11.5" diameter wire wreath frame
24" x 10 yard deco mesh
1 1/2" x 3 yard wired edge ribbon
4 Easter eggs on sticks
twist ties
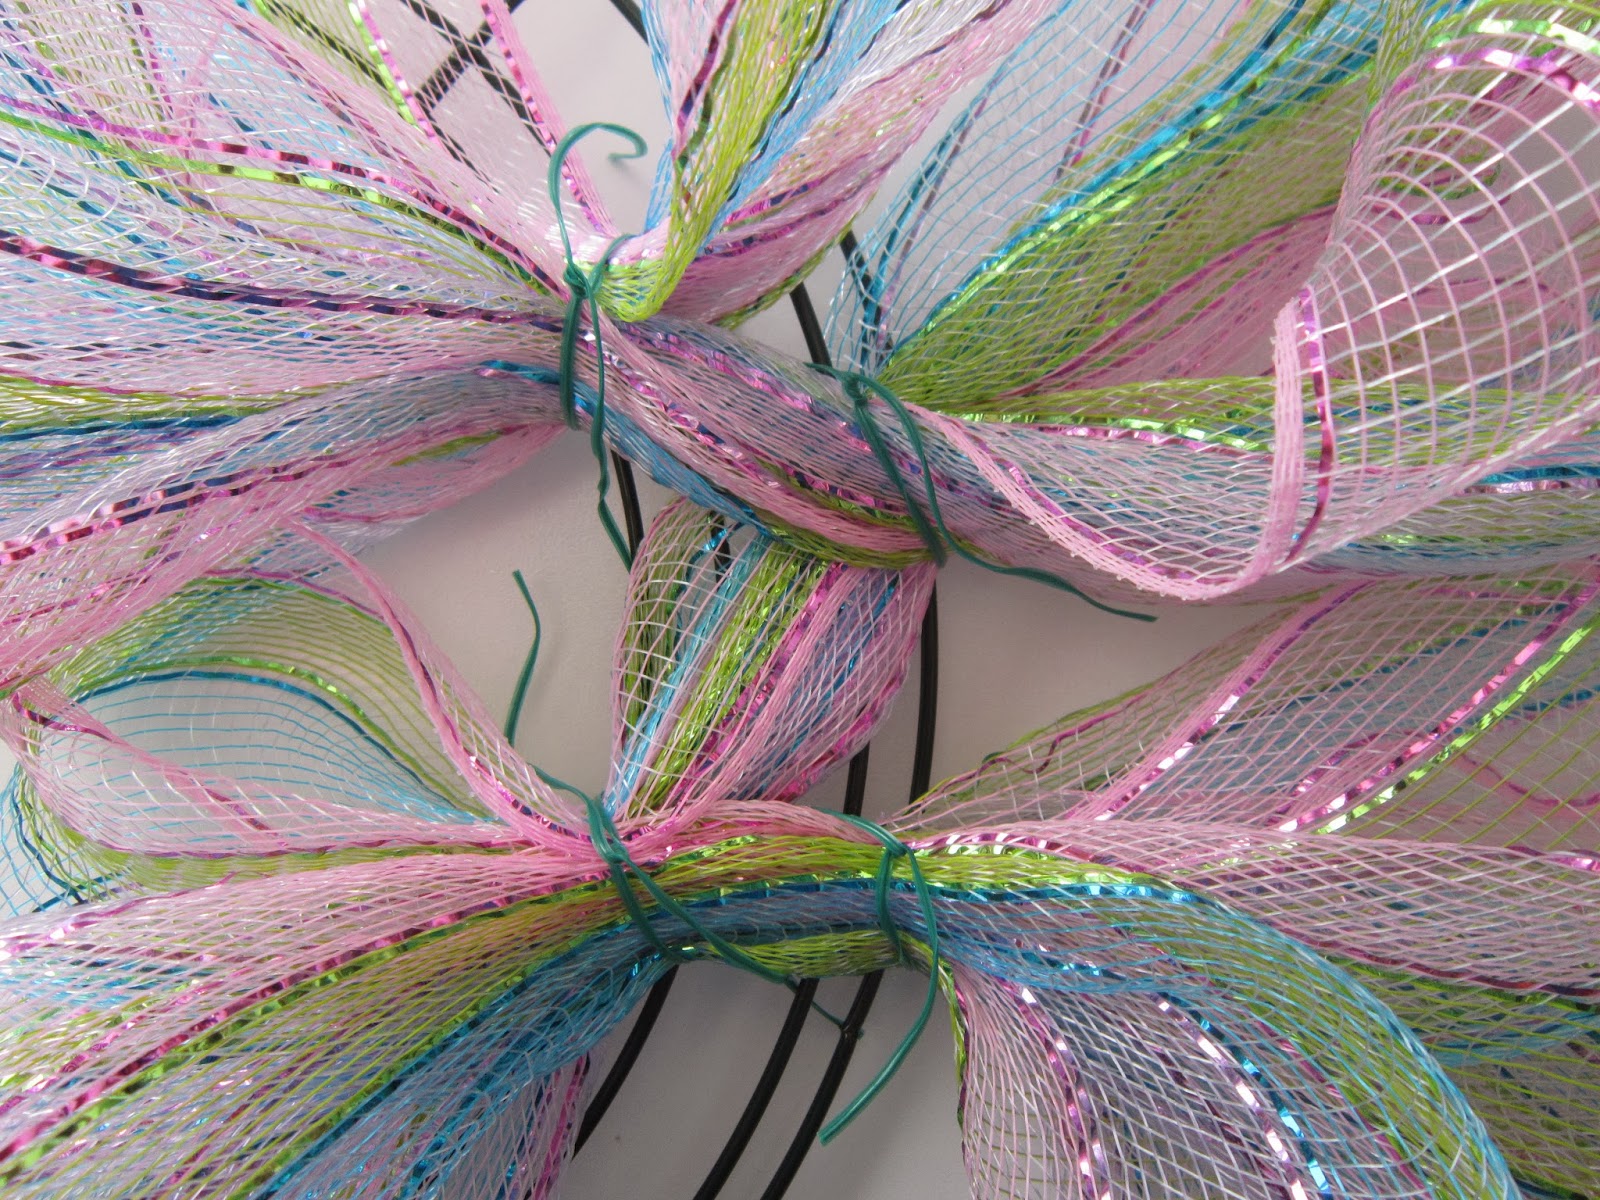
Start by gathering the end of the mesh together and forming a loop. Using a twist tie, wire the loop to the outside of the wreath frame. The larger you make the loops the larger your wreath will end up being. Keep in mind that larger loops with also require more mesh and you may run out before you finish if the loops are too large. I made my loops approximately 5 inches tall.
Form another loop with the mesh and wire it to the inside of the frame. Continue forming loops and alternating between the inside and the outside of the frame until the entire frame is filled with loops. The more loops you have the fuller your wreath will be in the end. If you have mesh left over at the end, trim it off once you have formed and wired your last loop.
Group your eggs together and wire the sticks together. Attach the cluster of eggs to the wreath using a twist tie. I wired mine in a location that was a little less full than the rest of the wreath as the eggs and the bow will camouflage it.
Tie a bow in the centre of the ribbon. The wire edge allows you to manipulate the ribbon so that the right side of the ribbon is showing on both loops as well as the tails. Insert a twist tie into the back of the ribbon and attach it to the wreath at the base of the egg cluster.
Once the ribbon is attached to the wreath you can then decide on how long you want the tails to be. I prefer to cut my ribbons in a fish tail end rather than in a straight line. To cut the fish tail, fold the ribbon in half length wise. Cut on an angle with the highest point being on the folded side. This will give you a perfect fish tail every time!
There you have it! A wreath bursting with so much Easter that even the Easter Bunny himself would be taken aback. Mom is going to love this wreath! If her visitors aren't smiling already from the warm temperatures, they definitely will be after seeing this wreath. If they aren't, well clearly they are the Easter version of Scrooge and they should loosen up and eat a Peep!
My Mom requested an Easter wreath, but I don't think she knew what she was in for. This wreath is jam packed with bright spring colors and sparkle. The only way to add more Easter to this wreath would be to wire the Easter Bunny himself to it. **Note: I do not condone wiring rabbits to wreath frames unless they are stuffed!
Deco mesh seems to be all the rage when it comes to wreaths lately, and its a great material to work with. Now that deco mesh is available in a wide range of colors, sizes, and even fabric types, you can create a wreath for any occasion quickly and easily. Once you get to basic steps down you will be a wreath making force to be reckoned with!
Supplies
11.5" diameter wire wreath frame
24" x 10 yard deco mesh
1 1/2" x 3 yard wired edge ribbon
4 Easter eggs on sticks
twist ties
Start by gathering the end of the mesh together and forming a loop. Using a twist tie, wire the loop to the outside of the wreath frame. The larger you make the loops the larger your wreath will end up being. Keep in mind that larger loops with also require more mesh and you may run out before you finish if the loops are too large. I made my loops approximately 5 inches tall.
Form another loop with the mesh and wire it to the inside of the frame. Continue forming loops and alternating between the inside and the outside of the frame until the entire frame is filled with loops. The more loops you have the fuller your wreath will be in the end. If you have mesh left over at the end, trim it off once you have formed and wired your last loop.
Now It's time to lift and separate! Spread out and fluff the loops so that all of the attachment points are covered. Don't worry about being gentle, your wreath will actually look better if you're a little rougher with it. This mesh is very durable and can stand up to some serious pulling and scrunching. Keep arranging and manipulating the loops until you are happy with the shape and fullness.Group your eggs together and wire the sticks together. Attach the cluster of eggs to the wreath using a twist tie. I wired mine in a location that was a little less full than the rest of the wreath as the eggs and the bow will camouflage it.
Tie a bow in the centre of the ribbon. The wire edge allows you to manipulate the ribbon so that the right side of the ribbon is showing on both loops as well as the tails. Insert a twist tie into the back of the ribbon and attach it to the wreath at the base of the egg cluster.
Once the ribbon is attached to the wreath you can then decide on how long you want the tails to be. I prefer to cut my ribbons in a fish tail end rather than in a straight line. To cut the fish tail, fold the ribbon in half length wise. Cut on an angle with the highest point being on the folded side. This will give you a perfect fish tail every time!
There you have it! A wreath bursting with so much Easter that even the Easter Bunny himself would be taken aback. Mom is going to love this wreath! If her visitors aren't smiling already from the warm temperatures, they definitely will be after seeing this wreath. If they aren't, well clearly they are the Easter version of Scrooge and they should loosen up and eat a Peep!
Subscribe to:
Posts (Atom)