Showing posts with label cookie. Show all posts

Monday, December 12, 2016

M&M Cookie Bars

These cookies are everything that I've ever wanted in the perfect cookie; a delicious batter, a slight crust on the outside, gooey on the inside, and TONS of chocolate. I don't know if I would voluntarily make a regular chocolate chip cookie now that I've made these. They're incredibly quick & easy and are a great treat to make with the kids this holiday season!


M&M Cookie Bars
1 cup butter, softened
3/4 cup white sugar
1 cup brown sugar
3 eggs
1 1/2t vanilla
3 cups flour
3/4t baking soda
3/4t salt
1 1/2 cups mini baking M&Ms (I used the entire 275g bag)
1 cup chocolate chips
1/2 cup white chocolate chips

Preheat oven to 350°. Line a 9x13 baking dish with parchment paper. To make the process easier, run the parchment paper under water and ring it out first.

Cream butter, sugar, and brown sugar together. Beat in eggs and vanilla. In a small bowl, combine flour, baking soda and salt. Slowly add the flour mixture to the butter and mix until well combined. Add the M&Ms and chocolate chips, reserving some to sprinkle on top at the end. Do not over-mix at the stage or the M&Ms will be crushed.

Pour the batter into the baking sheet and spread into an even layer. Press on the reserved M&Ms and chocolate chips. Bake at 350° for 35-40 minutes. Allow the bars to cool and then lift them out of the pan using the parchment paper and cut into squares.

If you would like to keep these around for longer than one day, I suggest immediately transferring them to a freezer bag and hiding them in the back of your deep freeze. Just a heads up, 8 seconds is the perfect time for one square in the microwave....

Original post

Thursday, April 2, 2015

Bunny Sandwich Cookies with Marshmallow Cream Frosting

I'm not normally excited by Easter when it comes to baking and crafts, like I am by other holidays like Christmas, but the warmer weather inspired me to start thinking about spring and Easter.  When I'm looking for some inspiration, the first place I always go is Pinterest!  I came across this post for the most adorable cookies I had ever seen.  They seemed pretty simple so I figured I could replicate them.

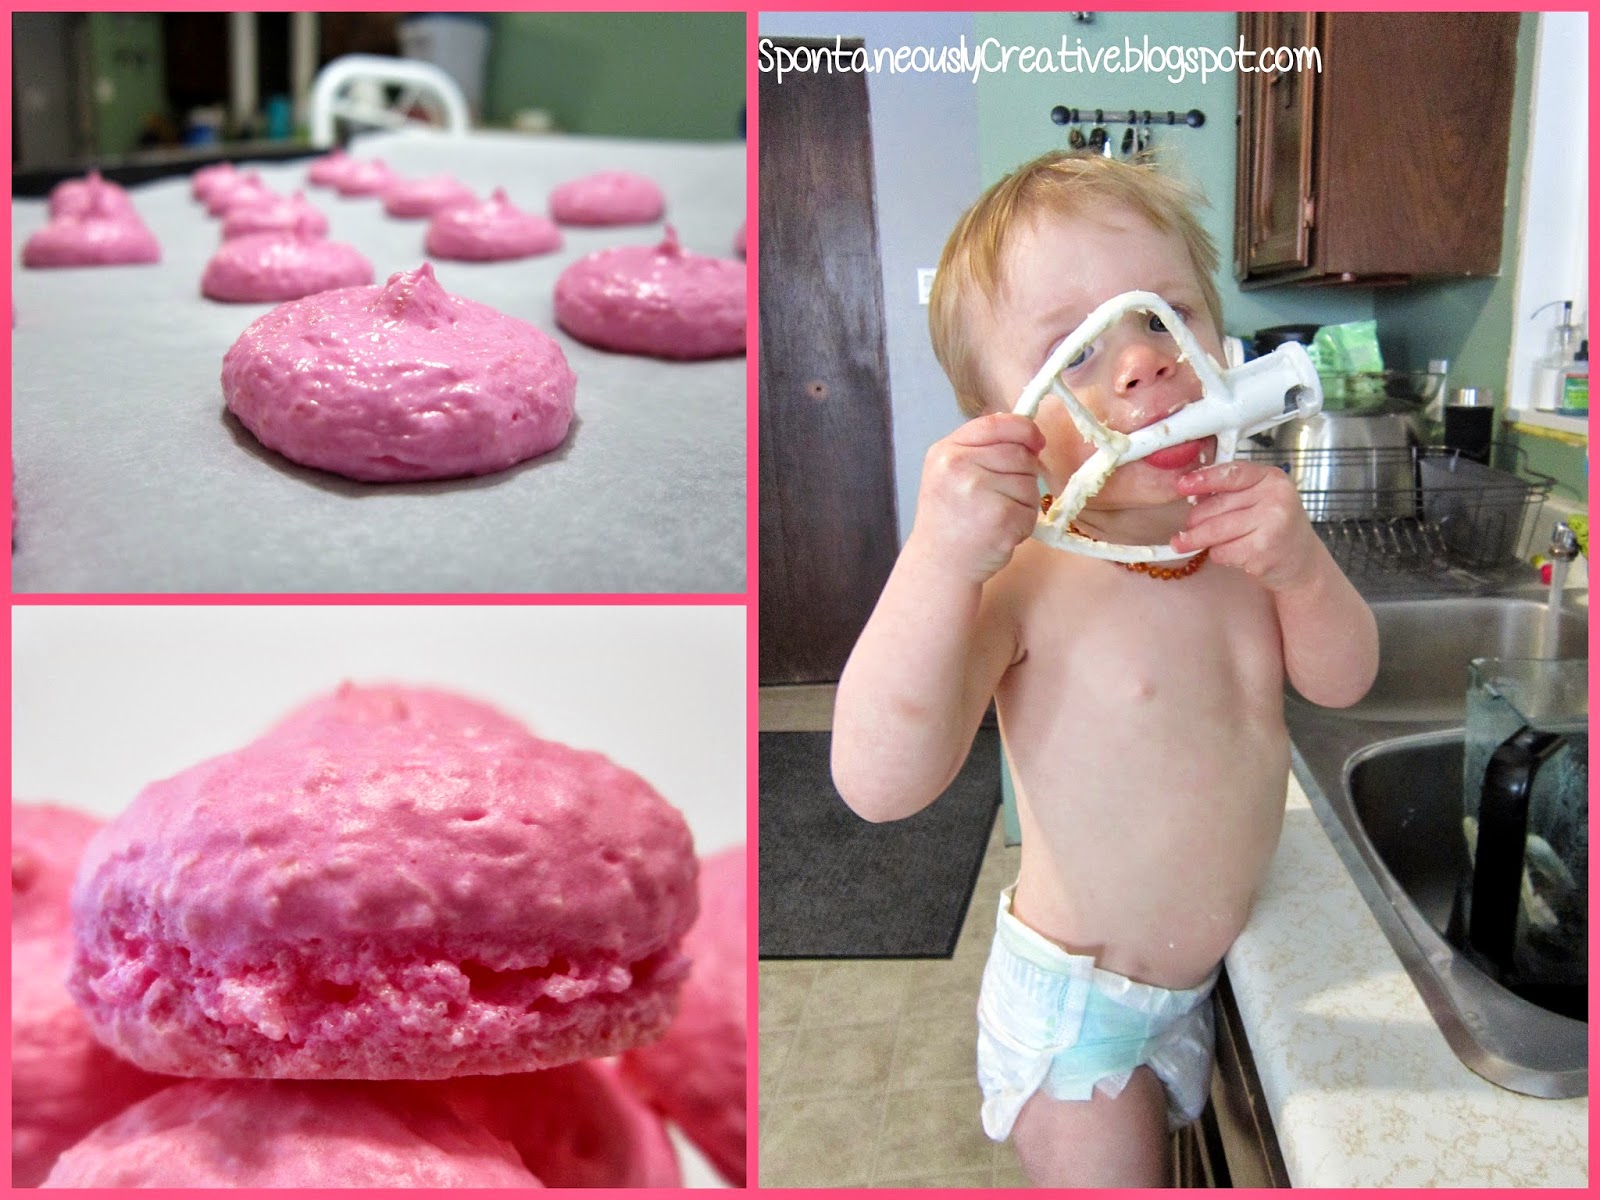
To be honest I never even read the recipe for the cookies, I just decided to use my go to sugar cookie recipe.  I mixed up a batch of dough, divided it in half, then kneaded Wilton's Golden Yellow color gel into one half and Rose color gel into the other half.  Of course as soon as Roman saw what was going on he would not leave the mixer alone until he got to lick the beater.  This boy has sure learnt fast that the mixer is for making treats!  Once the color was evenly distributed, I wrapped the dough in plastic wrap and refrigerated it over night.


When Roman went down for a nap after lunch, I took the dough out of the fridge and let it sit on the counter for a few minutes to warm slightly; this makes it a bit easier to roll out.  I rolled out one color at a time to 1/4" thick on a well floured surface, and cut out heart shaped cookies using a cookie cutter that I picked up at Bulk Barn.  To form the bunny head, cut one heart in half and lay it on a parchment lined baking sheet with the halves slightly separated to form the ears.  Then lay a heart on top of the two halves with the point between the ears to form the head.  All three pieces will adhere to each other while they bake.  Make sure you have one regular heart cookie for each bunny head to complete the sandwich.
 
Bake the cookies at 350° for 5-8 minutes until the cookies are cooked through but aren't too brown around the edges.  Allow cookies to cool completely on a wire rack.  Be VERY gentle when moving the cookies from the baking sheet to the wire rack, or you might end up with some one eared bunnies, like me.
 
Marshmallow Cream Frosting
7 oz. marshmallow cream
1/2 cup butter
1 1/2 cups icing sugar
1/2t vanilla
 
Cream butter until smooth.  Add marshmallow cream and mix well.  Slowly add in icing sugar followed by vanilla and whip until smooth.
 
 
Spread a decent amount of the frosting onto the back of the bunny head and sandwich on a heart cookie, making sure to have the good side of each cookie facing out.  Place a small amount of the frosting on one side of a Smartie and stick it on the back of the sandwich as the bunny's tail. 
 
When it comes to the bunny's face you have a few options.  You could use royal icing as it would set nice and hard, or you could go the route I did and use chocolate.  I melted down some chocolate wafers in a double boiler then placed it in a homemade parchment paper piping bag.  To make the piping bag simply cut a large circle out of parchment paper.  Fold the circle in half and then in half again to make a cone.  Cut the tip off the cone, open up the pocket in the cone and spoon in the chocolate.  Pipe eyes and a nose on to each of the bunny faces.  Set the cookies aside until the chocolate sets and they are able to be stacked. 
 
 
I absolutely love the way these cookies turned out!  Not only are they adorable but they are seriously tasty!  The marshmallow cream frosting is gooey and just sweet enough without being over powering.  Once the frosting sets it also takes on a marshmallow like texture which is perfect for Easter.  These cookies would be great for a kids Easter party or as part of a dessert table at your Easter meal.  I actually packaged a couple of these up in a cute Easter cellophane bag with a little carrot tag (all from Bulk Barn) and handed them out at play group.  I'm sure all the other mom's appreciated my sugaring up their kids...

Thursday, February 5, 2015

French Macarons

I think macarons come across as a very intimidating item to bake.  When I first decided I wanted to attempt these a few years back I prepared myself for the battle of a lifetime.  Turns out I had nothing to worry about.  If you can use a stand mixer you can make these cookies!

When I started thinking of fun things to make for Valentine's Day, one of the first things that came to mind were macarons.  There is something so fancy about these beautiful little cookies.  In the spirit of the special day I decided to color the macarons pink and fill them with buttercream frosting.  A red macaron filled with a chocolate ganache would also make a stunning cookie.  These macarons have just the right amount of snap on the outside but are still gooey and delicious on the inside. 


French Macarons
1 cup icing sugar
3/4 cup almond flour*
2 large egg whites
1/4 cup sugar

*If you can't find almond flour you can use ground almonds and force them through a fine mesh strainer to break it down into a flour like consistency.


Sift together icing use and almond flour.  Preheat oven to 325°.  Using a mixer whisk egg whites on medium speed until they start to form soft peaks.  Add in sugar and whisk on high speed until spiff peaks form.  Fold icing sugar and almond flour into the egg whites.  If you want to color your macarons this is the time to add a gel color, folding the color in until it is evenly distributed throughout the batter.

Transfer better to a pastry bag and with a round tip pipe 2 inch rounds 1 inch apart on a parchment lined baking sheet.  Lightly drop the baking sheets on the counter to release any air bubbles from the cookies.  Let the cookies stand at room temperature for 15 minutes.  Reduce the oven temperature to 325° and bake one sheet at a time for 10 minutes, rotating the tray half way through.  Allow cookies to cool on the baking trays for 2-3 minutes then transfer to a wire cooling rack.  Once the cookies are completely cooled, pipe or spread filling onto the bottom of one cookie and sandwich with another.


Believe it or not, macarons are extremely freezer friendly!  I would suggest baking the cookies and then freezing them before filling them.  Then thaw and fill when they are needed.  Just make sure to store them in a solid container in the freezer as they will crush if something is set on top of them.

Thursday, December 25, 2014

Italian Meatball Cookies

I promise this will be the last cookie recipe for the year!  I came across this recipe on Allrecipes.com when I was searching for recipes for John and I's first Christmas together.  Now the idea of a meatball cookie might not initially seem like a great idea, but the name comes from the way the cookie looks and now from what is it made of.

This cookie has everything you would want in a holiday cookie!  Cloves, allspice, cinnamon and nutmeg spice this cookie perfectly and make it sing with the flavors of the holidays.  The cocoa and glaze gives this cookie the perfect amount of chocolatelyness, and the walnuts give it just the right amount of crunch.  I might be crazy, but to me that sounds like a whole barrel full of Christmas!


Italian Meatball Cookies (Makes 30 cookies)
1/2 cup butter
1 1/2 cups sugar
3 eggs
2t vanilla
3 cups flour
2/3 cup cocoa powder
1 1/2t baking powder
1 1/2t baking soda
1t salt
1t cloves*
1t allspice
1t cinnamon
1/2t nutmeg
1 cup chopped walnuts
Glaze
2 cups icing sugar
1/3 cup cocoa powder
1/4 cup milk

* If you don't have cloves, like I never seem do, you can omit this and the cookies will still be delicious!

Preheat oven to 350° and line cookie sheets with parchment paper.  Cream together butter and sugar.  Add eggs and vanilla and mix well.  In a separate bowl stir together flour, cocoa, baking powder, baking soda, salt and spices.  Add the flour mixture to the butter mixture, mixing until the flour is completely combined.  Stir in the chopped walnuts by hand.

Form dough into 1 inch balls and place on parchment lined baking sheets.  Bake at 350° for 10 minutes.  Cookies should be fairly firm but still have some give to them.  Do not over bake them. Transfer cookies to a cooling rack and allow to cool slightly before glazing them.


Whisk together icing sugar, cocoa powder and milk until smoother.  Dip the top of the cookies into the glaze and place on the cooled parchment lined baking sheets to set.  If the glaze in the bowl begins to set up before you are done the cookies, whisk in a little more milk to soften it.

 
These cookies freeze extremely well so get them in there fast or I will not be held accountable for what happens if you don't!

Tuesday, December 23, 2014

Hamantashen

If I was only allowed to make one treat at Christmas time, this would be it!  Hamantashen are a Jewish filled cookie that will change your life!  They will brighten your outlook on life and bring peace and harmony to the world around you.  At least they do for me!  If sugar cookies and tarts had a baby this would be the delicious result!

I love to buy my baking supplies at Bulk Barn because I can buy the exact amount I need.  This is especially true when it comes to pie filling!  I usually like to have a few different fillings in my hamantashen and buying my pie filling at Bulk Barn allows me to get several different flavor without having to throw a bunch out.


Hamantashen
1 1/2 cups butter, softened
1 cup sugar
2 eggs
6T orange juice*
1T vanilla
2t baking powder
4 1/2 cups flour
12 oz can pie filling (I used cherry & strawberry rhubarb)

*If you don't have orange juice on hand you can just use water and I promise they will taste just as amazing!

Cream butter and sugar until smooth then beat in eggs one at a time.  Stir in orange juice and vanilla.  In a separate bowl mix together flour and baking powder.  Slowly add the dry ingredients to the wet mixing well between additions.  Cover and refrigerate for at least 2 hours, or overnight.

Allow the dough to warm slightly before rolling.  I like to cut the ball into 1/4s just to make it a little easier to manage.  Roll dough out to a 1/4 inch thickness and cut into 3 inch circles using a cookie cutter or a drinking glass, which is what I use.  If you feel your rounds are a little on the thick side you can squish them out a bit just before you fill them.  Spoon 1t of filling into the centre of each round and pinch the sides to form a triangle.  Place on a parchment lined baking sheet and bake for 8-10 minutes at 375°.  The cookies can also be frozen on the sheets before baking to help them retain their shape while baking. 


I probably should have followed the steps more carefully since most of my cookies flattened out.  This was likely a combination of soft dough and my need to jam as much filling in to the centre as possible.  These cookies freeze extremely well, I just recommend freezing them on a baking sheet first and layering them in a freezer container separating them with parchment paper so they don't stick together. 

Of course I can't make cookies without my quality control supervisor.  Luckily he got bored before the pie filling came out so I didn't have to wrestle it away from him.  A couple pieces of cookie dough and he was satisfied.


If you run out of pie filling might I suggest filling the cookies with Nutella!  I ran into this problem last year and John fell in love with the Nutella version!  I hope you enjoy a recipe that I love so much, and I apologise in advance for the 5lbs you will gain after eating the entire batch yourself!

Originally posted on Allrecipes.com

Tuesday, December 16, 2014

Banana Cake Cookies

When fall descended upon us I had the urge to bake some delicious pumpkin recipes.  I wanted something other than muffins and pies so I came across this recipe on Pinterest from Crème de la Crumb for a pumpkin sugar cookie.  By the time I got around to making the cookies I didn't have any fresh pureed pumpkin left and I didn't really want to buy any just to make these cookies.  I started racking my brain trying to come up with something I could sub in.  I finally settled on bananas, since heaven knows I have a few dozen in my freezer, but I needed to make some tweaks to make the original recipe work.  This is what I came up with!


Banana Cake Cookies
1 cup butter, softened
2 ripe bananas, mashed
1 cup sugar
2/3 cup icing sugar
1t vanilla
2 eggs
4 cups flour
1t baking powder
1/2t salt
1t cinnamon

Preheat oven to 350°. In a mixer combine butter, bananas, sugar, icing sugar, vanilla and eggs until smooth.  In a separate bowl stir together flour, baking powder, salt and cinnamon.  Gradually add the dry ingredients to the wet until well combined.  Dough will be fairly sticky.  Roll dough, or scoop with an ice cream scoop, into 2 inch balls and place them on a parchment lined baking sheet.  Bake for 10-12 minutes at 350° until the cookies are domed and start to look dry.

I am in love with these cookies, we all really enjoyed the cookies actually!  The puffiness of these cookies was actually an accident since I didn't have the cream of tartar the original recipes calls for, but I actually like the way it changes the cookie.  These cookies stayed incredibly soft even after a couple weeks on the counter in a freezer bag!

This was the first time I had Roman help me bake and it actually went better than I expected!  He added the bananas like a pro (after taking a few bites of course) and was really good at measuring out ingredients.

If a kid is going to learn anything about making cookies it's that you have to try the batter.  Yes I'm aware you shouldn't eat raw eggs, but I have done it since I was little and I survived so I'm sure he will too (he did by the way!).


On a serious note, I highly recommend designating a safe zone for the little ones for when the oven is open.  I was a little surprised when Roman actually stayed were I told him to, but he has kept it up consistently since!

Roman flaked out on me once the cookies were in the oven, other than the odd peek in to check on them, but he suddenly appeared out of nowhere like a cookie vampire once the cookies were out of the oven!

Thursday, December 11, 2014

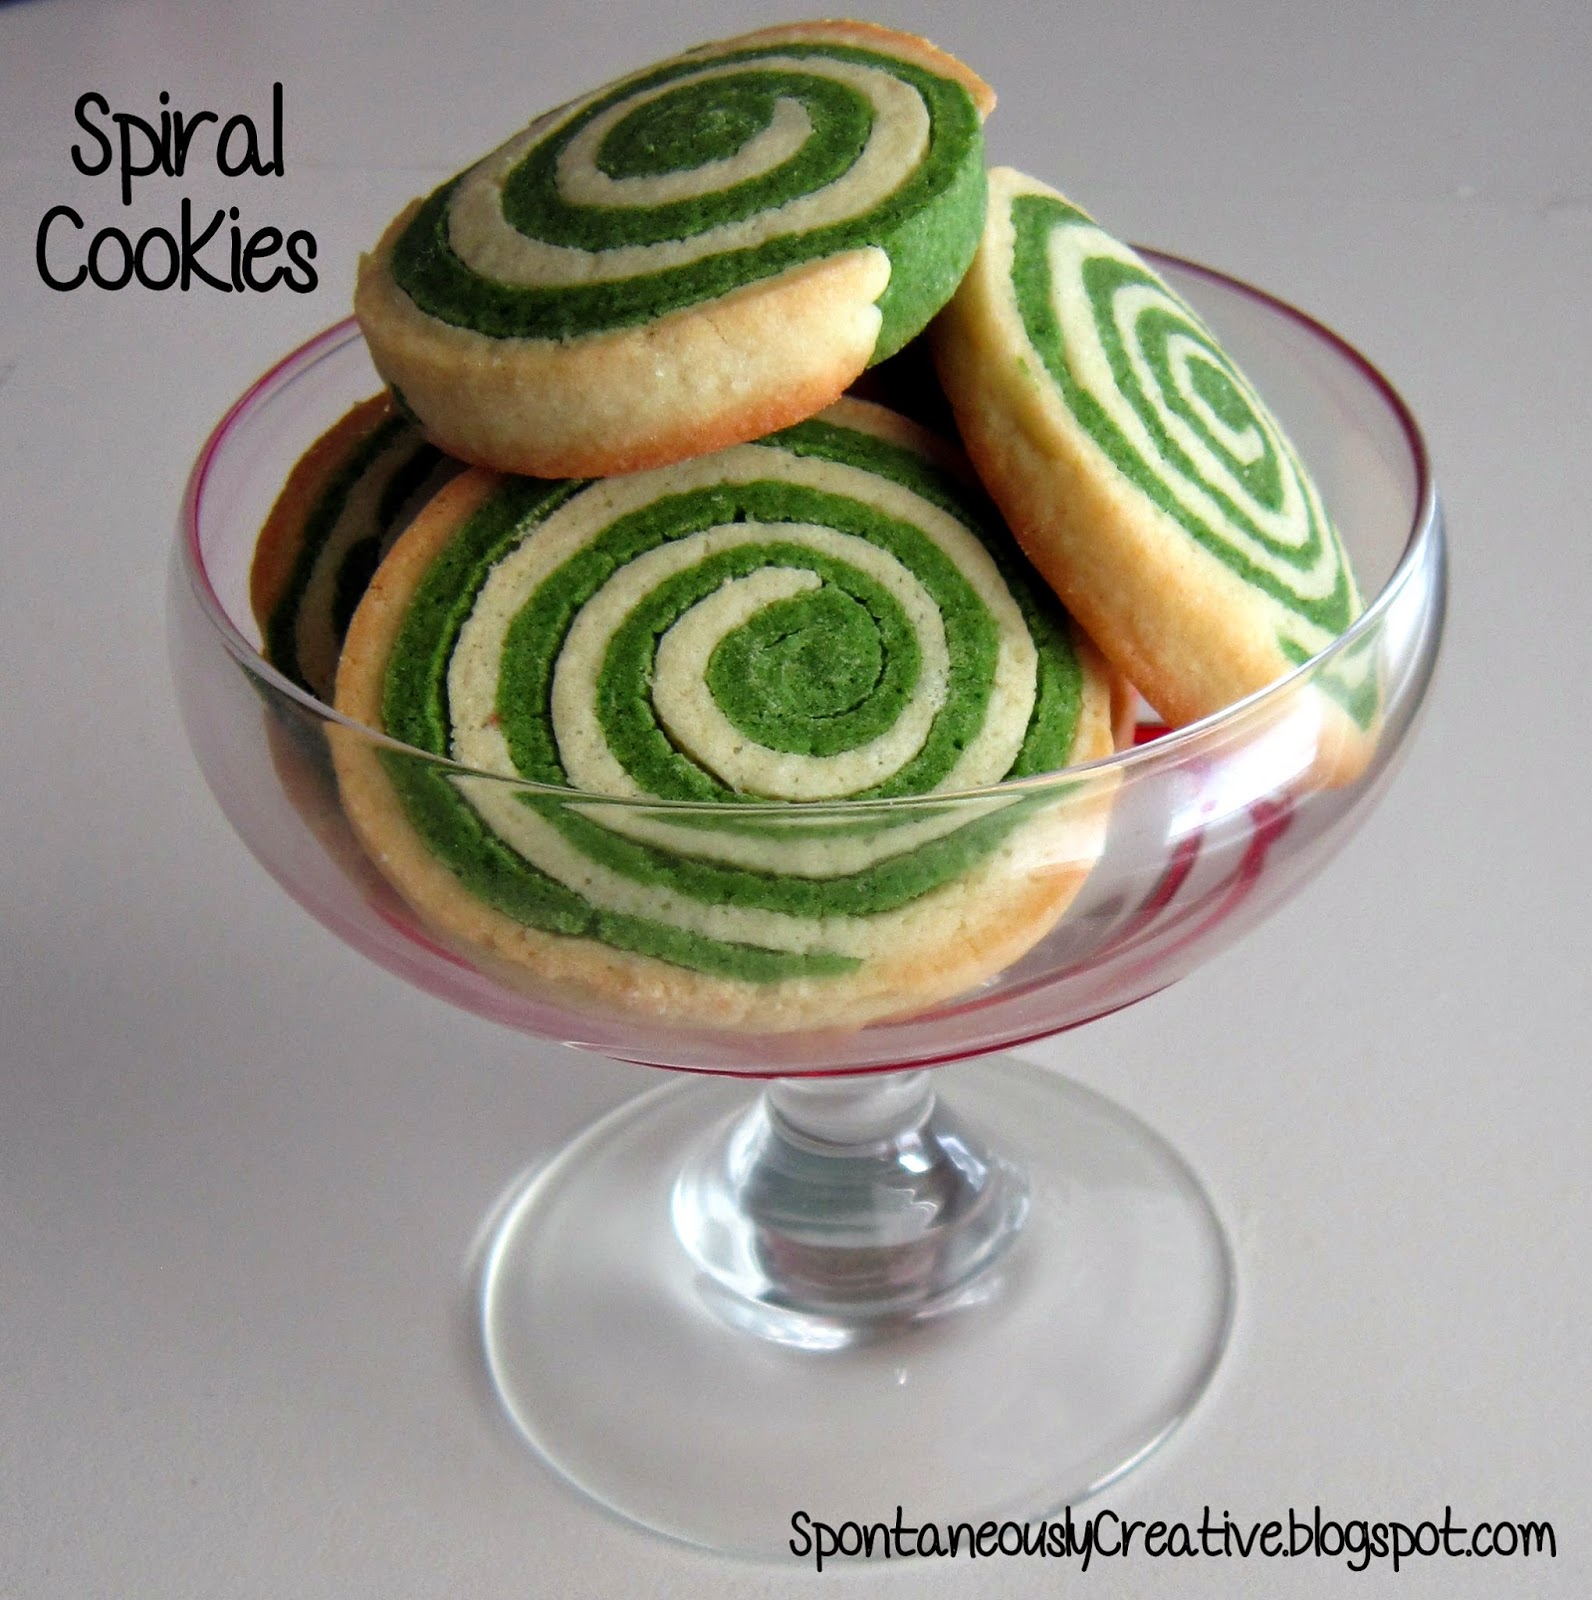
Spiral Cookies

When I was a kid Christmas was the one time of the year that my Mom made sugar cookies.  I loved slathering them in icing and sprinkling them with sprinkles and colored sugar.  The only thing better than decorating the cookies was eating the cookies.  These days I try to keep my cookies to a minimum (just because I try doesn't mean I succeed), but at Christmas time all bets are off and I become a cookie baking machine. 


I came across this recipe on AllRecipes.com a few years back and it is now the only sugar cookie recipe I use.  This recipe gives you a delicious, moist sugar cookie that holds it's shape amazingly well.  This time I've used them to make a sliced cookie but this dough also work extremely well for cookie cutter cookies!

Spiral Cookies (Makes approx. 2 dozen)
1 1/2 cups butter, softened
2 cups sugar
4 eggs
1t vanilla
5 cups flour
2t baking powder
1t salt

Cream together butter and sugar.  Add eggs one at a time mixing well after each addition.  Stir in vanilla.  In a separate bowl mix together flour, baking powder and salt.  Slowly add flour mixture to wet ingredients one cup at a time, being sure to scrape down the bowl half way through.

Divide the dough in half and wrap one half in plastic wrap.  Add some green (or any other color) gel coloring to the other half of the dough and knead until the coloring is evenly distributed throughout the dough.  Wrap the colored dough in plastic wrap and refrigerate all dough for at least one hour.

Remove dough from the fridge and allow to warm up slightly.  On a lightly floured surface, roll out the colored dough 1/4" thick in a square-ish shape.  Carefully set the dough aside and roll out the other half of the dough in the same way.  Layer the colored dough on top of the uncolored dough and gently roll over the dough to squish them together.


Starting at the edge closest to you, roll the dough into a log as tightly as possible.  If the dough isn't super tight, no worries, the spaces will fill in during baking.  Cut the log in half and wrap them in plastic wrap.  Refrigerate the logs for about an hour.  This will prevent the cookies from squishing when you slice them.

Unwrap the logs and slice them into 1" thick cookies.  If you want to jazz them up a but you can roll the cookies in crushed candy canes or sprinkles.  Lay the cookies on a parchment lined baking sheet and bake at 400° for 8 minutes or until they start to lightly brown.


When I was little Selby and I had a friend sleep over at our house and his Mom sent cookies with him.  The cookies were similar to these only they were square.  Ever since that day I have thought about those cookies, and 20 years is a long time!  I seem to remember the colored dough tasting different but I think that was just my little mind playing tricks on me.  I still think that colored dough tastes different (even though it doesn't) but I think it might actually just be the magic of Christmas!

Thursday, October 23, 2014

Chocolate Covered Halloween Cookies

Since I'm trying to get more into the Halloween spirit for Roman, I decided to make some Halloween treats!  I wanted to make something easy that wouldn't take up an entire day - I'm all for getting in the Halloween spirit but I'm willing to sacrifice an entire day just yet.  Chocolate covered Oreos seem to be the new "in" thing so I thought I'd make my own version. 


Like all great baking adventures I started by heading to Bulk Barn with Roman to pick up supplies.  I like shopping at Bulk Barn because I can buy only the quantity I need, which is handy when it comes to more expensive items because then I don't end up with a bunch of leftovers that I won't use.  Plus I know I'll only have to make one stop and they will have everything I need.  I ended up leaving the store with melting chocolate, a few kinds of sprinkles and some PeekFreans cookies.

The best way to melt chocolate is with a double boiler.  I usually just melt it in a pot and really haven't had any trouble with it.  When John saw me with chocolate in the pot he said "I don't know much about chocolate, but aren't you supposed to use a double boiler?".  I responded that you should but I never do and I've never burnt my chocolate.  Well, guess what happened today.  Yup, I burnt the chocolate.  I guess that's what happens when you get cocky.  So I started again by bringing a couple inches of water to a boil in a pot and sitting a glass bowl on top.  I added the chocolate and stirred until it was completely melted.  You want to be careful not to over heat it as your chocolate will start to get lumpy and thick.  When the chocolate is almost melted, reduce the heat to bring the water down to a simmer.  This will keep your chocolate warm but not overheat it.


Using my lovely BBQ tongs (it's the only pair of tongs I own) I dipped and flipped the cookies in the chocolate until they were completely covered in chocolate.  Grab the cookies with the tongs again and shake off as much of the excess chocolate as you can.  Be warned, if you shake too hard you may break your cookie!  I found out the hard way.  Place the cookie on a parchment lined cookie sheet.  If your tongs left marks in the chocolate, use a knife or an icing spatula to spread the chocolate around to cover the marks.  If there are areas that aren't covered as well as you would like you can also spread on more chocolate just as if you were icing a cake.  Finally, top the cookies with your sprinkles or other decorations while the chocolate is still soft.


For the pumpkin cookie decorations I used pecans and pumpkin seeds for the stem and leaves.  To make the stem I cut the point off a pecan half and stuck it onto the top of the cookie along with pumpkin seeds on either side of the stem.


The chocolate will take a couple of hours to harden so you'll have to be patient.  Or you can pop them in the fridge and you'll get to indulge in the chocolatiness that much faster!  Now you're probably wondering what you should do with the leftover melted chocolate.  This chocolate isn't cheap so I save every last drop - here's the trick!  Lay a piece of plastic wrap in a cereal bow and scoop in any leftover chocolate while it's warm.  Allow the chocolate to completely harden then just remove it from the bowl, peel off the plastic wrap, and store it in a sandwich bag.  When you want to use it again, cut the lump into small chunks and warm it in a double boiler again.  Oh and don't worry about the chocolate on the tongs, just lick that off, consider it your reward for making other people such delicious cookies!
 
The possibilities for this type of treat are endless, so get creative and make some spooky cookies for Halloween!

Wednesday, April 9, 2014

Haystack Easter Nests

Haystacks, or uncooked cookies as Mom calls them, have always been a staple in our family.  I'm not sure where the recipe originated, but as far back as I can remember there have always been haystack cookies.  The perfect combination of chewy oats, sweet coconut and delicious chocolate make for an irresistible cookie.

 
I decided to give this family favorite a twist and turn it into a festive Easter treat.  With the addition of candy covered chocolate eggs, these simple cookies are instantly transformed into the perfect Easter treat!

Haystack Cookies - Makes 4 dozen
3 cups oats
1/2 cup cocoa powder
1 cup shredded coconut
1/2 cup butter
2 cups sugar
1/2 cup milk
1t vanilla
candy covered chocolate eggs (just buy a lot because you know you will eat the leftovers anyway)


Combine butter, sugar, milk and vanilla in a small pot over medium high heat.  Bring to a boil and boil for 5 minutes.  In a large bowl mix together oats, cocoa powder and shredded coconut. 


Pour syrup over the oat mixture and stir until well combined.


Using a teaspoon, drop the mixture onto a parchment lined baking sheet.  While still warm, press a candy covered chocolate egg into the centre of each cookie.  Allow the cookies to cool before removing from the parchment paper.  To speed up the process you can place the trays in the freezer.


These cookies would make a great treat to take to work, or send to school with your kids, for Easter.  These cookies also freeze incredibly well, not that you'll have any left to freeze.  You don't even need to thaw them to eat them.  Just open the bag and stuff them in your mouth.  They are the perfect cookie for hiding in the back of the freezer and snacking on when nobody is looking.  Not that I would know anything about that...