Thursday, April 30, 2015

Plan With Me - May 2015

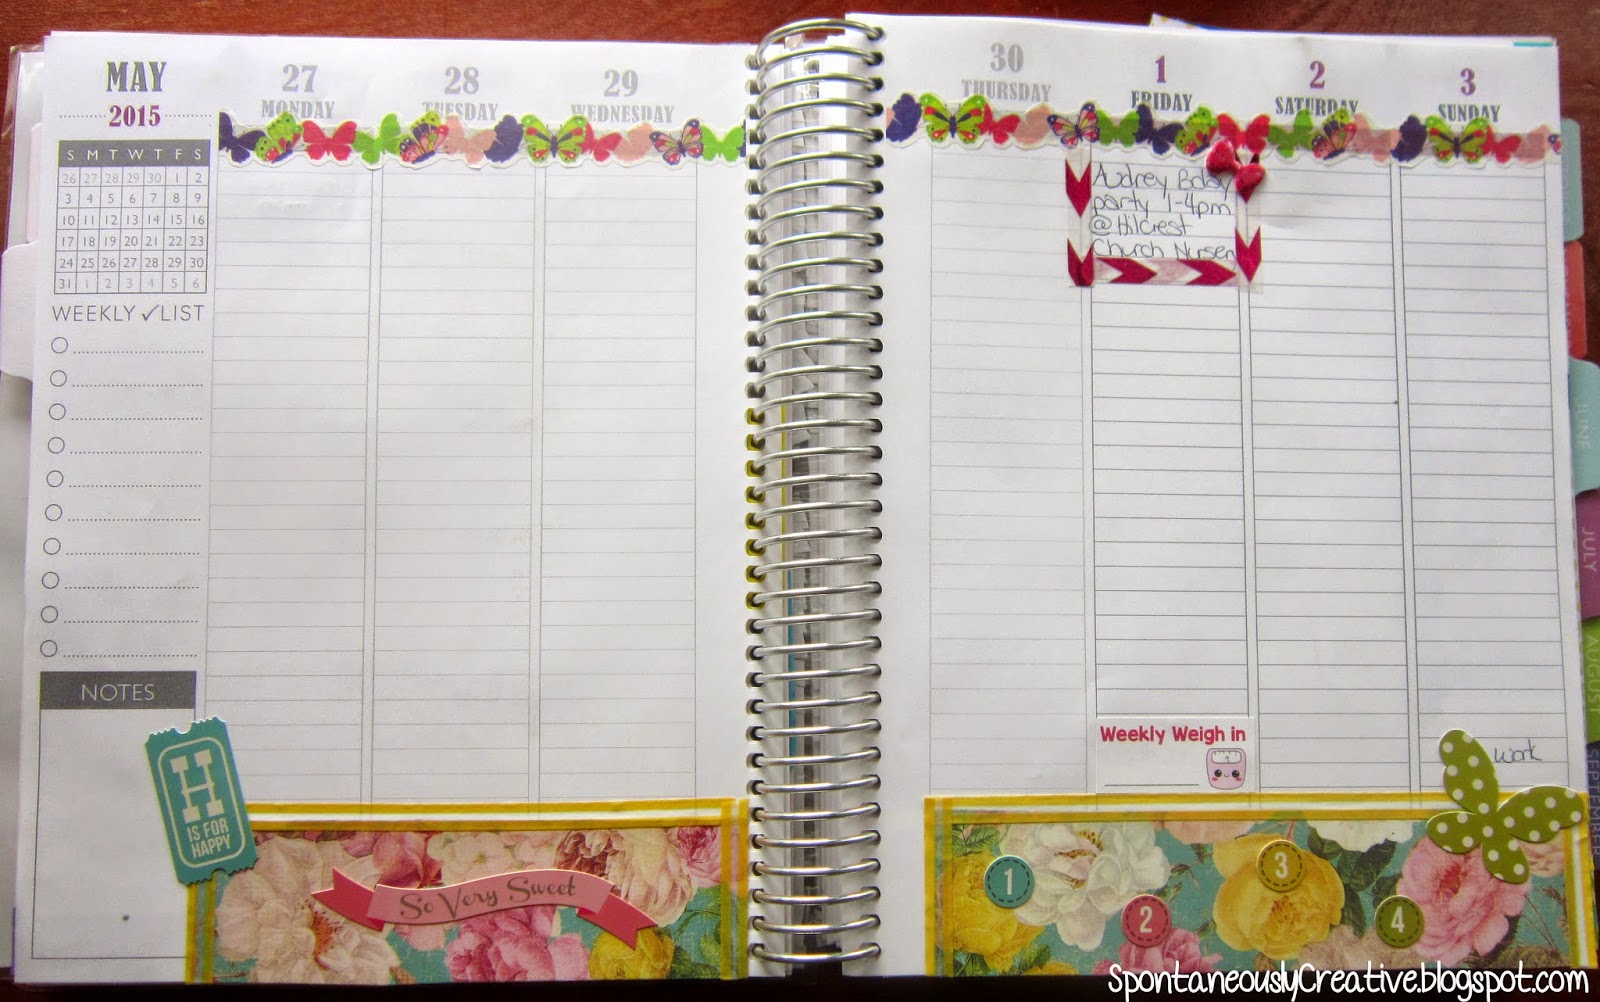
April showers bring May flowers and they are all over my planner for May!  The more I decorate my planner pages the more I get into the grove and get a feel for how I like to decorate them.  In April I was just kind of throwing things together and hoping that it turned out well.  I also didn't have the massive collection of stickers and washi tape that I have now amassed.  Between the supplies I picked up in Bismarck and the things I picked up at Michael's recently (if you want to see a post on that let me know!), I now have what I feel is a decent collection of things to make some well coordinated pages.

Each month in the Plum Paper Planner is color coordinated, so to keep things looking harmonious I try to work with that color pallet for the monthly view.  I really wanted to use this super fun gold washi tape I found at Dollar Tree so I decided to go with a purple and gold theme this month.  I also inserted this journaling card into the monthly view so I can add little notes or "To Do" items for the month that don't necessarily have to be done on a specific day.  Or maybe it'll just sit there empty and look pretty, who knows.

 
This week is honestly my least favorite week in May as far as decorating goes.  I was still experimenting when I decorated this page and I think it shows.  I love all the elements individually, but it didn't quite turn out the way I wanted it too.  Oh well, live and learn!


"Shine bright like a diamond!".  This is what happens when you decorate your planner while listening to the radio.  I'm pretty happy with the way this page turned out and was excited to get to use a cute cupcake and party hat sticker for Mother's Day.  I probably could have been a little more creative with the lettering but it serves it's purpose.

 
This is where it starts to get interesting!  Hello color!!  Most of the supplies from this page came from a recent shopping trip to Michael's.  I went a little hog wild because all the stickers were 60% off!  How could I not really?!  I decorated this page on a bright sunny day which transferred o the page. It's amazing how the weather can affect you without you even noticing.  I also ordered some stickers from Sweet Kawaii Design which is where the money stack sticker and "Weekly Weigh In" stickers came from.  This was the first time I didn't use scrap book paper at the bottom of the page and I'm quite happy with the way it turned out.  Layering on washi allows me to customize the look and it doesn't add as much thickness to the pages. 
 
 
For this week I was inspired by some hydrangea stickers I came across in my craft room.  It also happens to go well with the purple theme of the planner for this month.  Hydrangeas are one of my favorite, if not my favorite, flower so it was fun to be able to incorporate them into this weekly spread.  
 
This last spread was completely inspired by the alligator washi tape I picked up at Dollar Tree.  Before I knew it these pages had exploded into a tropical oasis.  The stickers are also from Dollar Tree and while the foam stickers do add some bulk to the planner itself, I think it's worth it because they are so much fun!  The pink checklist on the bottom left on the page is what I'm now using to keep track of my monthly cleaning tasks like cleaning the vacuum filter and other large cleaning jobs that only happen once a month.
 
So that is what my planner looks like for the month of May.  June is a blue color scheme and I'm super excited about it because I already have a few pages planned out in my mind.  I can't wait!  Happy planning!!


Tuesday, April 28, 2015

Choolate Cupcakes from Scratch

The best part of any party is the cake, especially when it comes to a birthday!  So when a friend of mine (and Roman's girlfriend) recently had a birthday I decided I wanted to give her a dozen cupcakes.  Of course they had to be chocolate because who doesn't want chocolate on their "29th & holding" birthday?

I quickly ran into a problem when I realized all my gooey chocolate cupcake recipes required ingredients I didn't have at home.  I didn't have time to run out to the store, so I headed to Pinterest.  After hunting through the recipes I finally decided on this one.  Unfortunately I didn't pin it so I can't even give credit to the baking genius that came up with it!  This scratch made recipe produces a moist, fudgey cupcake that will please every chocolate lover!


Chocolate Cupcakes from Scratch
1/2 cup cocoa powder
3/4 cup flour
1/2t baking soda
3/4t baking powder
1/4t salt
2 eggs
1/2 cup sugar
1/2 cup brown sugar
1/3 cup oil
2t vanilla
1/2 cup buttermilk*

*If you don't have buttermilk simply add 1/2T of vinegar to 1/2 cup milk and let it stand for 5 minutes; until it starts to thicken a bit.

Preheat oven to 350°.  In a large bowl stir together, cocoa powder, flour, baking soda, baking powder and salt.  In a separate bowl beat eggs and mix in sugar, brown sugar, oil and vanilla until well combined.  Stir half of the wet ingredients into the dry then mix in half the buttermilk.  Add the second half of the wet ingredients and then the remaining buttermilk; mixing until just combined.  Fill the muffin tins 1/2 full with batter and bake at 350° for 18-19 minutes.


I topped the cupcakes with my go to buttercream frosting and some silver nonpareils that I found in my baking cupboard.  Roman was very excited to deliver the cupcakes to one of his favorite people in the whole world.  Unfortunately he got a little too excited and smashed one of the cupcakes, or maybe he was just trying to put his own special touch on them?  Also, please don't judge me on the re-purposed delivery box...

Thursday, April 23, 2015

Gift Bag Tag

This is going to be a super short post but I wanted to share it because birthday season is coming up for our family.  In our family all the birthdays happen within the summer months.  John, my Mom and I are all within the same week, Roman and my Dad share a birthday, and then my brother is in the following month.


Roman was recently invited to his first birthday party and I was looking for an interesting way to wrap the gift.  I knew from experience at Roman's first birthday that one year olds prefer to pull tissue paper out of a bag as opposed to unwrapping paper from an object.  I had originally planned on making a card to include in the bag but instead I came up with this idea!

I found some gift tags amongst the pile of scrapbooking supplies in my craft room and thought it would be fun to make a gift tag for the bag.  Then it hit me; why make a tag and a card when the tag could be the card?!  I covered the front of the tag with scrapbook paper and ran a line of washi tape around the outside edge.  I found some letter and lizard stickers in my collection so I used those to finish off the front of the tag.  I outlined the back of the tag with more washi, added a message and a turtle sticker to finish it off.


Shortly after I made this tag Roman received his second birthday invitation so I whipped up another tag for the birthday girl.  This one was super fun for me because I don't get to make too many girly things these days.  Actually it took a little more thinking to come up with something girly since I seem to default to boy things.  I followed pretty much the same process to make this tag as the first, but used foam stickers to adhere the letters to the card so they are slightly raised. 


I think this is a super unique way to package a gift and it is more durable than a card, which is great for milestone birthdays like a kids first!  If you decide to make your own tag/card post a picture in the comments so I can see what you created!

Tuesday, April 21, 2015

Bismarck Clothing Haul

It's only been a couple of weeks since our trip to Bismarck, ND but it already seems like a lifetime ago.  Why is it that the build up to a vacation lasts for months but the well rested feeling afterwards only lasts a few days?  Luckily the clothes that I purchased on the trip remind me every day that the trip in fact did happen, and that at one time I was well rested.

With spring here (hopefully for good this time) and summer on it's way (maybe) I needed to refresh my wardrobe with some new items.  With my weight loss over the past year I don't have a single item of summer clothing that actually fits me so I had to start from scratch.  I like buying pieces that are versatile and can be mixed and matched to make tons of outfits without having to spend a fortune.  I also don't like spending a ton on each item, partly because I'm cheap, and partly because I'm at home with a busy little boy every day and $100 shirts get just as dirty and beat up as $5 ones at the end of the day.

Let's start with the outfit I'm wearing.  I picked up this pair of distressed Rock Star skinny jeans, vintage neon pink t-shirt, and black tami (under the t-shirt) from Old Navy.  I never thought I would be a skinny jean kind of girl until I finally tried a pair on; now it's basically all I wear.  I'm a HUGE fan of the Old Navy tami (cami/tank top) because they are thin and form fitting enough to layer but they are thick enough to wear alone.  Being a on the smaller chest size I also love that the arm a little more on the form fitting side because the arm holes aren't so large that your bra hangs out.  The shoes and belt I picked up at Target, and I'm in love with both of them.  If you're in the process of losing weight I highly recommend a belt like this because it adjusts to any size without having to worry about pesky holes or buying a new belt every few months.  The shoes are super comfortable and I've already been able to get a ton of wear out of them.


I also picked up three more tami's in hot pink, mint green and a soft blue color.  I'm sure they will all get a ton of wear once the weather gets warmer.  Anyone that has known me for any length of time with tell you that the last color they would ever associate with me would be pink, let alone hot pink.  That being said I seem to be on a pink spree!  It's hard to tell but these Rock Star skinny jeans, also from Old Navy, are a super light pink color.  Or at least they were.  It seems to me that when I washed them the pink either bled out or something blue bled in because they seem to be more white than pink now.  Regardless, I still like them; even if they aren't always practical around Roman.  I fell in love with this neon pink striped shirt for two reasons; 1. it's super fun and pink, and 2. it's the very first piece of clothing I ever, in my life, remember buying in a MEDIUM!  I just about passed out when I tried on the large and it was too big.  Granted it might just be the cut of the shirt but I'll take it!

While on my high from buying my first medium I decided to check out this super cute store called Vanity in the Kirkwood Mall.  These is exactly the type of store that I would normally glace into but never dream on going into before I lost the weight.  When I first went in I didn't think there was a hope I'd find anything that would fit me and was quite honestly just looking at accessories.  That is until I saw these pants!  These palazzo pants had such an awesome print that I just had to try them on.  The best part?  They have a wide, stretchy waste band similar to yoga pants so they are super comfortable.  I don't normally like to wear pants in the summer because it's just too hot but these are thin and flowy enough that they will be perfect for the days that aren't screaming hot.  Once I realised I fit into these pants I really started to look at the items in the store.  I've always wanted a denim vest but always found I looked like a football player.  This one is shorter in the back and well tailored so there isn't a bunch of excess fabric which avoids the football player look.  This vest paired with a white t-shirt and the palazzo pants is a killer outfit that I can't wait to wear more often!  Last I picked up a plaid button up shirt.  I have a few shirts like this but this is made from a thinner fabric which makes it easier to wear in the spring/summer and has a super unique color pallet, at least for my closet.  This will also be a great piece to have once fall swings around again.
 
 
This shirt I found at Target, and quite honestly I bought it just because I have never seen anything like it in my life.  Think about it, when was the last time you saw a shirt with a badminton birdie pattern on it?  Probably never right?  When I showed it to John he immediately started to laugh so I knew I had to own it.  I don't normally that your buying clothes based solely on the fact that your husband laughed at you, but this time I made an exception.  As you can tell this first pair of shoes is already getting a lot of wear.  I picked these up in the Kirkwood Mall and I love them!  These canvas espadrilles get dirty pretty quickly, but a little soap and scrubbing with a toothbrush has them back to new in no time.  Obviously the weather isn't quite ready for these sandals but I'm excited to get to wear them.  I found them at Shoe Carnival and I love the gold detail around the ankle strap.  It almost reminds me of something Roman, which is really why I bought them.
 
So that is the beginning of my summer wardrobe that I found in Bismarck.  Obviously I'll need a few more pieces to get myself through summer, but this is a great start for me.  Now I just have to wait for the warm weather!!

Thursday, April 16, 2015

Bismarck Planner Supplies Haul


When we decided to take a trip down to Bismarck, ND one of the first things on my "to find" list was planner supplies!  Granted I can buy this type of thing at home but I always see such cute supplies on blog/YouTube hauls that I really want to try and get my hands on some of them.  Plus the prices in the States can't be beat!  Without further ado, here is what I found!

 
The first item on my list was a laminating machine.  This one is by Scotch and I picked it up at Wal Mart.  The reason I wanted to get this in Bismarck is because it's only $20 there, where as it's $40 at home.  Even with the not so great exchange rate right now it was still a great deal to buy it down south.  I picked up 100 laminating pouches to go with it but didn't include them in the photos because they aren't very exciting.  I've used this to laminate the cover of my planner along with the dashboard and even my museum membership!  I have a feeling this machine will get a lot of use over time and it's super handy to have around the house. 
 
While we were at Hobby Lobby I picked up a couple packages of scrapbook paper to use in my planner.  This will be great for making note cards or I can glue strips onto the pages themselves as decoration.  I also found a cute pack of letters so I snapped them up.
 
I love these little packages of sticky notes that I picked up from the Dollar-Spot section in Target.  I tried looking for these in Target at home (before they closed) but never had any luck finding them in our store; so I was stoked when I found them there!
 
 
I also found these pretty pens and pencils at Target.  I was a little bummed that some of the pencils didn't have any lead in them, but considering they were $0.50 each I guess it isn't that big of a deal.  The pens I really like; they write great and are very comfortable to write with.
 
One of my new favorite stores is Joann Fabrics & Crafts.  I've been there before with my Mom but never paid much attention to what they had in the store.  This time I found all these adorable page flags, post it notes and washi tape.  I didn't have any thin washi in my collection so I picked up a good variety.  Plus at $0.50 a roll how can you go wrong!?  Oh, and another interesting development, Joann ships to Canada!!!
 
I wanted to find some Project Life type cards to use as note cards in my planner but they are so darn expensive at Michael's.  These cards I found at Hobby Lobby and because they were the store brand they were less expensive, plus they were on sale!  I honestly think we picked the perfect weekend to go to Hobby Lobby because everything I touched seemed to be on sale 50% off!
 
 
I almost forgot about this amazing tool!  This is a 1/8 hole punch that I use to punch holes in anything I want to add into my planner.  I looked at a similar punch at Michael's before we went to Bismarck and it was $21.  I found this at Hobby Lobby for $5!  I probably should have a bought a few but it feels pretty sturdy and I think it will last me a long time. 
 
The only downside to finding all this great stuff in Bismarck is that I can't run out and grab more!  Which John would probably say is a good thing.  I hear Target gets more sticky notes, pens and pencils with every season, so if you have the chance definitely hit up the Dollar-Spot and grab a few packages!  If you want to see how I've put some of these great supplies to use, check out my Plan With Me Post for April!

Tuesday, April 14, 2015

Easter 2015

Better late than never with my Easter post!  Easter was definitely a lot more fun for everyone this year since Roman is older and has a little bit more of an idea about what is going on.  Roman started his morning by following the Easter Bunny's footprints to his Easter basket.  I fully expected him to pick up and take off with the first bunny foot but I was pleasantly surprised that he actually followed them along.  Once he found the basket he wasted no time busting into the plastic eggs to retrieve the treats!  We made sure to set the ones with chocolate aside so he only had some yogurt drops.  Can't be starting the sugar high this early!


Once everyone was fed, we loaded up into the truck and headed to Grandma and Grandpa's house!  As soon as we walked in the door we were herded back out for an Easter egg hunt!  This was the first large scale Easter egg hunt Roman has ever taken part in and luckily he didn't have to dig through snow to find the eggs!  Actually it was the first Easter egg hunt I had ever taken part in; what gives Mom!?  Anywho, Roman really enjoyed running around the yard and collecting his eggs with his basket.  It got so heavy the poor guy had to drag it along behind him!  Selby had mentioned an interesting twist on the old fashion egg hunt.  Apparently a person he knows suggested that the parents maybe polish off a bottle of wine before hiding the eggs; then it's a hunt for everyone! Haha


Once we found all the eggs (which were all filled with chocolate eggs) we headed back into. the house to tackle the basket the Easter Bunny had left at Grandma and Grandpa's house!  By far the biggest hit in the basket (pail) was the bunny sippy cup.  After he tore open all his plastic eggs, and ate a few chocolate eggs, everything was thrown aside so he could play with his train set.


Shortly thereafter the rest of our extended family showed up.  Roman hasn't seen his second cousins since his first birthday so I was really excited for him to get to play with them.  While the kids play, us adults sat around talking and watching the Aquarium channel.  It's like the fireplace channel that comes on at Christmas but instead you watch the fish swim around in an aquarium.  Everyone thought I was crazy for picking it but it wasn't long before everyone was spaced out watching the fish.  If you watch long enough you might even get to see a tiny shrimp!


Then it was time for food!  Mom always makes ham and scalloped potatoes for Easter.  To go along with that there was corn, Ukrainian Easter bread, cheese, corn bread and a Ukrainian dish that I don't know the name of but its a baked pasta/square dish that has raisins in it, and of course hard boiled eggs.  Here began the egg wars!  It's simple, one person holds their egg on the bottom and the other person on the top.  The person with the top egg hits the bottom and whichever egg cracks loses.  This has been a tradition in our family for as long as I can remember.  I always thought it was a game of chance but John seems to think he has mastered the art of being the bottom egg and he never loses!


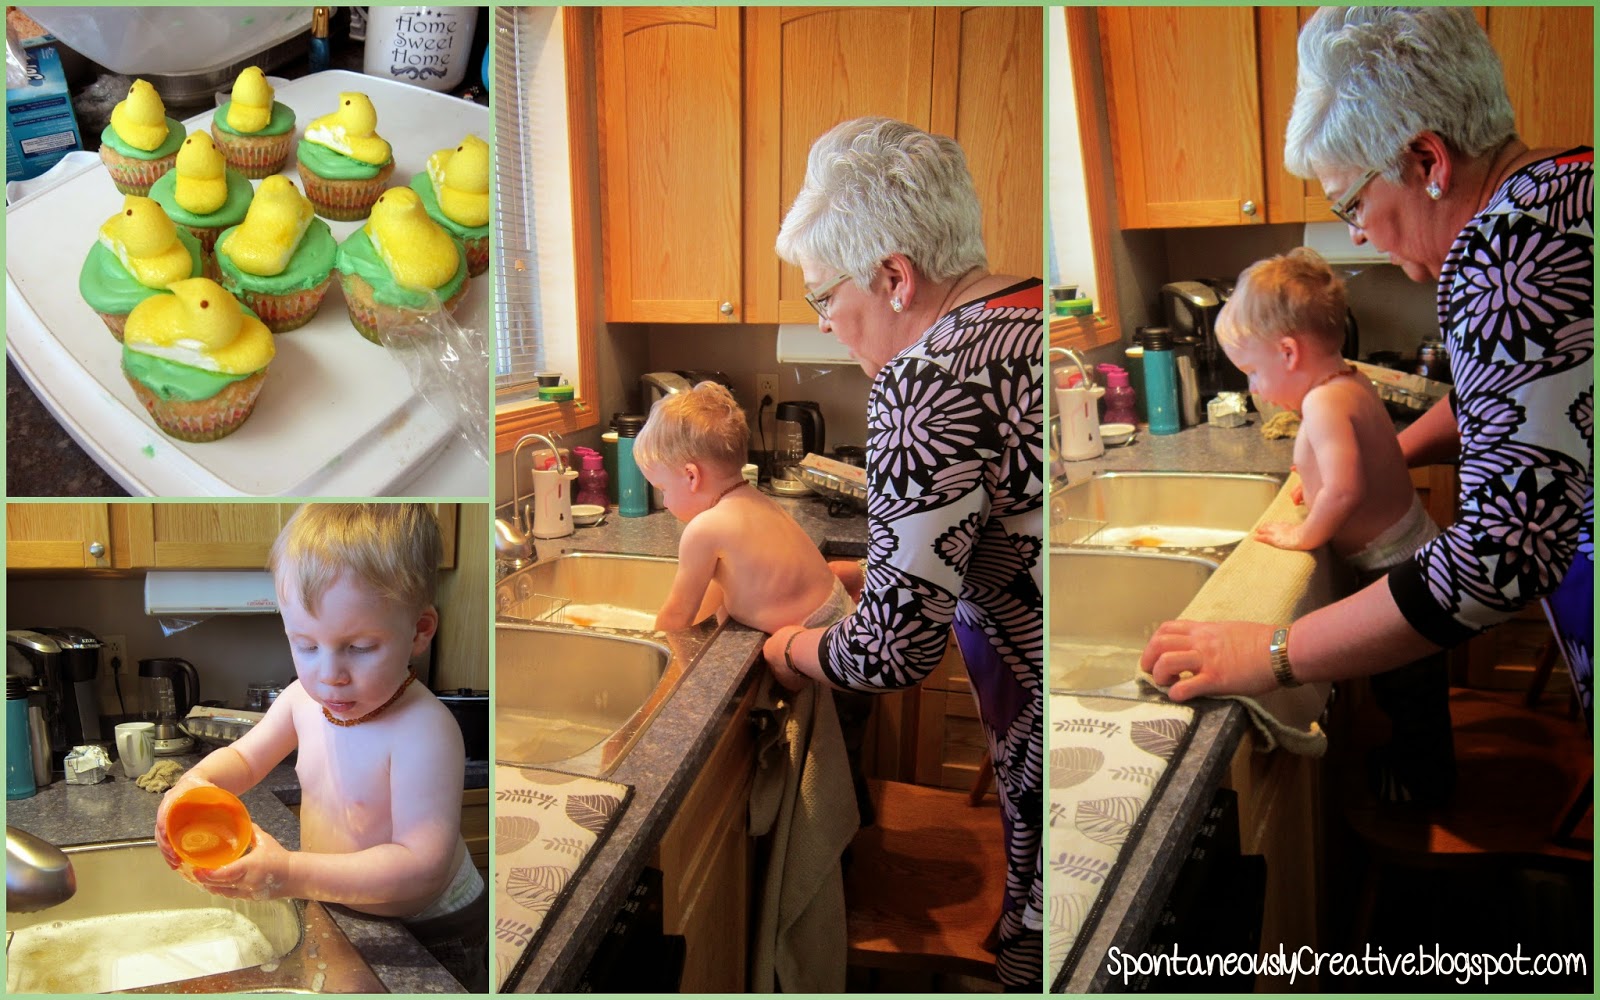
For dessert I made some Peep cupcakes, which turned out great, and everyone seemed to enjoy them!  Once everyone was done eating it was time to clean up, and if you know Roman then you know that this is his favorite part.  I think he loves doing dishes more than anyone I know.  I really hope this keeps up for a few more years!  Grandma tried to keep him dry but it was a losing battle (as always) so finally she just gave up.  Those 4 dishes that he washed for a good 20 minutes were probably the cleanest in the house!


It was a long, tiring day, but it was a great Easter spent with our family.  We went home a few pounds heavier with a pail full of chocolate and a wired up kid, and we couldn't have been happier!

Thursday, April 9, 2015

Decorating Eggs 2015

This is by far my favorite Easter tradition!  I don't even really like eating hard boiled eggs but I LOVE decorating them!  Last year Roman could only sit in his high chair and watch while I colored the eggs, but this year he is right in the game and he had a blast!  I picked up this decorating kit at Superstore for a whopping $2.  It came with 6 colors (yellow, orange, pink, green, blue & purple), stickers, wrappers, stands, and a memory game.  Obviously we aren't going to use the memory game but I thought it was a great value for $2.


For as long as I can remember my Mom always mixed up our egg dye in coffee mugs and lined them up on the kitchen table for Selby and I to color eggs.  I figured if it worked for her it would work for me.  What I didn't take into account is that all my mugs are difference sizes and shapes and most are large and the dye wouldn't cover the entire egg.  I guess next year I'll have to use plastic cups, or maybe I should get a set of mugs... 


Poor Roman was convinced that I had just set out several cups of tea on the table and he was a little disappointed that he couldn't drink them.  However, once I showed him how to put eggs into the mugs he quickly decided this was much more fun.  With a little help he had those mugs filled with eggs in no time flat!

I was pretty impressed with this dye because it didn't take long for the eggs to become saturated with color, or at least the ones that were completely submerged.  I was also impressed with how gentle Roman was being with the eggs.  Lately he doesn't like having help doing anything but he loved scooping the eggs out of the dye and seeing how they had changed color, so I guess he decided it was worth putting up with his parents helping him.  I'm sure it's a hard concept for a little guy to wrap his head around so he probably thought John and I were pulling some magic tricks on him, with our color changing eggs.  The box the decorating kit came in turned into a drying rack but my Mom always had us dry the eggs off on a paper towel lined cookie sheet so that's what I did as well.


Once the eggs were dry I introduced Roman to the world of stickers!  At first he had a bit of a hard time figuring out how to get them to stick to the eggs, but after a few tries e figured it out.  As you can see from some of the pictures he was pretty pleased with himself.  This is literally the reaction he had each and every time he stuck a sticker on an egg.  I dare you to look at that middle picture with a mouth full of liquid and not spit it all over the screen.  How can you not love this kid?!


Unfortunately Roman did get a little too excited with one of his eggs.  The poor pink egg was almost cut in half when his meat mitts crushed down on it.  He seemed a little upset by what happened and didn't squish another egg; the beauty of cause and effect! 


We ended up with 8 beautiful eggs (including the cracked one) that will live in our fridge for the next few days, or until they are gobbled up by John and Roman.  I may even indulge in one or two just so I can have an egg war with John.  Want to know what an egg war is?  Check out my upcoming Easter Sunday post and learn all about this super fun tradition!

Tuesday, April 7, 2015

Plan With Me - April 2015

As you can probably guess from the title of this post, I am still obsessed with my planner.  Actually it has probably gotten worse since our trip to Bismarck because I picked up a ton of great stuff there!  I really need to take a break from this planning business and write up a post of all the awesome planner stuff I picked up in the States! 

Until then I thought it would be fun to share how I have decorated my planner for the upcoming month.  Of course I'm always adding to the pages so they aren't fully complete, but you'll get the general idea of where I was going with the pages.  Enjoy!


I almost forgo!  I always made this super cute dashboard for my planner from a gift bag that I found at Target.  I cut the sides out of the bag, sent it through the laminator, and they attached a few of my favorite sticky notes.  This way I always have sticky notes on hand if I need to jot something down quick, and they aren't floating around in my purse!


Thursday, April 2, 2015

Bunny Sandwich Cookies with Marshmallow Cream Frosting

I'm not normally excited by Easter when it comes to baking and crafts, like I am by other holidays like Christmas, but the warmer weather inspired me to start thinking about spring and Easter.  When I'm looking for some inspiration, the first place I always go is Pinterest!  I came across this post for the most adorable cookies I had ever seen.  They seemed pretty simple so I figured I could replicate them.

To be honest I never even read the recipe for the cookies, I just decided to use my go to sugar cookie recipe.  I mixed up a batch of dough, divided it in half, then kneaded Wilton's Golden Yellow color gel into one half and Rose color gel into the other half.  Of course as soon as Roman saw what was going on he would not leave the mixer alone until he got to lick the beater.  This boy has sure learnt fast that the mixer is for making treats!  Once the color was evenly distributed, I wrapped the dough in plastic wrap and refrigerated it over night.


When Roman went down for a nap after lunch, I took the dough out of the fridge and let it sit on the counter for a few minutes to warm slightly; this makes it a bit easier to roll out.  I rolled out one color at a time to 1/4" thick on a well floured surface, and cut out heart shaped cookies using a cookie cutter that I picked up at Bulk Barn.  To form the bunny head, cut one heart in half and lay it on a parchment lined baking sheet with the halves slightly separated to form the ears.  Then lay a heart on top of the two halves with the point between the ears to form the head.  All three pieces will adhere to each other while they bake.  Make sure you have one regular heart cookie for each bunny head to complete the sandwich.
 
Bake the cookies at 350° for 5-8 minutes until the cookies are cooked through but aren't too brown around the edges.  Allow cookies to cool completely on a wire rack.  Be VERY gentle when moving the cookies from the baking sheet to the wire rack, or you might end up with some one eared bunnies, like me.
 
Marshmallow Cream Frosting
7 oz. marshmallow cream
1/2 cup butter
1 1/2 cups icing sugar
1/2t vanilla
 
Cream butter until smooth.  Add marshmallow cream and mix well.  Slowly add in icing sugar followed by vanilla and whip until smooth.
 
 
Spread a decent amount of the frosting onto the back of the bunny head and sandwich on a heart cookie, making sure to have the good side of each cookie facing out.  Place a small amount of the frosting on one side of a Smartie and stick it on the back of the sandwich as the bunny's tail. 
 
When it comes to the bunny's face you have a few options.  You could use royal icing as it would set nice and hard, or you could go the route I did and use chocolate.  I melted down some chocolate wafers in a double boiler then placed it in a homemade parchment paper piping bag.  To make the piping bag simply cut a large circle out of parchment paper.  Fold the circle in half and then in half again to make a cone.  Cut the tip off the cone, open up the pocket in the cone and spoon in the chocolate.  Pipe eyes and a nose on to each of the bunny faces.  Set the cookies aside until the chocolate sets and they are able to be stacked. 
 
 
I absolutely love the way these cookies turned out!  Not only are they adorable but they are seriously tasty!  The marshmallow cream frosting is gooey and just sweet enough without being over powering.  Once the frosting sets it also takes on a marshmallow like texture which is perfect for Easter.  These cookies would be great for a kids Easter party or as part of a dessert table at your Easter meal.  I actually packaged a couple of these up in a cute Easter cellophane bag with a little carrot tag (all from Bulk Barn) and handed them out at play group.  I'm sure all the other mom's appreciated my sugaring up their kids...