Thursday, July 31, 2014

Roman's First Birthday Party!

The day that my little baby turns one is getting closer and closer (by the time this goes live he will officially be 1!!), so today we celebrated this amazing little man with a spectacular jungle themed birthday party!  I absolutely love planning parties and since this was my first crack at a kids party I was super enthusiastic from the start!  Maybe a little too enthusiastic depending on who you talk to....


I'm quickly becoming known for my over the top decorations and outlandish ideas.  It does take a lot of time to put a party like this together but I love it, and when it's for my little guy, nothing but the best will do!  I had been collecting pieces for this party for months and to be honest I wasn't completely sure what all I had until I opened the boxes up again the day before the party.  I had a feeling we were in for a long decorating session, and to save my marriage (my decorating tends to drive John batty) I enlisted the help of my Mom and Mother-in-law.  It took the four of us a couple of hours but I think the result was well worth the effort!


Our living room has these great brown beams that lend themselves extremely well to imitating tree trunks, so I decided to use them to my advantage.  We twisted two different shades of green streamers together and then draped them along the beams.  To make it look more authentic we weren't concerned with them being symmetrical, much to the joy of John and my Mom!  I purchased a few stems of leaves from a local craft store and removed the leaves from the stems.  Then I punched a hole in each leaf and we strung them onto fishing line.  These were then taped to the beams to give us some jungle foliage.  We also used two different shades of twisting balloons to all some fullness to the beams.  John came up with the great idea of curling the darker green balloons and I absolutely love the way they turned out!  The look was completed with some paper monkeys strung on fishing line, tissue puffs around each end of the trunks and last but definitely not least, an inflatable parrot.  Unfortunately my 5 foot monkey had some inflating issues and was pretty much flat by the time the party started.  He was still an interesting addition, even if he was a little two dimensional.


I found this great mural at a local craft store as well and I knew I wanted to incorporate it somehow.  I ended up wrapping it around our entertainment centre (since wall space is at a premium in our house) and using it as a photo backdrop.  It added a little extra jungle pop and also gave us a place to hide some of those last minute clean up items that you always seem to miss!  Along the top of our entertainment centre I staggered shimmer palm trees, honeycomb palm trees, and inflatable beach ball animals.  The animals also doubled as favors for the kids attending the party.  I don't have a photo of them but the kids also took home animal tails that clip to your clothes, they were a huge hit!


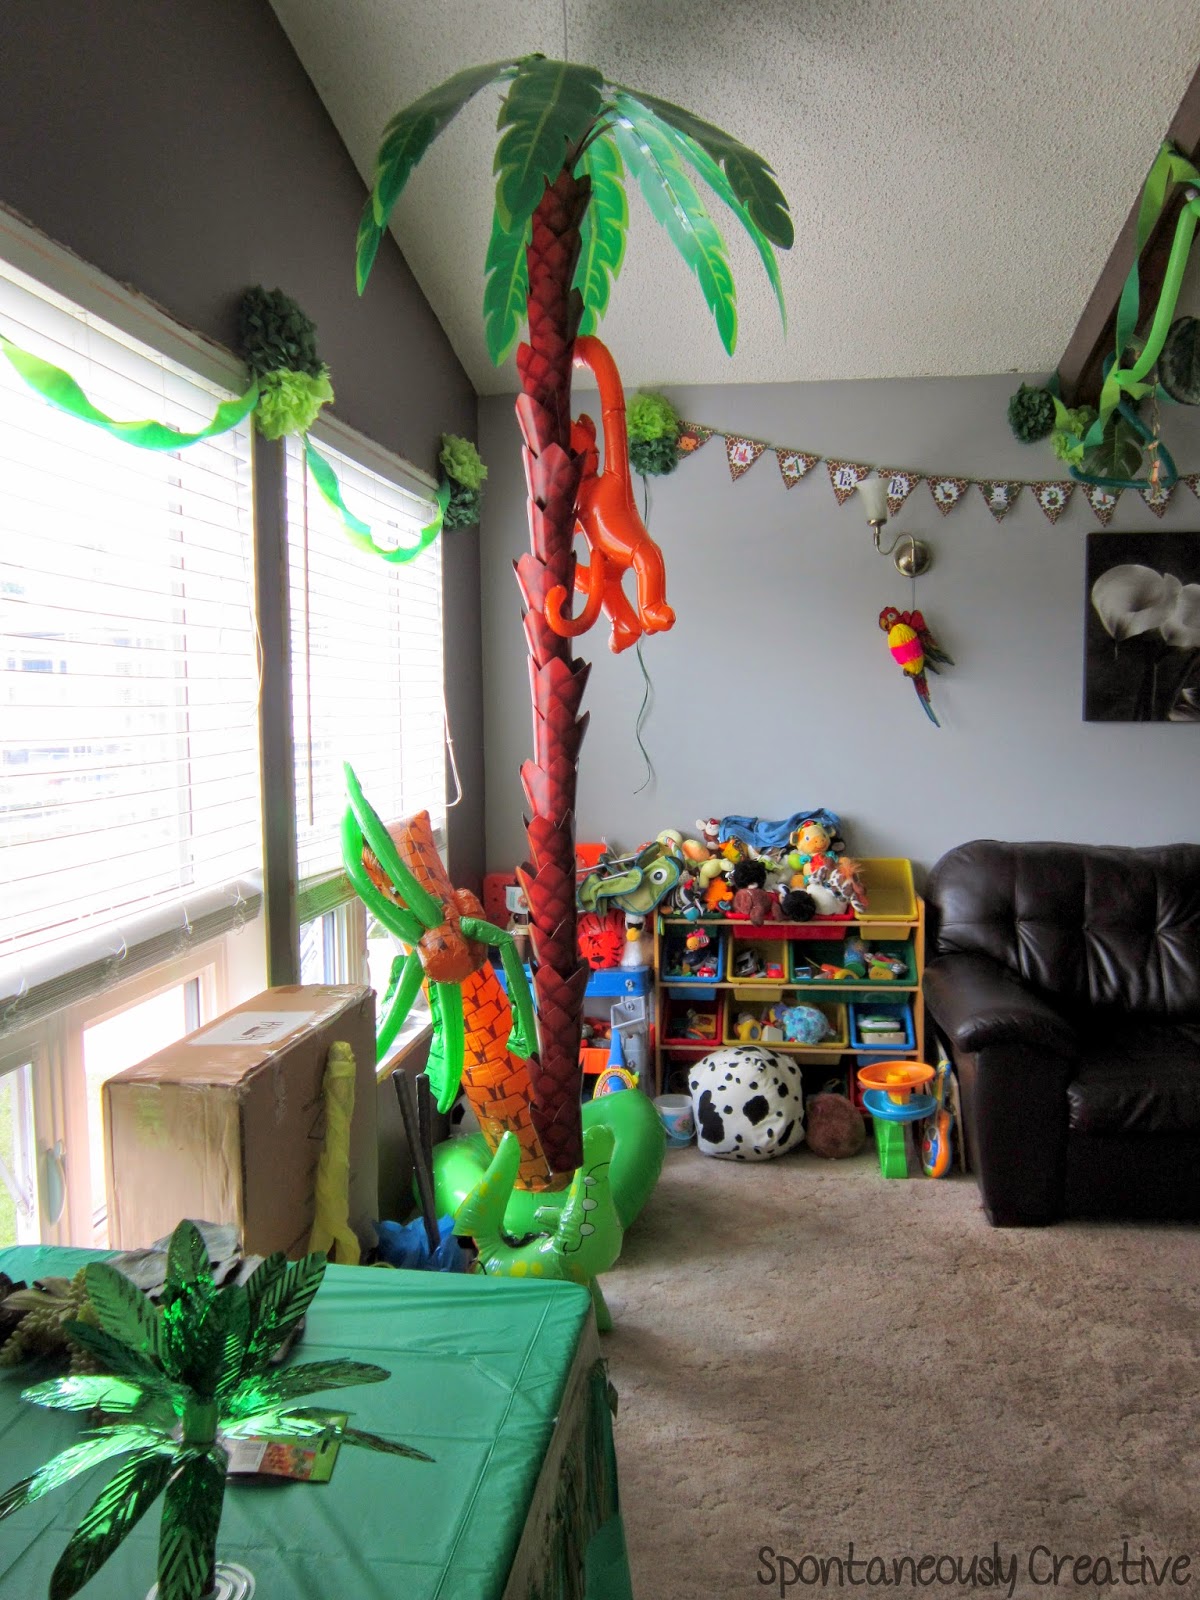
To complete the living room décor, I hung an 8 foot cardboard tree palm tree from an exiting hook in the ceiling (I guess it does serve a purpose) and sat an inflatable palm tree in the corner.  As you can tell from the photo the inflatable tree didn't last very long and we ended up having to tie it to the blinds.  If I learnt anything from this party is it that you can never count on the quality of an inflatable.  Good thing I decided to get the cardboard palm tree or we wouldn't have had one for the party! *gasp*

Finally after all many months of painstakingly trying to get Roman to sit still for his monthly photo I was able to share the fruits on my labor.  It's amazing how much Roman changed from one month to the next especially when I'm with him every day and don't necessarily notice the changes.  How did such a tiny dark haired baby turn into a big blond toddler so quickly?!


Now for every one's favorite part, the food!  For birthdays I think it's a fun personal touch to have a menu consisting of the birthday boy's, or girl's, favorite foods.  After all, it is their day!  For Roman's birthday meal I made:

Baboon Burgers
Hyena Hot Dogs
Hungry Hippo Hummus
Viper Veggie Pizza
Elephants Eggs (deviled eggs with avocado mixed into the yolk)
Macaw Mac & Cheese Bites (baked mac & cheese balls)
Fruit Tray (I dropped the ball on this one and didn't have a clever name for it)


Now obviously hot dogs and hamburgers aren't one of Roman's favorite foods, but I didn't think our guests would want tuna sandwiches for lunch.  Roman devoured a lot of food at lunch, but the hands down favorite for him was the hummus.  He got a little messy but I was actually impressed by how clean he was.  I guess it helps when it's all his favorite foods, not much hits the floor that way!


I love these plastic table cloths from the dollar store.  They fit my table perfectly and I can just ball them up at the end of the day and toss it into the trash.  After a long day of partying, who wants to wash a table cloth?  The fringe I picked up at a craft store but you could also use several grass skirts attached together.  Space is always at a premium on a buffet table so I decided to pre-wrap the utensils with the napkins so they would take up less space on the table.  To hold them together I made napkin rings to match the theme the jungle theme.  I also use the same idea to make these super cute water bottle labels.  I thought they were a fun way to dress up the water bottles to make them more appealing rather than just plopping plain water bottles on the table.


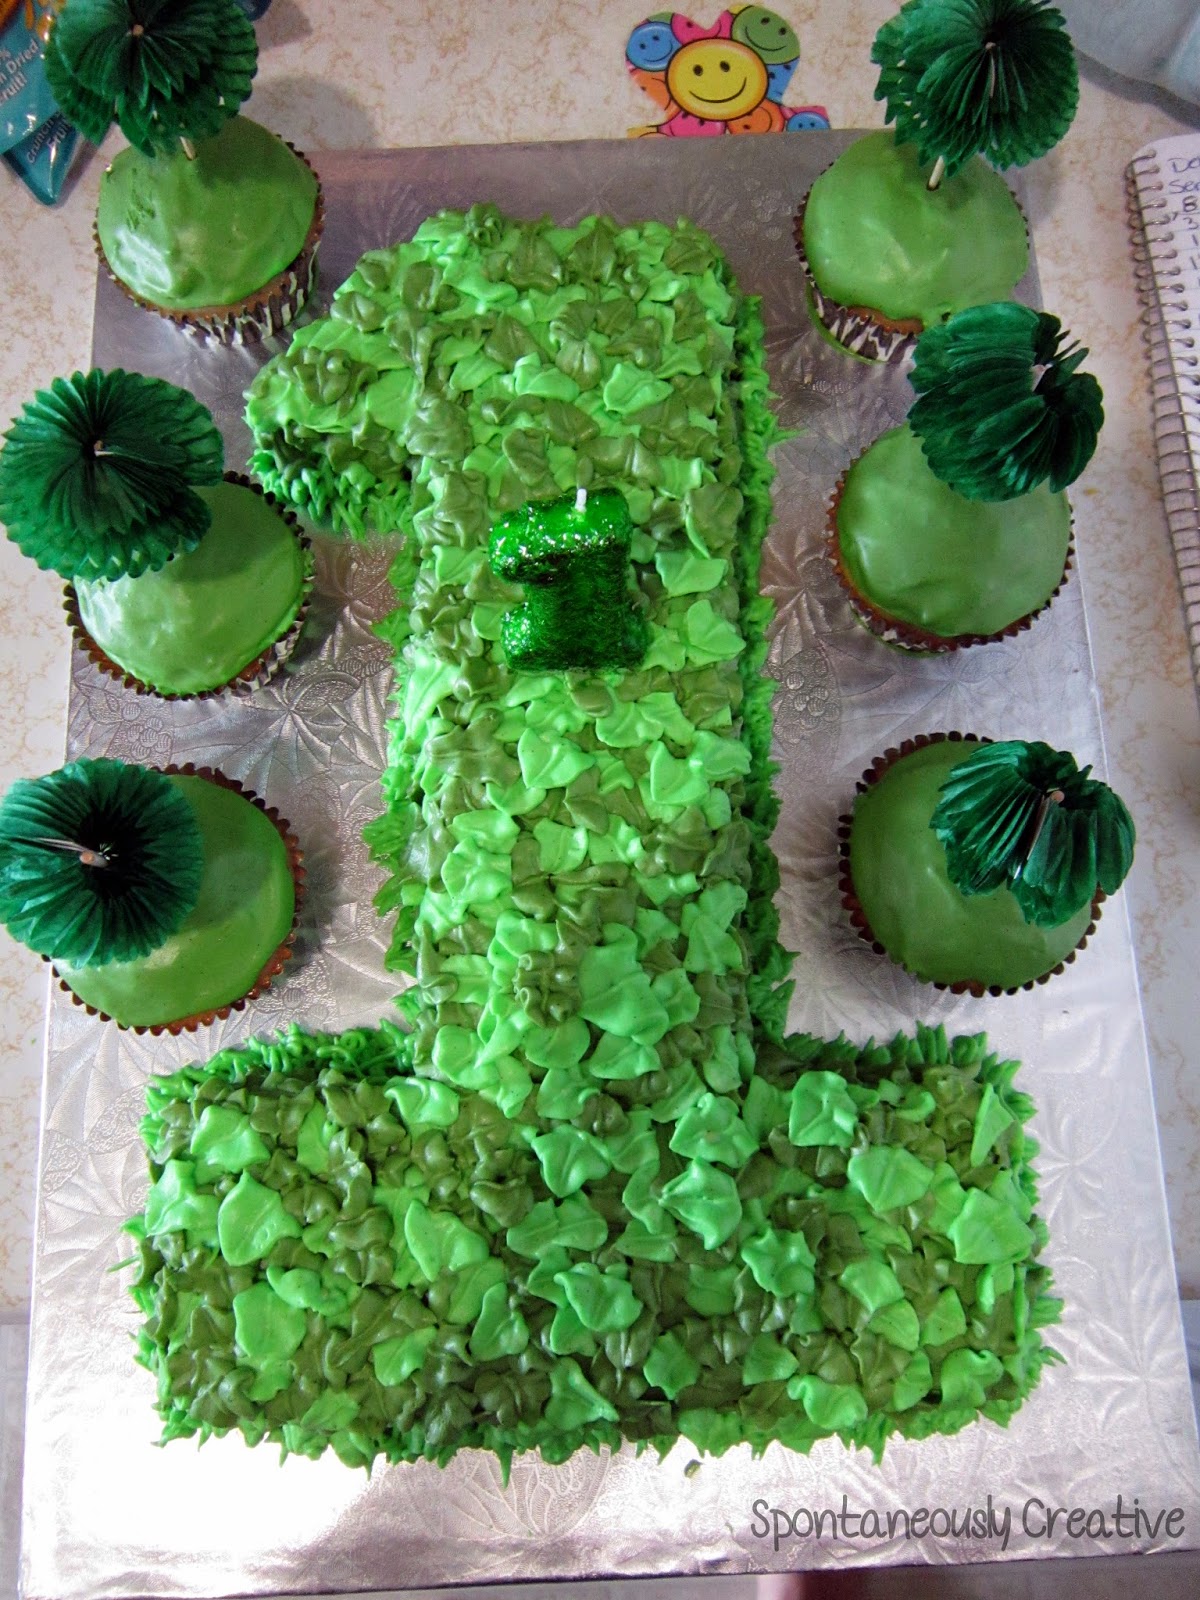
I always look forward to cake at a party, and this one was no different.  I kept with the theme of making Roman's favorite foods and made Roman a lemon blueberry cake with Whipped Cream Frosting.  I took my inspiration from this cake I found on Pinterest.  Now obviously this cake was going to be a large undertaking for one person, so I decided to enlist the help of my Mom.  Between the two of us we managed to pipe this entire cake in no time flat.  We used the #67 Wilton tip for the leaves and the #233 Wilton tip to make the grass around the base of the cake.  We spread a layer of frosting onto the cupcakes and topped them with these adorable palm tree picks I found at PartyCity.


When all was said and done everyone had a great time at Roman's birthday party.  Roman particularly loved playing with all the other kids and running rampant through the house.  The food was gobbled up and much to my surprise I managed to keep the quantity at a normal level this time!  We were very blessed to get to spend this special day with our family and close friends, and had a fantastic time visiting with everyone.  Let the planning for the next party begin!

Tuesday, July 29, 2014

Puffed Oven Pancakes

 
The quest for new and interesting foods for Roman continues!  He seems to really like pancakes, his favorite right now is pancakes topped with mashed avocado (strange I know), so I thought I'd try a new type of pancake.  These oven pancakes have more egg in them than normal pancakes which is great for getting more protein into him!

I was originally introduced to this type of pancake (also known as a German pancake) by Trellyn who made them while we were visiting her and her family.  The best part of this pancake is that you can just pop it in the oven and leave it for a few minutes instead of having to stand there and flip pancakes for half an hour.  Plus how cute are they!?  This recipe was originally posted on Once a Month Meals.

Puffed Oven Pancakes (makes 10 pancakes)
2 eggs
6T milk
6T flour
1/4t salt

Mix all ingredients together.  Pour into greased muffin tins.  Bake at 400° for 10-12 minutes until the edges start to turn golden.  Let them cool completely, wrap in plastic wrap and place in a freezer bag to freeze.  To serve, simply reheat in the microwave.

I topped these pancakes with fresh raspberries and sliced peaches that I glazed with some melted orange/lemon/grapefruit marmalade.  They would also be delicious topped with maple syrup or even avocado, if your taste buds are anything like Roman's.  Not only are these great for kids but they are also perfect for a busy morning breakfast or even breakfast on the go!  I had to eat the pancake I used for the picture (it's a hard job but someone has to do it) and I could have eaten 6 more, at least.

Thursday, July 24, 2014

Project Garden

We are two months into project garden and things are moving along wonderfully!  As I mentioned in my yard update post, we have had some amazing weather for growing plants this year and our garden has definitely benefited from it, for the most part....  To see what this garden looked like at the start click here!


Let start off with the herbs, or as I refer to them as, the jungle.  We use a lot of parsley when we cook, especially in the summer, so I figured it was a good idea to plant 4 parsley plants.  Who knew that they would all grow to a mammoth size!  I have been cutting off branches and leaves every few days and they are still growing out of control!  I guess that is a good problem to have when it comes to growing food.  Clearly I couldn't possibly use all of this parsley fresh, so after washing it I pop it into a sandwich bag and freeze it.  The best part, when it's frozen you don't even have to chop it because it breaks up like ice!  The basil, thyme, chives and dill are all producing well.  I've been able to harvest from each several times already.  But seriously, if you need some parsley just let me know and I'll mail it to you!
 
I have been very pleasantly surprise but the pepper plants.  To be honest I didn't have a whole lot of faith that they were actually going to produce peppers.  I've only ever tried to grow peppers one other time and all I got was one measly pepper.  While I don't have any peppers yet, the plants are loaded with flowers which I hope (fingers crossed!!) will turn into delicious peppers.  Unfortunately I don't have quite as many peppers plants as I started out with.  It seems the learning curve for a certain white sasquatch (Bronx) was a little slower than I hoped it would be, and of course he had to level the two strongest plants with the most flowers.  Oh well, such is life I suppose.  I'm sure whatever caused him to high-tail through the garden was extremely important and would completely justify the loss of my pepper plants....
 
The white sasquatch was also responsible for the loss of my watermelon plant.  I wasn't too broken up about this since I didn't think I was actually going to end up with a watermelon anyway.  In hindsight, with the fabulous weather we've had, it might have stood a chance!  There is no sense in leaving an empty space in the garden when I could be growing something, so I decided to pick up some cucumber plants to fill the space.
 

Mother Nature wasn't completely on my side though.  I had almost no luck at all with any of the seeds I planted.  Part of the problem was where I decided to plant some of them; I didn't realize one corner of the bed was as shady as it was, and I think the other part was the white sasquatch and his spotted companion (Lola).  Over the course of their many trips through the garden I think they pounded the seeds down far enough that there was no hope in germination.  Animals I tell ya.  I recently seeded beans where the original cucumbers were, so here's hoping that these ones take!


On to the fruit!!  The strawberries are doing surprisingly well considering I had basically zero hope of them producing anything.  There was one good size strawberry that I was saving for Roman but the birds got to it before I did.  I've been meaning to cover them with mesh but since the first berry I haven't had many more show up, so I haven't been in a rush.  Not bad for an experiment I guess!  Our Saskatoon tree is chock-full of nice sized Saskatoons and I couldn't be more excited!  If you don't know what Saskatoon's are, they are a delicious berry synonymous with Saskatchewan and quite possibly the most scrumptious morsel of berry goodness that you will ever taste!  We are taking the birds on head on and trying anything we can to keep the birds away.  So far we have spinning shiny decorations hanging in the tree to deter them, and we may have shot a few with the water hose when they got too close.  (No birds were harmed in the writing of this blog post!).  If you have any tips to keep the pesky birds away, please share in the comments!


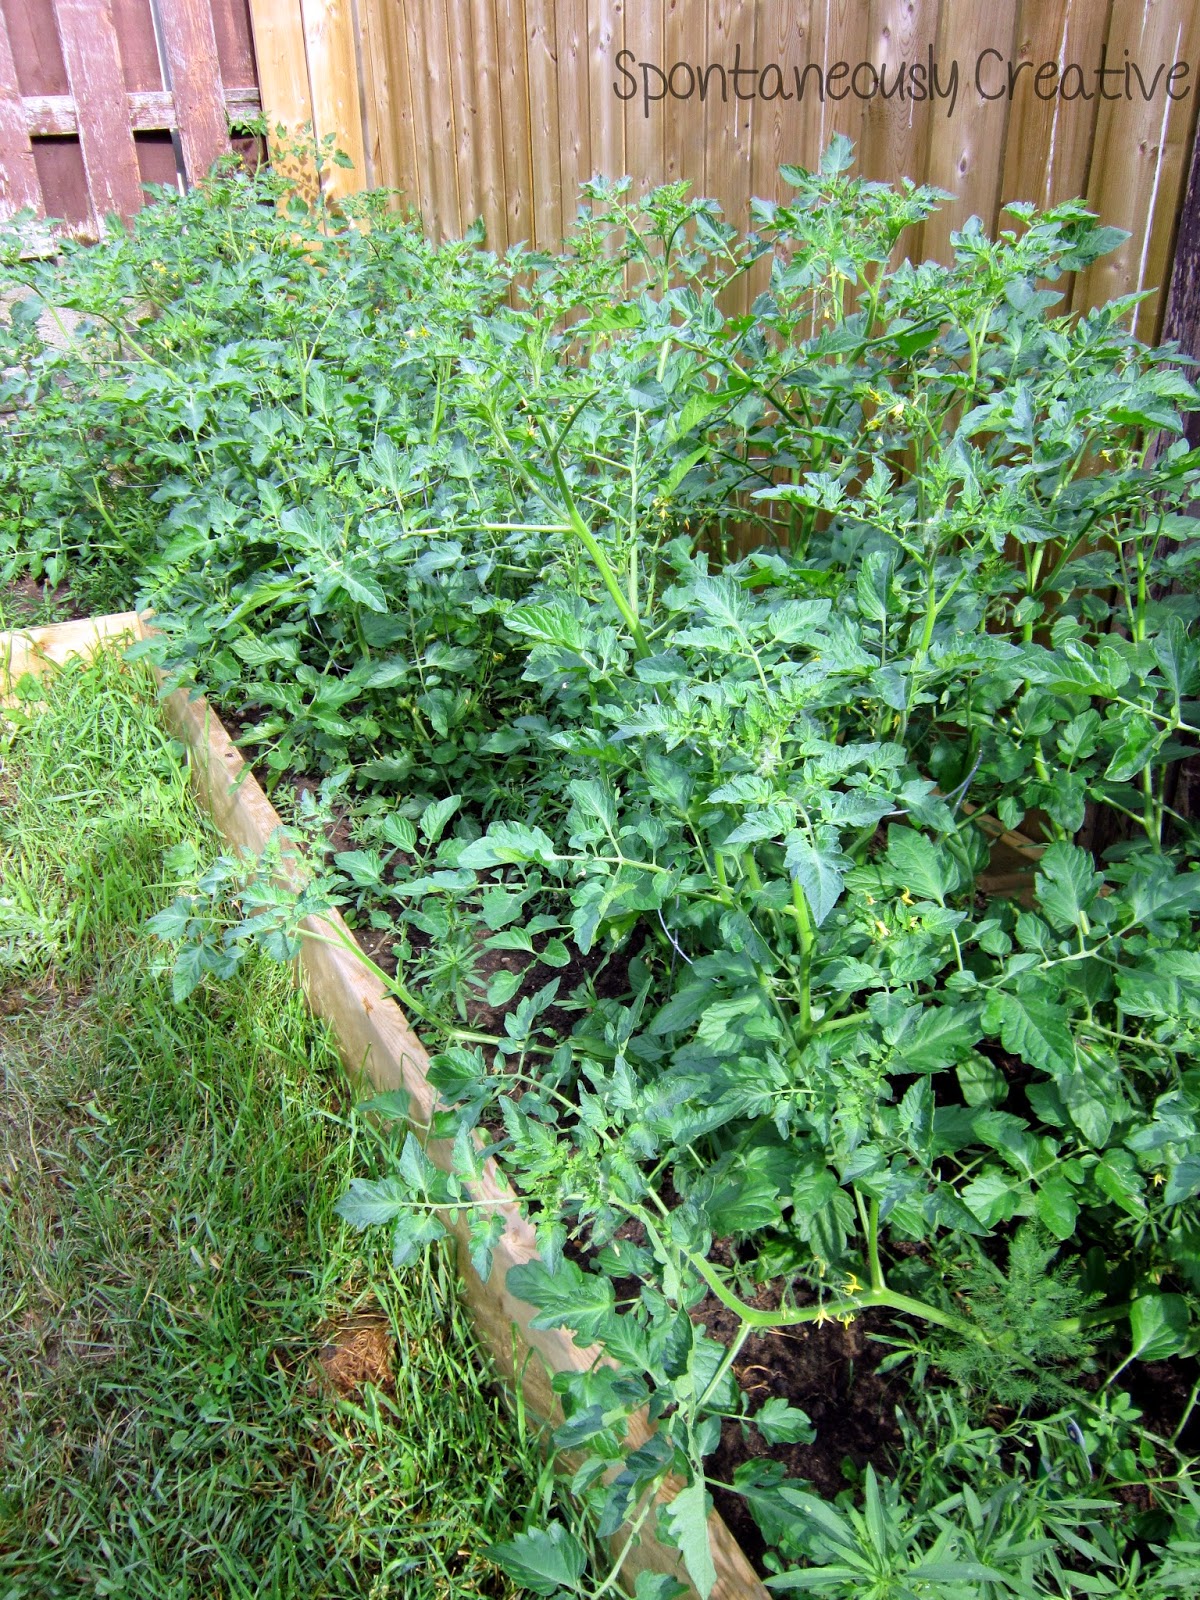
Onto the pies de resistance, the tomatoes!  I have no idea how these behemoths came to be.  All I did was water (although not much with all the rain) and give them a bit of organic fertilizer.  These plants also get the most sun out of any of the plants in the entire garden.  I guess the trick to growing massive tomatoes is to ignore them for the large part....  I think we are going to be overloaded with tomatoes come fall, which is good because Mom's tomatoes died so we'll be able to supply her!  Be sure to keep an eye out for a tomato sauce canning video this fall, no canner required!!


Tuesday, July 22, 2014

Maybe I do have a green thumb!

We've had some amazing weather this year when it comes to growing flowers and grass.  We have had tons and tons of rain broken up by some very hot days.  As much as I hate the humidity (and the heat for that matter) the plants seem to love it.  Let's jump right in to the update!  Click here for the original post!

It's been about a month since I planted all my flowers and I am happy to report that they are all still alive!  Probably most impressive is that the weeds in the flower bed aren't as big as the flowers!!  This is really shocking since everything is literally growing like a weed and of course the fact that I despise weeding more than anything in the world.  I think I would actually go through labour again before I spent an afternoon weeding.  I was also lucky enough to have my Aunt (Hi Aunt Kathy!) come over and water my flowers while we were away on vacation, which I'm sure saved them from certain death.

My irises bloomed beautifully but the idea of taking a picture for this post completely escaped me!  Which is unfortunate because they were gorgeous!  I forgot just how much I truly love lilies until mine started to bloom.  John probably thought I had lost my mind as I went running across the yard to bask in the glory of the first lily bloom.  Now it has become a daily ritual to check the progress of the new buds and to admire the magnificent blooms.


A few weeks ago my Mom, Roman and I made a trip to Dutch Growers to pick up some new additions for the flower bed and came across this beauty!  I loved this mushroom the moment I saw it!  Because the top is attached to the base by a spring, Roman also loves it since he can hit it and make it dance!  Some people try to keep their kids out of their flower beds.  I have accepted the fact that there are not enough hours in the day to chase this child out of my flowers and therefor have tried to make my flower bed baby friendly.  So far there haven't been any flower casualties as he's too distracted by the "toys" to notice the flowers, let's hope it stays that way!  Thanks Mom for the Birthday mushroom!

Now for the new additions to the flower bed.  I decided to get a few ground cover perennials to help choke out some of the weeds so that one day I won't have to weed at all!  Just the thought of it makes me smile!  The first plant I picked up was a Purple Robe Rockfoil.  This plant has small spiky leaves that produces red/purple flowers with white centres in spring.  The horticulturist at Dutch pointed out this next plant to me.  Elfin Thyme is a moss like plant with tiny leaves and tiny pink/purple flowers.  The selling point for this plant, you can walk on it!  Perfect for planting between paving stones on a walk path, or for a flower bed that doubles as a playground for small people!  It is also drought tolerant which is perfect for this south exposure bed.  Last but not least I picked up a Creeping Speedwell, which is similar to my Creeping Jenny (which I learnt is also a perennial not an annual!).  The plant has small white flowers that bloom in mid spring to early summer and can stand up to moderate foot traffic.  Bring on destructor baby!

The other day I noticed that Canadian Tire had all their plants on 50% off.  We decided to stop by and see what they had left.  I'm so glad that we did!  I have loved hydrangeas forever.  In Toronto (where John is from) people have them all over the place and I knew one day I could have my very own bush.  Would you believe they had the Annabelle Hygrandea on sale for $15!?!  Plus the plant is huge (probably close to 3 feet) and is in really good shape considering the time of year and the fact that it was on clearance.  John loves lilacs so I knew I wanted to get a couple for the yard.  Just my luck they had Syringa Vulgaris 'Prairie Petite' on sale for $11 each!  Total score! 


Now for John's pride and joy, the lawn.  I think we won the lottery when we decided to try to grow grass this year.  With all the rain we've had I only had to water the grass for a couple weeks before the rain took over and showered the seeds with the elixir of growth.  The bare spots are filling in amazingly and it's just a lot more lush and green over all.  There are still a few spots that are a little worn down but with dogs in the yard you can't expect perfection.  The only down side to this amazing grass is that poor John has been having to cut it twice a week just to keep from losing Lola in the yard!

Thursday, July 17, 2014

Whipped Cream Frosting


This is quite honestly the most delicious, mouth watering, worship worthy frosting I have ever tasted, and I've eaten my fair share of frosting!  I recently found this recipe on Wholesome Baby Food while I was searching for a "better for you" frosting recipe for Roman's smash cake.  As soon as I mixed this frosting up I knew I had found a recipe that would be in the family forever.  I immediately called my Mom into the kitchen and made her taste it.  We then proceeded to hover over the baby gate and eat half of the leftover icing with spoons while my Dad looked on in disgust.  Men just don't understand a woman's need to eating straight icing!

The cream cheese and sugar gives this frosting the taste of a cream cheese frosting, but it is elevated to a whole new level by the whipped cream.  Not only is this frosting light and fluffy, but the whipped cream also subdues the cream cheese flavour to make a well balanced and delectable frosting.  This frosting pairs wonderfully with cakes, cupcakes, or even muffins with a flavour more on the tart side.  I spread some of the leftover frosting on my Lemon Cranberry Crumble Muffins and it was to die for!

Whipped Cream Frosting
8oz cream cheese, softened
1 cup sugar
1/8t salt
1t vanilla
1 1/2 cups heavy whipping cream

Using a mixer, or a whisk if you're a ninja, whip the cream until it forms stiff peaks.  Set aside.  Beat together the cream cheese, sugar, salt and vanilla until smooth.  Gently fold the whipped cream into the cream cheese mixture.  If you want to color the icing, add the coloring now and gently mix until the color is evenly distributed.

It's just that easy!  The airy consistency of this frosting lends itself incredibly well to piping simple shapes like swirls and shells and would be a great frosting to learn with.  This recipe will forever be in my arsenal for decorating cakes.  Along with the traditional buttercream icing, you will never need to look for another frosting recipe again!

Tuesday, July 15, 2014

A Cake Without a Future


A cakes sole purpose is to be eaten and enjoyed by people.  It seems a little unfair that this cake will never reach it's full potential.  On the other hand, maybe it's better to not be eaten at all?  Well this cake wasn't exactly eaten but it was definitely mangled and it absolutely brought joy to one little boy!  Not to mention that I got some great photos out of the deal!

The cake itself is a vanilla cake and has less sugar than a traditional cake.  I wasn't sure how much cake Roman was actually going to get so I wanted to make sure it wasn't overly sugary.  The base icing is a Whipped Cream Frosting.  This frosting is quite possibly one of the most delicious frostings I have ever made!  My Mom who was gracious enough, along with my Dad, to watch Roman while I decorated this cake, helped me to finish off the leftover icing.  *TIP - always know when to stop yourself fro eating the icing.....  For the grass and leaves I used my go to buttercream icing that I colored green with Wilton's Leaf Green gel color.  The buttercream icing has a thicker consistency that dries stiffer which works perfectly with the delicate design of the leaves and grass.  If you are piping shells or a simple swirl, you could absolutely use the whipped cream icing to pipe with. 


For the number 1 in the centre of the cake I used a template and some decorative sugar. Find a font that you like and print out a large number 1 on card stock.  Cut the 1 out leaving a 1 shaped void in the centre of the card stock.  Lay the template down on the cake and sprinkle the sugar over the open area.  Lightly press the sugar onto the cake and then slowly lift the template off.  If there is any disturbance to the icing simply smooth it out with a spatula.  This technique could be used for any number of shapes to coincide with any occasion or theme.


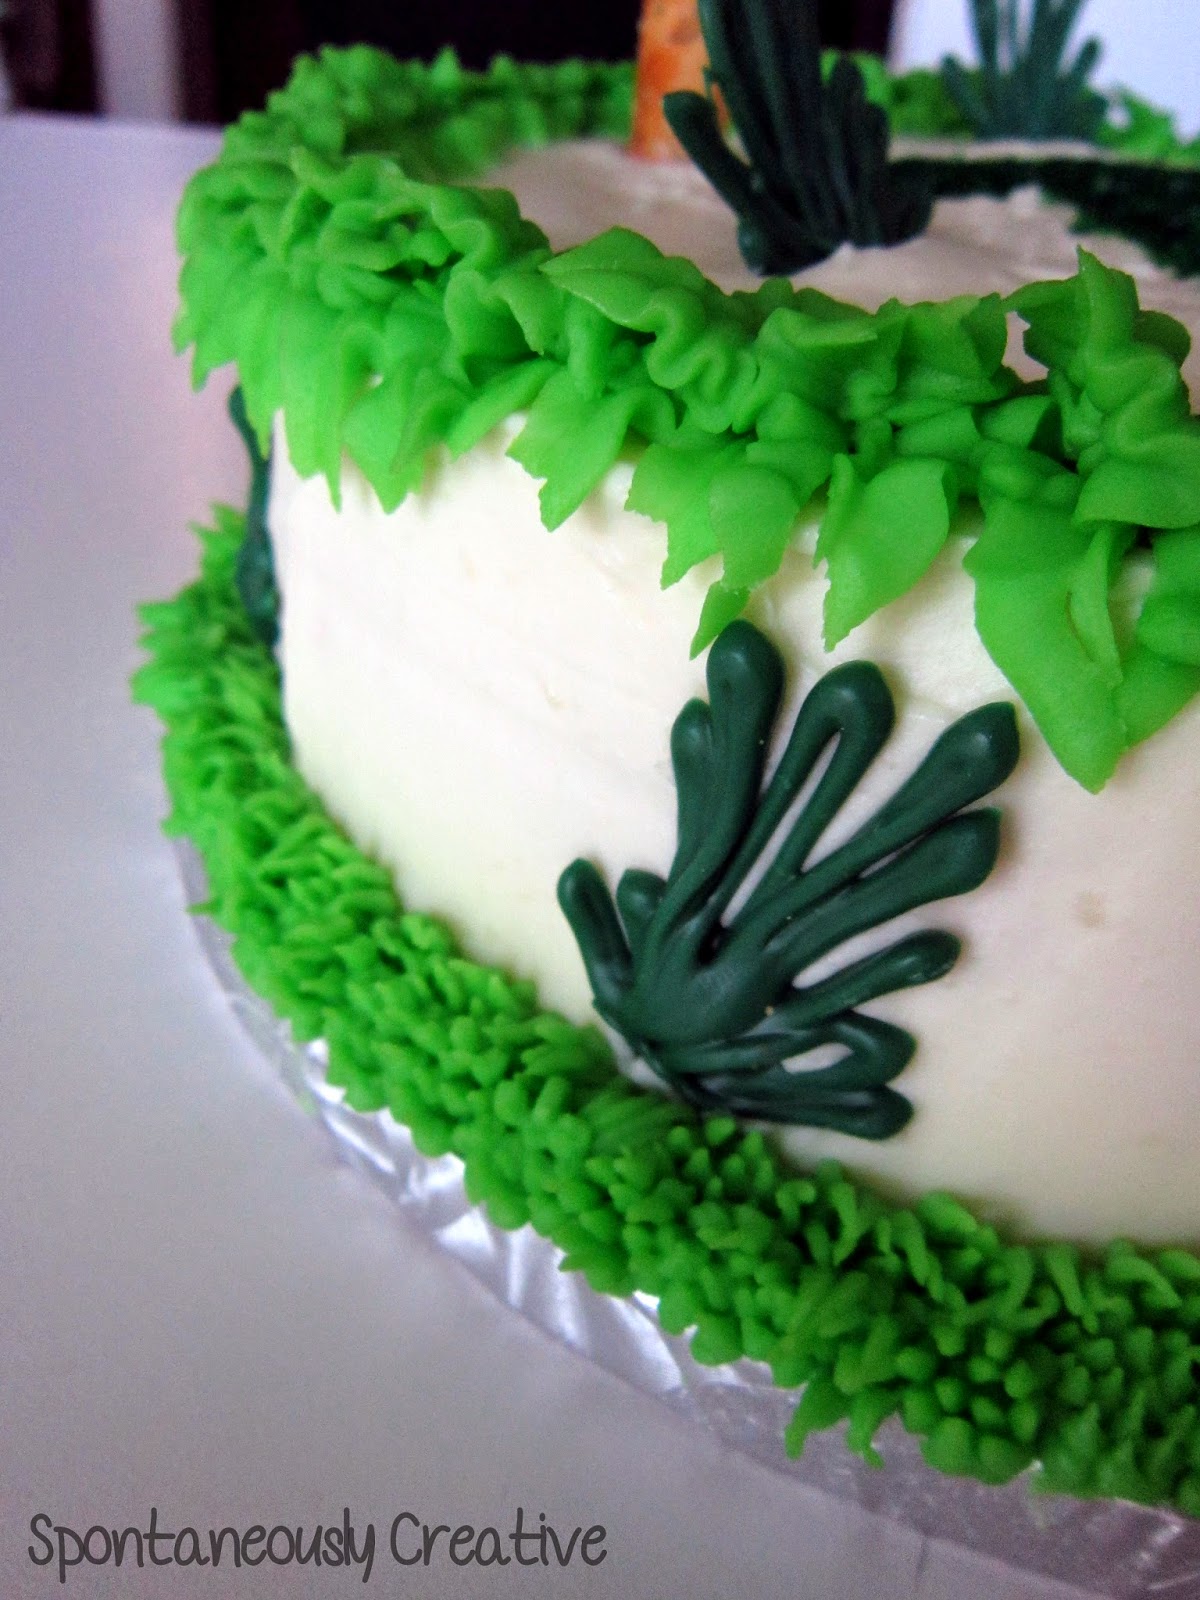
I used a #67 Wilton tip to pipe the leaves.  I started with a row of leaves with the tips of the leaves hanging over the edge of the cake and followed that up with a row of leaves with the tips pointing towards the centre of the cake.  It wasn't looking quite as full as I wanted so I added another row of leaves that stood up between the first two rows.  This gave great dimension to the garland of leaves.  The Wilton #233 tip makes perfect and realistic looking grass.  Because it is an easy shape to pipe you can fill a large space with grass in no time flat.  I started with a row of grass on the cake board right up against the base of the cake.  I continued adding grass to the cake board until the top was completely covered. Not only does this look great but it also hides the line where the cake meets the board, concealing an edge that is notoriously difficult to ice perfectly.


My favorite part of the cake is the palm trees.  I came across this photo on Pinterest and I instantly knew that I wanted to recreate the tree for Roman's smash cake.  *TIP - not only do tall items like trees or candles look great on a smash cake, but they also help keep the child's interest on the cake and give them an incentive to touch the cake!  I started by melting some green chocolate disks on the stove and spooning it into a disposable piping bag.  *TIP - using a disposable piping bag not only makes clean up easier, but because you snip your own tip you can control how much chocolate will be flowing from the piping bag.  Lay a chocolate disk down on some parchment paper and drizzle the melted chocolate over it.  Once the chocolate has hardened, squeeze a large blob onto the end of a pretzel or sesame stick.  Then attach the tree top to the stick and allow to dry.  *TIP - if your chocolate hardens in the piping bag before you can attach the top, just pop the piping mag in the microwave for a few seconds to re-melt the chocolate.  For the bushes drizzle the melted chocolate onto the parchment paper in the shape of a bush and let it harden.  Then just pop it off and stick in on the cake!

This may seem like a lot of work for a cake that will never be all that it can be, but I truly love decorating cakes, especially if they are for my little man!  Not to mention that I'll have these pictures forever and I know if the cake wasn't what I had envisioned or was too plain, it would drive me crazy every time I looked at the photos.  That being said, this picture still makes my chest tighten just a bit....

Thursday, July 10, 2014

Vanilla First Birthday Cake


I love a good cake post.  Sometimes I think I should had started this blog years ago when I have time to bake to my hearts content, then I could post about nothing but cake....and I'd be the size of a house.  Maybe it's a good thing I didn't start blogging until now....back to the birthday cake! 

Roman, the lucky devil will have two birthday cakes.  One for his cake smash and one for his actual birthday party.  I found this recipe on Wholesome Baby Food while cruising the internet for a baby friendly cake recipe.  Because Roman is going to be let loose on the cake with nothing stopping him from eating the entire thing (don't worry I'll step in if it looks like he's going to eat it all) I didn't want to make him a traditional cake.  Don't get me wrong, I see nothing wrong with a kid enjoying a piece of cake on their first birthday, but I also think they should only have a piece not the entire cake (just my opinion). 

Vanilla First Birthday Cake (makes one 9" round cake)
2 cups all purpose flour
1 cup pastry flour
1/2 cup sugar
2t baking powder
1t baking soda
1/4t salt
1 1/2 cups plain Greek yogurt
1 cup buttermilk*
4T canola oil
3t vanilla
3 egg whites

*If you don't have buttermilk you can use regular 2% or whole milk.  Just add 1T of lemon juice to 1 cup of milk and let it stand for 5 minutes.  Super easy money saving tip!

Spray cake pan with oil.  Combine dry ingredients in a small bowl and mix until well combined.  In a large bowl, whisk together all wet ingredients.  Slowly add the dry ingredients to the wet and mix until most of the lumps are gone.  Pour into pan and bake at 350° for 1 hour or until toothpick inserted into the centre comes out clean.

This recipe immediately spoke to me as it only has 1/2 cup sugar in a 9" round cake.  Not bad at all!  I also learnt that if you happen to be out of regular oil spraying spray cooking oil into a measuring spoon also works fairly well.  Granted my measurements probably weren't exact but the cake still turned out!

This cake ended up being a little too dense for Roman to be able to dig his hands into, so I would probably recommend using a lighter cake recipe for little hands to smash.  We still made it work and Roman got to chow down on a huge chunk of cake thanks to Dad!

Tuesday, July 8, 2014

Let the Cake Smashing Begin!


It's getting harder and harder to hide from the fact that my little man is growing up.  Even though the party is planned and the invites have been sent, I'm going to submerge myself in the water of denial (ha see what I did there?) until I can no longer hide from the fact that my baby boy is.....1!  Okay maybe I'm being a bit dramatic.

To kick off the birthday festivities I decided to have a cake smash photo shoot for Roman.  Obviously it's more for us and the awesome pictures than for Roman, but how can he not enjoy smashing into and eating an entire cake?  I mean, he basically does the same thing at every meal anyway. 

I didn't want to give Roman a regular cake slathered in super sugary butter cream icing to smash because I wasn't sure exactly how much was going to end up in his mouth.  The last thing I want is a baby all hopped up on sugar because I wanted some cute pictures.  Talk about a plan backfiring!  I found a recipe for a Vanilla First Birthday Cake and Whipped Cream Frosting on Wholesome Baby Food that has almost no sugar.  This way Roman can have his cake and eat it too, without keeping us awake all night!  I did however use regular butter cream icing for leaves and grass.  To see what the cake looked like pre-Roman, and how I decorated it, click here!


I'm super lucky to have a Mom who is a whiz at sewing so she was able to sew Roman's adorable diaper cover and bow tie.  I knew there was no point in putting him in actual clothes since they would get caked with icing.  Looks like my instincts were bang on...

Now obviously nobody looks forward to carrying a baby, dripping with icing and drool, through the house to the bathtub.  To be honest I was a little hesitant just to pick him up.  So we herded him over to a plastic tub that I picked up at Party City so he could splash in the water and clean himself up a bit before we took him in the house.  Plus it was another chance for some great photos!


I have to give a shout out to our amazing photographer!  Ken works with John and does photography on the side.  He was nice enough to offer to take the photos for us.  He was amazing and we love the photos we received!  Look at the smile on that baby's face!  I guess he's only technically a baby for another 23 days....  Now I'm off to enjoy these great photos and wallow over how fast this little man is growing up.

Thursday, July 3, 2014

Fillet of Fish Mornay with Vegetables

Quite a mouthful of a title I know, but I promise it's worth it!  First off, Wikipedia tells me that "mornay" is "a béchamel sauce with shredded or grated cheese added".  I will admit I had no idea what it meant until just this moment when I Googled it.  I can't be the only person that feeds my kid things when I have no idea what they are....  What I do know is that this is absolutely delicious!  Not just toddler food delicious but "I could eat an entire bowl myself" delicious.  Truth be told I finished off what Roman left in his bowl.  And begins a life of eating the kids leftovers.


When I first got the Okay from Roma's doctor to start solids I was so excited that I immediately ordered Annabel Karmel's First Meals cookbook from Chapters.  I haven't used the book much, but lately I've been in a bit of a rut with Roman's food.  He loves to feed himself but that only leaves a few options for things to give him. However, I've recently discovered that if the food is good enough he will let me feed him.  After cruising through the 9-12 month old section of the book I came across this delicious recipe.  Well actually it was the picture that got me, that's usually how I pick which recipes I'm going to make, but doesn't everyone?

Fillet of Fish Mornay with Vegetables (Makes approx. 2 cups)
1T butter
2/3 cup leeks, washed and thinly sliced
1 cup carrots, peeled and chopped
2/3 cup broccoli, cut into small florets
1/3 cup fresh/frozen peas
4oz white fish
2/3 cup milk
3 peppercorns
1 bay leaf
parsley

Sauce
1 1/2T butter
1T flour
1/3 cup grated cheddar cheese *Roman LOVES cheese so I dumped a little extra in for him

Saute leeks in butter until soft.  Add the carrots, cover with water, and cook for 10 minutes.  Add broccoli and cook for 5 minutes.  Add peas and simmer for an additional 5 minutes or until all veggies are tender.

Meanwhile, place fish in a pan and simmer in milk, peppercorns, bay leaf and parsley for 5 minutes or until the fish is cooked through.  Remove the fish and the spices from the milk.  Discard the spices and set aside the fish and milk separately.

To prepare the sauce, melt butter in a pan, stir in the flour and cook for 1 minute.  Slowly whisk in the milk the fish was cooked in.  Bring to a boil and cook until the sauce has thickened.  Remove from heat and stir in cheese until it is melted.

Drain water from the vegetables and flake in the fish.  Pour sauce over vegetables and mix until well combined.  You can blend this mixture for a younger child or leave it as is for one that is accustomed to chewing.

Roman gives this meal one arm up!  He devoured his entire bowl and then some.  I don't think a drop landed on his bib, which is honestly shocking if you've ever seen this kid eat.  This recipe makes enough for 3-4 meals for Roman so I divided what was left between two mini loaf tins and popped them in the freezer.  This way I always have a delicious lunch or supper on hand and I don't have to dirty a single pan!  Happy eating!

Tuesday, July 1, 2014

Grilled Lemon Chili Shrimp

We love seafood in our house, so when summer comes it's only a matter of time before the shrimp hit the Bar-B.  I often prepare my shrimp this way but you could swap out the herbs and chili for any spices you may have in your spice rack.  Sometimes the most delicious spice combinations are discovered when you just start dumping things on! 

 
This is a light meal that just oozes summer.  To keep with the light feeling I decided to pair the shrimp with Grilled Vegetables and Fried Couscous.  This meal is super easy to prepare since the couscous just needs to be reheated and the veggies can be prepared ahead of time.  Citrus juice cooks shrimp so you would not want to let the shrimp sit overnight in the lemon juice because it would likely be cooked before it hit the grill, unless that is you want ceviche in which case soak away!

Grilled Lemon Chili Shrimp
1 lb raw shrimp, peeled and de-veined
1 lemon, juiced
3T oil *Use whatever kind you like.  I used melted coconut oil and it worked well*
2T chili powder
2T parsley

Mix together lemon juice, oil and parsley.  Toss shrimp in the lemon mixture until well coated.  Arrange shrimp on wood or metal skewers *TIP - if using wood skewers, soak them in water first to prevent burning.  Sprinkle chili powder over shrimp.  Grill shrimp until they are pink (time will vary depending on grill temperature).  You can also brush any of the excess lemon mixture on the shrimp as they grill to add more flavour.