I thought this was quite fitting to post this amongst the Christmas cookies recipes. It's been a couple months since I posted about the beginning of my weight loss journey so I thought I would give you an update of what I've been eating and doing, and how that has affected my weight loss.
October and November are always crazy months in our house. John works for a tire company and work gets extremely busy during these months with people switching over to winter tires. This means that he usually isn't home until 7:30/8pm which affects my weight loss in a couple ways. First off I haven't been able to make it to DanceFit every Monday night. Heavens knows John tries his best to get home in time for me to go, but it doesn't always work out. The other problem is that I am a social eater. Which means when John comes home at 7:30 and sits down for his supper, I often find myself suddenly sitting at the table talking about our days and stuffing something into my mouth, even though I just ate an hour before. Lack of dancing combined with my social eating was starting to cause some problems. So I quickly learnt to seclude myself in the living room, where I can still see John and we can talk, but I no longer feel the urge to stuff my face. Small win!
Speaking of DanceFit, I am in love with this class! It is something that I look forward to all week! I no longer feel like I'm going to die after the first 10 minutes! That happens around the 20 minute mark now haha. There is something so satisfying about sweat burning your eyes mid workout and being a little shaky going down the stairs afterwards. This session of DanceFit is over and we have a few weeks break before it starts up again, but I will most definitely be going back. I recently signed up for a free demo fitness class at another gym in town. It's a combination of Insanity and PiYo (Pilates/Yoga). The class is in a week and I'm already a little concerned that I'm going to die half way through. If you haven't heard of Insanity search it out on YouTube and you will see why I'm a little nervous. I must have been having a really good day on the day I signed up because I clearly thought my abilities were way above what the actually are. If my blog posts suddenly stop you'll know that the class killed me.
Food has been a fickle beast for me lately. I'm not really on a schedule for my meals and snacks anymore. I've gotten to the point that I consume most of my calories at my meals and found I was overdoing it with my snacks. If I divide up my calories between my meals I don't feel I need I snack in between. That being said I am a boredom eater, and if I am just sitting around with nothing to do I will demolish a handful of sugar cookies or a few slices of puffed wheat cake. I've learnt that in order to keep my snacking under control I have to keep myself busy. Which, as most of you know, isn't very hard to do.
My go to breakfast as of late has been 1/3 cup quick oats with 1-1.5 T of dark brown sugar and 3/4 cup of whole milk (because that's all we have in our house these days). I like using dark brown sugar because it has more molasses in it and has a stronger taste. This means I can use less and still get that delicious brown sugar flavor that I love. Does anyone else like to eat straight brown sugar or is it just me? Again, I wonder why I'm overweight haha.
One of the hardest changes for me to make was to stop drinking my calories. I LOVE milk, always have always will. It's only been recently that I've actually forced myself to drink water when I'm thirsty rather than milk or orange juice. Tea has actually been a great help in ditching the milk. I'm not a huge fan of water because it has no flavor so I have really enjoyed cold steeping fruit teas. I started out by adding a 1/4 cup of agave syrup to a pitcher of tea and slowly reduced the amount of sugar. Now the sugar free tea tastes delicious to me, and it doesn't have any calories but it tastes like juice!
These two months haven't been without their struggles, such is life with weight loss. I'd fallen off the rails a bit before and still managed to loose weight so I guess I got cocky. With Christmas coming up there has been more baking sitting around and ending up in my mouth. I would be sitting on the couch while Roman napped and 4 sugar cookies would jump right into my mouth. Honest! They climbed out of the container, ran across the kitchen and living room avoiding both dogs, scrambled up the couch and flung themselves into my mouth mid yawn. Don't you hate when food force feeds itself to you? I know I can't be alone on this one! Oh look, here comes one now!! In all seriousness there aren't enough DanceFit classes in the world to save me from the amount of baking that I can ingest over the holiday season, so it's up to me to be accountable and learn to keep my paws out of the treats!
When all is said and done I've now lost a total of 30 pounds! I think that most people hope for a speedy weight loss but I'm quite happy with my average of one pound per week. This is much easier to maintain and there is a lot less disappointment on the scale if every week is the same. There is nothing more discouraging than loosing 3 pounds one week and one pound the next when you were expecting another 3.
For the first time in years I had to buy clothes because the ones I owned were too big! Actually I don't ever remember having to buy clothes in a smaller size. Also a first is that I was able to fit into a large Old Navy shirt and actually find pants there that fit me! I even bought skinny jeans, which I swore I would never EVER wear, and now they are my favorite pair of jeans.
If you are joining me on this journey I hope that you are reaching your goals! Don't be discouraged by the tough days. If your eating falls off the wagon, embrace it, have one more cookie, and start the next day fresh. Don't dwell on the small stumble just focus on the big picture and try again tomorrow!
Tuesday, December 30, 2014
Thursday, December 25, 2014
Italian Meatball Cookies
I promise this will be the last cookie recipe for the year! I came across this recipe on Allrecipes.com when I was searching for recipes for John and I's first Christmas together. Now the idea of a meatball cookie might not initially seem like a great idea, but the name comes from the way the cookie looks and now from what is it made of.
This cookie has everything you would want in a holiday cookie! Cloves, allspice, cinnamon and nutmeg spice this cookie perfectly and make it sing with the flavors of the holidays. The cocoa and glaze gives this cookie the perfect amount of chocolatelyness, and the walnuts give it just the right amount of crunch. I might be crazy, but to me that sounds like a whole barrel full of Christmas!

Italian Meatball Cookies (Makes 30 cookies)
1/2 cup butter
1 1/2 cups sugar
3 eggs
2t vanilla
3 cups flour
2/3 cup cocoa powder
1 1/2t baking powder
1 1/2t baking soda
1t salt
1t cloves*
1t allspice
1t cinnamon
1/2t nutmeg
1 cup chopped walnuts
Glaze
2 cups icing sugar
1/3 cup cocoa powder
1/4 cup milk
* If you don't have cloves, like I never seem do, you can omit this and the cookies will still be delicious!
Preheat oven to 350° and line cookie sheets with parchment paper. Cream together butter and sugar. Add eggs and vanilla and mix well. In a separate bowl stir together flour, cocoa, baking powder, baking soda, salt and spices. Add the flour mixture to the butter mixture, mixing until the flour is completely combined. Stir in the chopped walnuts by hand.
Form dough into 1 inch balls and place on parchment lined baking sheets. Bake at 350° for 10 minutes. Cookies should be fairly firm but still have some give to them. Do not over bake them. Transfer cookies to a cooling rack and allow to cool slightly before glazing them.

Whisk together icing sugar, cocoa powder and milk until smoother. Dip the top of the cookies into the glaze and place on the cooled parchment lined baking sheets to set. If the glaze in the bowl begins to set up before you are done the cookies, whisk in a little more milk to soften it.

This cookie has everything you would want in a holiday cookie! Cloves, allspice, cinnamon and nutmeg spice this cookie perfectly and make it sing with the flavors of the holidays. The cocoa and glaze gives this cookie the perfect amount of chocolatelyness, and the walnuts give it just the right amount of crunch. I might be crazy, but to me that sounds like a whole barrel full of Christmas!
Italian Meatball Cookies (Makes 30 cookies)
1/2 cup butter
1 1/2 cups sugar
3 eggs
2t vanilla
3 cups flour
2/3 cup cocoa powder
1 1/2t baking powder
1 1/2t baking soda
1t salt
1t cloves*
1t allspice
1t cinnamon
1/2t nutmeg
1 cup chopped walnuts
Glaze
2 cups icing sugar
1/3 cup cocoa powder
1/4 cup milk
* If you don't have cloves, like I never seem do, you can omit this and the cookies will still be delicious!
Preheat oven to 350° and line cookie sheets with parchment paper. Cream together butter and sugar. Add eggs and vanilla and mix well. In a separate bowl stir together flour, cocoa, baking powder, baking soda, salt and spices. Add the flour mixture to the butter mixture, mixing until the flour is completely combined. Stir in the chopped walnuts by hand.
Form dough into 1 inch balls and place on parchment lined baking sheets. Bake at 350° for 10 minutes. Cookies should be fairly firm but still have some give to them. Do not over bake them. Transfer cookies to a cooling rack and allow to cool slightly before glazing them.
Whisk together icing sugar, cocoa powder and milk until smoother. Dip the top of the cookies into the glaze and place on the cooled parchment lined baking sheets to set. If the glaze in the bowl begins to set up before you are done the cookies, whisk in a little more milk to soften it.
These cookies freeze extremely well so get them in there fast or I will not be held accountable for what happens if you don't!
Tuesday, December 23, 2014
Hamantashen
If I was only allowed to make one treat at Christmas time, this would be it! Hamantashen are a Jewish filled cookie that will change your life! They will brighten your outlook on life and bring peace and harmony to the world around you. At least they do for me! If sugar cookies and tarts had a baby this would be the delicious result!
I love to buy my baking supplies at Bulk Barn because I can buy the exact amount I need. This is especially true when it comes to pie filling! I usually like to have a few different fillings in my hamantashen and buying my pie filling at Bulk Barn allows me to get several different flavor without having to throw a bunch out.

Hamantashen
1 1/2 cups butter, softened
1 cup sugar
2 eggs
6T orange juice*
1T vanilla
2t baking powder
4 1/2 cups flour
12 oz can pie filling (I used cherry & strawberry rhubarb)
*If you don't have orange juice on hand you can just use water and I promise they will taste just as amazing!
Cream butter and sugar until smooth then beat in eggs one at a time. Stir in orange juice and vanilla. In a separate bowl mix together flour and baking powder. Slowly add the dry ingredients to the wet mixing well between additions. Cover and refrigerate for at least 2 hours, or overnight.
Allow the dough to warm slightly before rolling. I like to cut the ball into 1/4s just to make it a little easier to manage. Roll dough out to a 1/4 inch thickness and cut into 3 inch circles using a cookie cutter or a drinking glass, which is what I use. If you feel your rounds are a little on the thick side you can squish them out a bit just before you fill them. Spoon 1t of filling into the centre of each round and pinch the sides to form a triangle. Place on a parchment lined baking sheet and bake for 8-10 minutes at 375°. The cookies can also be frozen on the sheets before baking to help them retain their shape while baking.

I probably should have followed the steps more carefully since most of my cookies flattened out. This was likely a combination of soft dough and my need to jam as much filling in to the centre as possible. These cookies freeze extremely well, I just recommend freezing them on a baking sheet first and layering them in a freezer container separating them with parchment paper so they don't stick together.
Of course I can't make cookies without my quality control supervisor. Luckily he got bored before the pie filling came out so I didn't have to wrestle it away from him. A couple pieces of cookie dough and he was satisfied.

If you run out of pie filling might I suggest filling the cookies with Nutella! I ran into this problem last year and John fell in love with the Nutella version! I hope you enjoy a recipe that I love so much, and I apologise in advance for the 5lbs you will gain after eating the entire batch yourself!
Originally posted on Allrecipes.com
I love to buy my baking supplies at Bulk Barn because I can buy the exact amount I need. This is especially true when it comes to pie filling! I usually like to have a few different fillings in my hamantashen and buying my pie filling at Bulk Barn allows me to get several different flavor without having to throw a bunch out.
Hamantashen
1 1/2 cups butter, softened
1 cup sugar
2 eggs
6T orange juice*
1T vanilla
2t baking powder
4 1/2 cups flour
12 oz can pie filling (I used cherry & strawberry rhubarb)
*If you don't have orange juice on hand you can just use water and I promise they will taste just as amazing!
Cream butter and sugar until smooth then beat in eggs one at a time. Stir in orange juice and vanilla. In a separate bowl mix together flour and baking powder. Slowly add the dry ingredients to the wet mixing well between additions. Cover and refrigerate for at least 2 hours, or overnight.
Allow the dough to warm slightly before rolling. I like to cut the ball into 1/4s just to make it a little easier to manage. Roll dough out to a 1/4 inch thickness and cut into 3 inch circles using a cookie cutter or a drinking glass, which is what I use. If you feel your rounds are a little on the thick side you can squish them out a bit just before you fill them. Spoon 1t of filling into the centre of each round and pinch the sides to form a triangle. Place on a parchment lined baking sheet and bake for 8-10 minutes at 375°. The cookies can also be frozen on the sheets before baking to help them retain their shape while baking.
I probably should have followed the steps more carefully since most of my cookies flattened out. This was likely a combination of soft dough and my need to jam as much filling in to the centre as possible. These cookies freeze extremely well, I just recommend freezing them on a baking sheet first and layering them in a freezer container separating them with parchment paper so they don't stick together.
Of course I can't make cookies without my quality control supervisor. Luckily he got bored before the pie filling came out so I didn't have to wrestle it away from him. A couple pieces of cookie dough and he was satisfied.
If you run out of pie filling might I suggest filling the cookies with Nutella! I ran into this problem last year and John fell in love with the Nutella version! I hope you enjoy a recipe that I love so much, and I apologise in advance for the 5lbs you will gain after eating the entire batch yourself!
Originally posted on Allrecipes.com
Thursday, December 18, 2014
Puffed Wheat & Rice Krispie Cake
It's a two for one blog post! For me puffed wheat cake and Rice Krispie cake go together like peanut butter & jam (or peanut butter and eggs as Selby just texted me), I can't imagine one without the other. When I was little Mom always made these two delicious treats at the same time and always around Christmas time. Granted there isn't anything particularly Christmasy about puffed wheat or Rice Krispies (unless you get the Christmas box), but sometimes it's all about the tradition!

Puffed Wheat Cake
1/4 cup melted butter
1/2 cup corn syrup
1t vanilla
1 cup brown sugar
3T cocoa powder
10 cups puffed wheat
Measure the puffed wheat into a large bowl and butter a 9x13" pan. Combine all ingredients except puffed wheat in a pot and bring to a boil over medium high heat stirring constantly. You don't want to boil it too long or your cake will be extremely hard once it sets. Once the surface of the liquid starts to look bubbly like an Aero bar, remove it from the heat and pour it over the puffed wheat. Stir the puffed wheat until it is completely covered with the chocolate mixture. Pour the puffed wheat into the buttered 9x13" pan, pressing it down with a spatula. Allow to cool, slice, and enjoy!
Rice Krispie Cake
1/2 cup butter
6 cups mini marshmallows
1t vanilla
10-11 cups Rice Krispies
Butter a 9x13" pan. Melt butter in a large pot. Add marshmallows and cook, stirring constantly, until marshmallows are almost completely melted. If you over cook the mixture it will set up hard as a rock, so remove it from the heat when there are a few lumps left and stir in vanilla. Pour in Rice Krispies and stir until they are completely covered with the marshmallow mixture. Press Rice Krispies into the buttered 9x13" pan and allow to cool (if you can wait that long). Slice once cooled.
Unfortunately, or fortunately depending on how you look at it, my cakes didn't last very long. Most of the Rice Krispie cake was done before I even had it sliced. Although the puffed wheat cake managed to get cut into squares, I didn't get it into the freezer fast enough and I ended up eating most of it in the first few days. I realize this stuff is meant to be eaten but maybe not all in a week.....by a single person.....
Tuesday, December 16, 2014
Banana Cake Cookies
When fall descended upon us I had the urge to bake some delicious pumpkin recipes. I wanted something other than muffins and pies so I came across this recipe on Pinterest from Crème de la Crumb for a pumpkin sugar cookie. By the time I got around to making the cookies I didn't have any fresh pureed pumpkin left and I didn't really want to buy any just to make these cookies. I started racking my brain trying to come up with something I could sub in. I finally settled on bananas, since heaven knows I have a few dozen in my freezer, but I needed to make some tweaks to make the original recipe work. This is what I came up with!

Banana Cake Cookies
1 cup butter, softened
2 ripe bananas, mashed
1 cup sugar
2/3 cup icing sugar
1t vanilla
2 eggs
4 cups flour
1t baking powder
1/2t salt
1t cinnamon
Preheat oven to 350°. In a mixer combine butter, bananas, sugar, icing sugar, vanilla and eggs until smooth. In a separate bowl stir together flour, baking powder, salt and cinnamon. Gradually add the dry ingredients to the wet until well combined. Dough will be fairly sticky. Roll dough, or scoop with an ice cream scoop, into 2 inch balls and place them on a parchment lined baking sheet. Bake for 10-12 minutes at 350° until the cookies are domed and start to look dry.
I am in love with these cookies, we all really enjoyed the cookies actually! The puffiness of these cookies was actually an accident since I didn't have the cream of tartar the original recipes calls for, but I actually like the way it changes the cookie. These cookies stayed incredibly soft even after a couple weeks on the counter in a freezer bag!
This was the first time I had Roman help me bake and it actually went better than I expected! He added the bananas like a pro (after taking a few bites of course) and was really good at measuring out ingredients.

If a kid is going to learn anything about making cookies it's that you have to try the batter. Yes I'm aware you shouldn't eat raw eggs, but I have done it since I was little and I survived so I'm sure he will too (he did by the way!).

On a serious note, I highly recommend designating a safe zone for the little ones for when the oven is open. I was a little surprised when Roman actually stayed were I told him to, but he has kept it up consistently since!

Roman flaked out on me once the cookies were in the oven, other than the odd peek in to check on them, but he suddenly appeared out of nowhere like a cookie vampire once the cookies were out of the oven!

Banana Cake Cookies
1 cup butter, softened
2 ripe bananas, mashed
1 cup sugar
2/3 cup icing sugar
1t vanilla
2 eggs
4 cups flour
1t baking powder
1/2t salt
1t cinnamon
Preheat oven to 350°. In a mixer combine butter, bananas, sugar, icing sugar, vanilla and eggs until smooth. In a separate bowl stir together flour, baking powder, salt and cinnamon. Gradually add the dry ingredients to the wet until well combined. Dough will be fairly sticky. Roll dough, or scoop with an ice cream scoop, into 2 inch balls and place them on a parchment lined baking sheet. Bake for 10-12 minutes at 350° until the cookies are domed and start to look dry.
I am in love with these cookies, we all really enjoyed the cookies actually! The puffiness of these cookies was actually an accident since I didn't have the cream of tartar the original recipes calls for, but I actually like the way it changes the cookie. These cookies stayed incredibly soft even after a couple weeks on the counter in a freezer bag!
This was the first time I had Roman help me bake and it actually went better than I expected! He added the bananas like a pro (after taking a few bites of course) and was really good at measuring out ingredients.
If a kid is going to learn anything about making cookies it's that you have to try the batter. Yes I'm aware you shouldn't eat raw eggs, but I have done it since I was little and I survived so I'm sure he will too (he did by the way!).
On a serious note, I highly recommend designating a safe zone for the little ones for when the oven is open. I was a little surprised when Roman actually stayed were I told him to, but he has kept it up consistently since!
Roman flaked out on me once the cookies were in the oven, other than the odd peek in to check on them, but he suddenly appeared out of nowhere like a cookie vampire once the cookies were out of the oven!
Thursday, December 11, 2014
Spiral Cookies
When I was a kid Christmas was the one time of the year that my Mom made sugar cookies. I loved slathering them in icing and sprinkling them with sprinkles and colored sugar. The only thing better than decorating the cookies was eating the cookies. These days I try to keep my cookies to a minimum (just because I try doesn't mean I succeed), but at Christmas time all bets are off and I become a cookie baking machine.
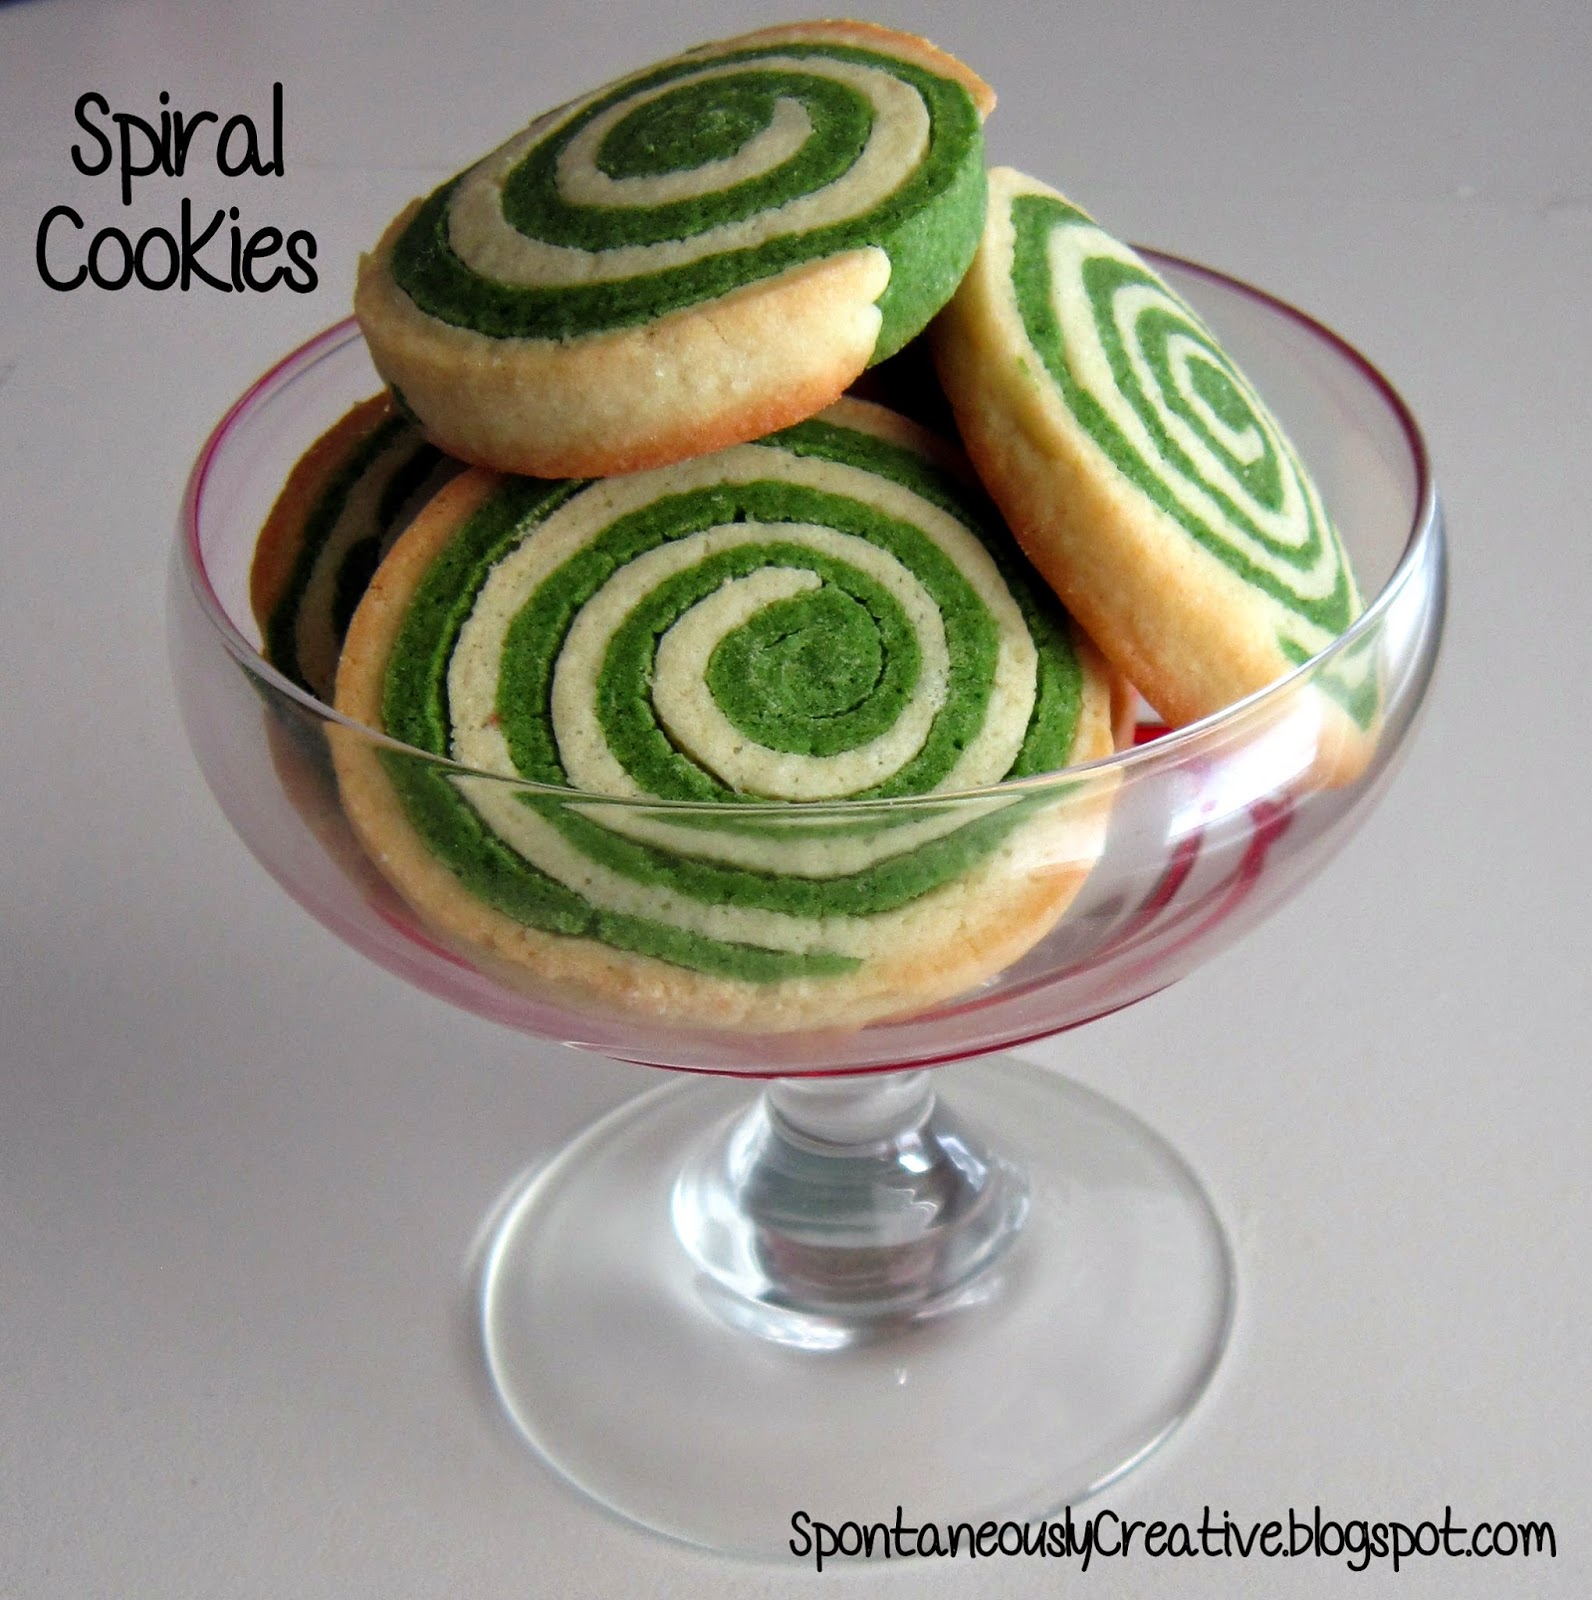
I came across this recipe on AllRecipes.com a few years back and it is now the only sugar cookie recipe I use. This recipe gives you a delicious, moist sugar cookie that holds it's shape amazingly well. This time I've used them to make a sliced cookie but this dough also work extremely well for cookie cutter cookies!
Spiral Cookies (Makes approx. 2 dozen)
1 1/2 cups butter, softened
2 cups sugar
4 eggs
1t vanilla
5 cups flour
2t baking powder
1t salt
Cream together butter and sugar. Add eggs one at a time mixing well after each addition. Stir in vanilla. In a separate bowl mix together flour, baking powder and salt. Slowly add flour mixture to wet ingredients one cup at a time, being sure to scrape down the bowl half way through.
Divide the dough in half and wrap one half in plastic wrap. Add some green (or any other color) gel coloring to the other half of the dough and knead until the coloring is evenly distributed throughout the dough. Wrap the colored dough in plastic wrap and refrigerate all dough for at least one hour.
Remove dough from the fridge and allow to warm up slightly. On a lightly floured surface, roll out the colored dough 1/4" thick in a square-ish shape. Carefully set the dough aside and roll out the other half of the dough in the same way. Layer the colored dough on top of the uncolored dough and gently roll over the dough to squish them together.

Starting at the edge closest to you, roll the dough into a log as tightly as possible. If the dough isn't super tight, no worries, the spaces will fill in during baking. Cut the log in half and wrap them in plastic wrap. Refrigerate the logs for about an hour. This will prevent the cookies from squishing when you slice them.

Unwrap the logs and slice them into 1" thick cookies. If you want to jazz them up a but you can roll the cookies in crushed candy canes or sprinkles. Lay the cookies on a parchment lined baking sheet and bake at 400° for 8 minutes or until they start to lightly brown.

When I was little Selby and I had a friend sleep over at our house and his Mom sent cookies with him. The cookies were similar to these only they were square. Ever since that day I have thought about those cookies, and 20 years is a long time! I seem to remember the colored dough tasting different but I think that was just my little mind playing tricks on me. I still think that colored dough tastes different (even though it doesn't) but I think it might actually just be the magic of Christmas!
I came across this recipe on AllRecipes.com a few years back and it is now the only sugar cookie recipe I use. This recipe gives you a delicious, moist sugar cookie that holds it's shape amazingly well. This time I've used them to make a sliced cookie but this dough also work extremely well for cookie cutter cookies!
Spiral Cookies (Makes approx. 2 dozen)
1 1/2 cups butter, softened
2 cups sugar
4 eggs
1t vanilla
5 cups flour
2t baking powder
1t salt
Cream together butter and sugar. Add eggs one at a time mixing well after each addition. Stir in vanilla. In a separate bowl mix together flour, baking powder and salt. Slowly add flour mixture to wet ingredients one cup at a time, being sure to scrape down the bowl half way through.
Divide the dough in half and wrap one half in plastic wrap. Add some green (or any other color) gel coloring to the other half of the dough and knead until the coloring is evenly distributed throughout the dough. Wrap the colored dough in plastic wrap and refrigerate all dough for at least one hour.
Remove dough from the fridge and allow to warm up slightly. On a lightly floured surface, roll out the colored dough 1/4" thick in a square-ish shape. Carefully set the dough aside and roll out the other half of the dough in the same way. Layer the colored dough on top of the uncolored dough and gently roll over the dough to squish them together.
Starting at the edge closest to you, roll the dough into a log as tightly as possible. If the dough isn't super tight, no worries, the spaces will fill in during baking. Cut the log in half and wrap them in plastic wrap. Refrigerate the logs for about an hour. This will prevent the cookies from squishing when you slice them.
Unwrap the logs and slice them into 1" thick cookies. If you want to jazz them up a but you can roll the cookies in crushed candy canes or sprinkles. Lay the cookies on a parchment lined baking sheet and bake at 400° for 8 minutes or until they start to lightly brown.
When I was little Selby and I had a friend sleep over at our house and his Mom sent cookies with him. The cookies were similar to these only they were square. Ever since that day I have thought about those cookies, and 20 years is a long time! I seem to remember the colored dough tasting different but I think that was just my little mind playing tricks on me. I still think that colored dough tastes different (even though it doesn't) but I think it might actually just be the magic of Christmas!
Tuesday, December 9, 2014
Christmas Decorations 2014
John and I love Christmas and we love to decorate! We put our decorations up right after Remembrance Day and they usually stay up until the middle of January, after Ukrainian Christmas. Since it is the season of sharing I thought I'd take you for a tour of our decorations, along with the stories that go with them!

Let's start with my favorite, and probably the most important decoration, the tree! I prefer an artificial tree because you can use it year after year and it doesn't shed needles. Plus with 2 dogs, a cat and a toddler, I think a real tree might put me over the edge. We picked up this amazing 9 foot, pre-lit tree from Superstore last year during their boxing week sale. Would you believe we got this tree for only $14!! If you are in the market for a tree I highly recommend looking later on in the boxing week sales, and checking out stores like Superstore that don't have to space to store the trees for the rest of the year.

At first I wasn't sold on the pre-lit tree, but now that we have one I love it. This is the first year that divorce papers didn't need to be drawn up before we got the lights on the tree! I also love that the lights are strung throughout the tree and not just on the edge of the branches. I do kinda miss having multicolored lights but I guess you can't have everything.
I love having an eclectic mix of ornaments on a tree. I've never been the kind of person that had a color scheme for the tree that the ornaments had to match. Growing up Mom had all kinds of ornaments including ones that Selby and I had made. Those are the ornaments that I think make a tree unique to the family and interesting. A few of those ornaments have now made their way onto our tree. Everyone has a "Baby's First" ornament, and I'm surprised mine hasn't disintegrated by now as old as it is. The gold ornament was a gift from an aunt and Selby has one very similar to it.

Roman's "Baby's First" ornament I picked up from a craft sale in town for his first Christmas. I also made hand and foot impressions that year in salt dough. It's a little crazy now to compare his hands and feet to these ornaments. How did he get so big so fast?! I'm sure it will just be a matter of time before our tree is full of paper snowflakes (like Grandma's) and marshmallow balls (like Mom's) and I really can't wait for that day!

Even the pets have made the tree! I ordered these ornaments from Etsy over the years as our little fur family has grown. When I ordered the ornament with Casper on it (our late puppy) I ordered one for each member of our family so we would all have Casper on our tree. Casper was an amazing dog and he definitely deserves the honor of being placed on the tree. Actually, Mom has two Casper ornaments! Unfortunately the lady no longer makes the ornaments or I would have her make one of Roman. I might have to send her a message and see if I can convince her!

Last year during the boxing week sales, Mom and I hit up a couple stores to find some good deals and I came home with a few things. I don't normally shop at Pier1 because it can be very expensive, but boxing week is the perfect time to go! I found a handful of beautiful ornaments for a fraction of the cost. When I find unique items I like to pick up just one to give the tree some interest. *TIP - when buying ornaments for a tree you want to buy 1 or in groups of 3. This will give your tree a nice balance.

I came across these adorable clip on birds at Michael's during that same shopping trip last year. My Mom made ornaments years and years ago from clothes pins and tiny bears and these birds reminded me of them. The other day I came across these beautiful pine cones at Superstore when they were setting out the decorations so I just had to pick up three of them. The rest of the ornaments were from a $25 bundle pack from Costco to help fill in the bare spots since we recently cleared out some of the more tattered/ugly ornaments that made their way onto our tree.

Onto the entertainment centre! On the very top I have the beginning of what I hope will be a forest some day. For now if consists of a few foam trees that I made this year and a silver tree I picked up on sale at Canadian Tire years ago. This thing loses so much litter every year that I'm actually surprised there is any left on it. I also have my little light up reindeer and penguin on the top shelf. These guys are from an Avon catalogue years ago, and the only work sporadically, but they are cute none the less!

Now the nut family is actually out all year long but it does remind me of Christmas. When Selby and I were younger we would play a game at our grandparent's house called hide the thimble. Basically one of us would hide a thimble in the house and the other would have to find it. You might think this would be an impossible game but it was actually extremely easy. Why? Because we ALWAYS hid the thimble on the walnut's hat! We played this game all year round but something about my grandparent's makes me think of Christmas.

These three amigos used to live on the air conditioning unit in our apartment and would often get their butts frozen to the unit. I bet they think they are flying high now! The sparkle balls I made last year when I had all the time in the world because Roman napped three times a day and couldn't crawl. Man those were the days!

Funny story about these angels. I actually bought these angels two years apart at a craft sale in Regina. I must have really liked the angel because I bought the same one twice. What are the chances of that? I wish I could remember the name of the booth at the sale to share with you because they always had amazing things there. I actually picked up this moose there as well.

The elf and moose standing beside the TV were part of a boxing week bundle that we picked up at Canadian Tire years ago when John was working there. Most or the bundle was ugly (that's where most of the ornaments that got tossed came from) but these two were worth the cost of the bundles. We used to stand them up next to the Christmas tree but that just isn't going to work anymore with Roman running around. Luckily he hasn't touched them once yet!

Lastly we have Pingoo and his Associates. I'm pretty sure John is the one who named these bad boys that we found at Sears, if I remember correctly. They light up and change colors but like most things in this house the batteries are dead and I never remember to buy more. You would think with so many toys that take batteries we would have some somewhere. Maybe I should ask for some for Christmas...

Hanging over each of our front windows is a giant piece of candy. This was another project I completed last year while Roman was immobile. They are super easy and inexpensive to make and I think they look great. I bought a disk of Styrofoam and traced the pattern on a candy piece onto the disk. Then I painted it, wrapped it in cellophane, twisted the ends and tied it up with some ribbon. Viola, instant giant candies! You could even make smaller versions for your tree! We also have window clings on the front windows but they are a little hard to take photos of so you'll just have to trust me on that one.

The last of the indoor decorations are in the hallway. Here I decided to flank our Christmas card holder with Roman's snowflake paintings. The card holder was another project from last year (man alive I got a lot accomplished last year!) and it was super easy. I found the board with Santa on it at Dollarama. I painted it and hot glued three strips of ribbon onto the back. At Michael's I fond some mini clothes pins that I use to pin the cards to the ribbon.

Out into the cold we go to check out the outdoor decorations! Our display is significantly large than it was last year but we are nowhere near done growing. We want to be the Griswolds of Moose Jaw! John and I picked up the bow on the gate from Canadian Tire to hang from our balcony when we lived in our apartment. We didn't really have a great place for it here so the gate is where it got stuck. The tree silhouette was a boxing week find at Wal Mart last year. It has a stand that allows it to sit anywhere but John didn't think it would stand up to our crazy Saskatchewan winds so we wired it to the fence to make sure we weren't retrieving it out of the neighbors yard every other day.

I actually found these cute little devils at a garage sale! The snowman had never been taken out of the box and the penguin was only used inside. At $5 for the pair, how do you go wrong? The only downside is that because they are on the smaller side they tend to get stuck in the snow when the wind packs it on top of them. Not a big deal though. I just wanted out there and dig him out. Roman usually gets a kick out of it. We had the carousel last year and I was excited to see it again this year. Unfortunately it stopped working half way through the winter last year. I'm sure there is some way to fix it, I just haven't put that much effort into it yet.

You are seeing clearly. We have a Christmas tree in our front yard! This is actually the tree we used to have in our house, and the tree my Mom had for years before that. This time we strung it with outdoor lights and zip tied the lights and ornaments to the tree. John roped it down on two sides and it doesn't move an inch in the wind. A house down the street from us had a tree in their yard last year so I can't take the credit for this idea. What a great way to re-purpose an old tree!

I purchased the white wreath at a wholesale craft store last year and used twist ties to attach the ornaments and bow to it. This year the bow broke, it was from Dollarama and I'm impressed it lasted one winter, so John just zip tied it on while he was hanging it. The candy canes also came from the wholesale crafts store. To stick them into the ground, John ground down some 12" spikes, heated them in the oven, and stuck them into the bottom of the candy canes. Once the spikes were in the candy canes he just pushed them into the ground. Not only do they tie the driveway into the rest of the yard but they make navigating the driveway in deep snow a piece of cake!

So that's the tour! I hope you enjoyed seeing our Christmas decorations and maybe it will inspire your own display! This is the time of year to spread kindness and cheer and restore our faith in humanity (at least it is for me). John, Roman and myself would like to wish everyone a Merry Christmas, Happy Hanukkah, Happy Kwanzaa, Happy whatever you celebrate!
Let's start with my favorite, and probably the most important decoration, the tree! I prefer an artificial tree because you can use it year after year and it doesn't shed needles. Plus with 2 dogs, a cat and a toddler, I think a real tree might put me over the edge. We picked up this amazing 9 foot, pre-lit tree from Superstore last year during their boxing week sale. Would you believe we got this tree for only $14!! If you are in the market for a tree I highly recommend looking later on in the boxing week sales, and checking out stores like Superstore that don't have to space to store the trees for the rest of the year.
At first I wasn't sold on the pre-lit tree, but now that we have one I love it. This is the first year that divorce papers didn't need to be drawn up before we got the lights on the tree! I also love that the lights are strung throughout the tree and not just on the edge of the branches. I do kinda miss having multicolored lights but I guess you can't have everything.
I love having an eclectic mix of ornaments on a tree. I've never been the kind of person that had a color scheme for the tree that the ornaments had to match. Growing up Mom had all kinds of ornaments including ones that Selby and I had made. Those are the ornaments that I think make a tree unique to the family and interesting. A few of those ornaments have now made their way onto our tree. Everyone has a "Baby's First" ornament, and I'm surprised mine hasn't disintegrated by now as old as it is. The gold ornament was a gift from an aunt and Selby has one very similar to it.
Roman's "Baby's First" ornament I picked up from a craft sale in town for his first Christmas. I also made hand and foot impressions that year in salt dough. It's a little crazy now to compare his hands and feet to these ornaments. How did he get so big so fast?! I'm sure it will just be a matter of time before our tree is full of paper snowflakes (like Grandma's) and marshmallow balls (like Mom's) and I really can't wait for that day!
Even the pets have made the tree! I ordered these ornaments from Etsy over the years as our little fur family has grown. When I ordered the ornament with Casper on it (our late puppy) I ordered one for each member of our family so we would all have Casper on our tree. Casper was an amazing dog and he definitely deserves the honor of being placed on the tree. Actually, Mom has two Casper ornaments! Unfortunately the lady no longer makes the ornaments or I would have her make one of Roman. I might have to send her a message and see if I can convince her!
Last year during the boxing week sales, Mom and I hit up a couple stores to find some good deals and I came home with a few things. I don't normally shop at Pier1 because it can be very expensive, but boxing week is the perfect time to go! I found a handful of beautiful ornaments for a fraction of the cost. When I find unique items I like to pick up just one to give the tree some interest. *TIP - when buying ornaments for a tree you want to buy 1 or in groups of 3. This will give your tree a nice balance.
Onto the entertainment centre! On the very top I have the beginning of what I hope will be a forest some day. For now if consists of a few foam trees that I made this year and a silver tree I picked up on sale at Canadian Tire years ago. This thing loses so much litter every year that I'm actually surprised there is any left on it. I also have my little light up reindeer and penguin on the top shelf. These guys are from an Avon catalogue years ago, and the only work sporadically, but they are cute none the less!
Now the nut family is actually out all year long but it does remind me of Christmas. When Selby and I were younger we would play a game at our grandparent's house called hide the thimble. Basically one of us would hide a thimble in the house and the other would have to find it. You might think this would be an impossible game but it was actually extremely easy. Why? Because we ALWAYS hid the thimble on the walnut's hat! We played this game all year round but something about my grandparent's makes me think of Christmas.
These three amigos used to live on the air conditioning unit in our apartment and would often get their butts frozen to the unit. I bet they think they are flying high now! The sparkle balls I made last year when I had all the time in the world because Roman napped three times a day and couldn't crawl. Man those were the days!
Funny story about these angels. I actually bought these angels two years apart at a craft sale in Regina. I must have really liked the angel because I bought the same one twice. What are the chances of that? I wish I could remember the name of the booth at the sale to share with you because they always had amazing things there. I actually picked up this moose there as well.
The elf and moose standing beside the TV were part of a boxing week bundle that we picked up at Canadian Tire years ago when John was working there. Most or the bundle was ugly (that's where most of the ornaments that got tossed came from) but these two were worth the cost of the bundles. We used to stand them up next to the Christmas tree but that just isn't going to work anymore with Roman running around. Luckily he hasn't touched them once yet!
Lastly we have Pingoo and his Associates. I'm pretty sure John is the one who named these bad boys that we found at Sears, if I remember correctly. They light up and change colors but like most things in this house the batteries are dead and I never remember to buy more. You would think with so many toys that take batteries we would have some somewhere. Maybe I should ask for some for Christmas...
Hanging over each of our front windows is a giant piece of candy. This was another project I completed last year while Roman was immobile. They are super easy and inexpensive to make and I think they look great. I bought a disk of Styrofoam and traced the pattern on a candy piece onto the disk. Then I painted it, wrapped it in cellophane, twisted the ends and tied it up with some ribbon. Viola, instant giant candies! You could even make smaller versions for your tree! We also have window clings on the front windows but they are a little hard to take photos of so you'll just have to trust me on that one.
The last of the indoor decorations are in the hallway. Here I decided to flank our Christmas card holder with Roman's snowflake paintings. The card holder was another project from last year (man alive I got a lot accomplished last year!) and it was super easy. I found the board with Santa on it at Dollarama. I painted it and hot glued three strips of ribbon onto the back. At Michael's I fond some mini clothes pins that I use to pin the cards to the ribbon.
Out into the cold we go to check out the outdoor decorations! Our display is significantly large than it was last year but we are nowhere near done growing. We want to be the Griswolds of Moose Jaw! John and I picked up the bow on the gate from Canadian Tire to hang from our balcony when we lived in our apartment. We didn't really have a great place for it here so the gate is where it got stuck. The tree silhouette was a boxing week find at Wal Mart last year. It has a stand that allows it to sit anywhere but John didn't think it would stand up to our crazy Saskatchewan winds so we wired it to the fence to make sure we weren't retrieving it out of the neighbors yard every other day.
I actually found these cute little devils at a garage sale! The snowman had never been taken out of the box and the penguin was only used inside. At $5 for the pair, how do you go wrong? The only downside is that because they are on the smaller side they tend to get stuck in the snow when the wind packs it on top of them. Not a big deal though. I just wanted out there and dig him out. Roman usually gets a kick out of it. We had the carousel last year and I was excited to see it again this year. Unfortunately it stopped working half way through the winter last year. I'm sure there is some way to fix it, I just haven't put that much effort into it yet.
You are seeing clearly. We have a Christmas tree in our front yard! This is actually the tree we used to have in our house, and the tree my Mom had for years before that. This time we strung it with outdoor lights and zip tied the lights and ornaments to the tree. John roped it down on two sides and it doesn't move an inch in the wind. A house down the street from us had a tree in their yard last year so I can't take the credit for this idea. What a great way to re-purpose an old tree!
I purchased the white wreath at a wholesale craft store last year and used twist ties to attach the ornaments and bow to it. This year the bow broke, it was from Dollarama and I'm impressed it lasted one winter, so John just zip tied it on while he was hanging it. The candy canes also came from the wholesale crafts store. To stick them into the ground, John ground down some 12" spikes, heated them in the oven, and stuck them into the bottom of the candy canes. Once the spikes were in the candy canes he just pushed them into the ground. Not only do they tie the driveway into the rest of the yard but they make navigating the driveway in deep snow a piece of cake!
So that's the tour! I hope you enjoyed seeing our Christmas decorations and maybe it will inspire your own display! This is the time of year to spread kindness and cheer and restore our faith in humanity (at least it is for me). John, Roman and myself would like to wish everyone a Merry Christmas, Happy Hanukkah, Happy Kwanzaa, Happy whatever you celebrate!
Thursday, December 4, 2014
Pumpkin Pie Baby/Toddler Food with the Infantino Squeeze Station
We are now fully immersed in fall which means pumpkin everything is popping up in the stores. Coffee, tea, muffins, cookies, even pancake mix all seems to have pumpkin somehow added into them. I can't help but notice that one group of people is being horrible discriminated against and being left out of the pumpkin party. Won't someone please think of the children!! Specifically the babies and toddlers!!

Luckily I am on the case and have the little ones covered! Not only did I come up with a healthy and delicious snack, but now even the littlest tikes can enjoy a slice of pumpkin pie! I enlisted the help of my handsome little man and my handy Infantino Squeeze Station to make this delicious snack for Roman. I'm pretty lucky that Roman loves all food and quite happily eats roasted pumpkin plain, but I think it would be wrong of me to deprive him of the warm and spicy flavors of pumpkin pie. Or maybe I'm over thinking this...
Pumpkin Pie Baby Toddler Food
4 cups pumpkin puree
1/2t cinnamon
1/4t allspice
1/4t nutmeg
2T agave syrup
Preheat oven to 350°. Cut pumpkin in half and scrape out the insides, the same way you would if you were carving a pumpkin. Place the pumpkin halves, cut side up, on a cookie sheet and bake at 350° for 60 minutes or until tender.

Once the pumpkin is baked and slightly cooled, peel or cut the skin away from the flesh of the pumpkin. Cut the pumpkin into manageable pieces and puree in a blender. Add water as needed to get a smooth texture. Transfer puree into a large mixture bowl and mix the remaining ingredients into the pumpkin until well distributed. You may want to add more or less agave syrup to tailor the flavour to your little one.

Now for the fun part, making the pouches! If you have a baby or toddler, you need one of these machines. It would also make a great gift for someone who is expecting and planning on making their own baby food. Unfortunately we can't buy these in stores in Canada, so I purchased mine from Amazon.com. Even with the currency exchange and the shipping it was still a great deal. This is how it works!

First you slide the pouches into the filling station and twist on the filling canisters. Fill the canisters just shy of the top, or less if your little one doesn't eat this much. Place the plunger on top and press the puree into the pouch. Viola! With the plunger still inside the canister, unscrew the canister from the pouch. Slide the pouch off of the filling station and screw on the cap. These pouches can be stored in the fridge or in the freezer. I usually freeze mine since I make them in larger batches and just let them thaw in the fridge overnight or on the counter for a couple hours before I give them to Roman. *TIP - to use the squeeze station your puree must be smooth. Lumps will get caught in the bottom of the canister and it will make filling your pouches impossible.
Luckily I am on the case and have the little ones covered! Not only did I come up with a healthy and delicious snack, but now even the littlest tikes can enjoy a slice of pumpkin pie! I enlisted the help of my handsome little man and my handy Infantino Squeeze Station to make this delicious snack for Roman. I'm pretty lucky that Roman loves all food and quite happily eats roasted pumpkin plain, but I think it would be wrong of me to deprive him of the warm and spicy flavors of pumpkin pie. Or maybe I'm over thinking this...
Pumpkin Pie Baby Toddler Food
4 cups pumpkin puree
1/2t cinnamon
1/4t allspice
1/4t nutmeg
2T agave syrup
Preheat oven to 350°. Cut pumpkin in half and scrape out the insides, the same way you would if you were carving a pumpkin. Place the pumpkin halves, cut side up, on a cookie sheet and bake at 350° for 60 minutes or until tender.
Once the pumpkin is baked and slightly cooled, peel or cut the skin away from the flesh of the pumpkin. Cut the pumpkin into manageable pieces and puree in a blender. Add water as needed to get a smooth texture. Transfer puree into a large mixture bowl and mix the remaining ingredients into the pumpkin until well distributed. You may want to add more or less agave syrup to tailor the flavour to your little one.
Now for the fun part, making the pouches! If you have a baby or toddler, you need one of these machines. It would also make a great gift for someone who is expecting and planning on making their own baby food. Unfortunately we can't buy these in stores in Canada, so I purchased mine from Amazon.com. Even with the currency exchange and the shipping it was still a great deal. This is how it works!
First you slide the pouches into the filling station and twist on the filling canisters. Fill the canisters just shy of the top, or less if your little one doesn't eat this much. Place the plunger on top and press the puree into the pouch. Viola! With the plunger still inside the canister, unscrew the canister from the pouch. Slide the pouch off of the filling station and screw on the cap. These pouches can be stored in the fridge or in the freezer. I usually freeze mine since I make them in larger batches and just let them thaw in the fridge overnight or on the counter for a couple hours before I give them to Roman. *TIP - to use the squeeze station your puree must be smooth. Lumps will get caught in the bottom of the canister and it will make filling your pouches impossible.
Tuesday, December 2, 2014
Foam Christmas Trees
I've always wanted to have a Christmas tree display but I've never had the space. The shelves of our entertainment stand are already fairly full of Christmas decorations so I decided to use the very top of the stand to build my forest. I'm sure I'll end up adding to it over the years but these cute and easy foam trees are the perfect start.

I already had a few foam cones in my craft room so the only thing I had to purchase for these trees was the foam. I found a pack of green, red & white craft foam at Wal Mart for $5 which I thought was a steal! With my handy glue gun near by it was time to get to work!
I made a leaf template out of a cardboard box that was headed to the recycle bin. It took a few trials but I finally got a shape I was happy with. Then I used this template to trace leaf shapes all over the foam sheets. I squeezed them in pretty tight so there wasn't much wasted. Once the leaves are traced onto the foam the fun begins. And by fun I mean the painstaking process of cutting out all the leaves. It actually wasn't too horrible since I usually did it at night while I watched TV with John. I ended up needing about 250 leaves for one tall (12") and one short (6") tree.

With my leaves nicely bagged to protect them from my little leaf eating toddler, I headed down to the craft room to hang out with my bestest crafting buddy, my glue gun! Is there anything a glue gun can't do?! I started by gluing the first row of leaves to the bottom of the tree and letting half of the leaf to hang past the bottom of the cone. This way the cone will be completely covered. The second row of leaves added off-set from the first row, so the space between each leaf is covered. This process is repeated to cover the entire cone.

Once you reach the top of the cone you want about 1/4 of the top of the leaf to stick up over the top of the cone. The next row is off-set and glued onto the top of the last row. This is repeated until the top forms a peak, then glue all the points together.

Originally Posted on Marisa Howard Designs
I already had a few foam cones in my craft room so the only thing I had to purchase for these trees was the foam. I found a pack of green, red & white craft foam at Wal Mart for $5 which I thought was a steal! With my handy glue gun near by it was time to get to work!
I made a leaf template out of a cardboard box that was headed to the recycle bin. It took a few trials but I finally got a shape I was happy with. Then I used this template to trace leaf shapes all over the foam sheets. I squeezed them in pretty tight so there wasn't much wasted. Once the leaves are traced onto the foam the fun begins. And by fun I mean the painstaking process of cutting out all the leaves. It actually wasn't too horrible since I usually did it at night while I watched TV with John. I ended up needing about 250 leaves for one tall (12") and one short (6") tree.
With my leaves nicely bagged to protect them from my little leaf eating toddler, I headed down to the craft room to hang out with my bestest crafting buddy, my glue gun! Is there anything a glue gun can't do?! I started by gluing the first row of leaves to the bottom of the tree and letting half of the leaf to hang past the bottom of the cone. This way the cone will be completely covered. The second row of leaves added off-set from the first row, so the space between each leaf is covered. This process is repeated to cover the entire cone.
Once you reach the top of the cone you want about 1/4 of the top of the leaf to stick up over the top of the cone. The next row is off-set and glued onto the top of the last row. This is repeated until the top forms a peak, then glue all the points together.
Originally Posted on Marisa Howard Designs
Subscribe to:
Comments (Atom)