
For this cake I used my "chocolate cupcakes from scratch" recipe. I don't know if I would necessarily recommend this recipe for cakes, because it's so fluffy it sinks a bit in the middle, but it's so good who really cares. Plus you can just fill the dip in with more icing! Mmmmmm buttercream icing...

First step, cover the entire cake with icing. Start by dropping a good sized blob of icing in the middle-ish of your cake. Using a small icing spatula, push the icing over the edge of the cake. Holding your spatula vertically, slide your spatula back and forth to spread out the icing. Clear as mud right? That's why I recorded this part because I had a feeling it wouldn't be very easy to explain in just words, and taking photos while icing isn't exactly easy. Once the sides are coated, use an offset spatula to cover the top with icing. The goal for this step is to get just enough icing on the cake to cover the cake itself. Don't worry if you get a few tiny crumbs in the icing, we'll take care of that soon. If you do get some larger ones, just scoop them off with something other than your icing spatula. You don't want them getting back into the icing. Once your first layer of icing is on, pop your cake in the freezer for 2-3 minutes, just to set the icing.
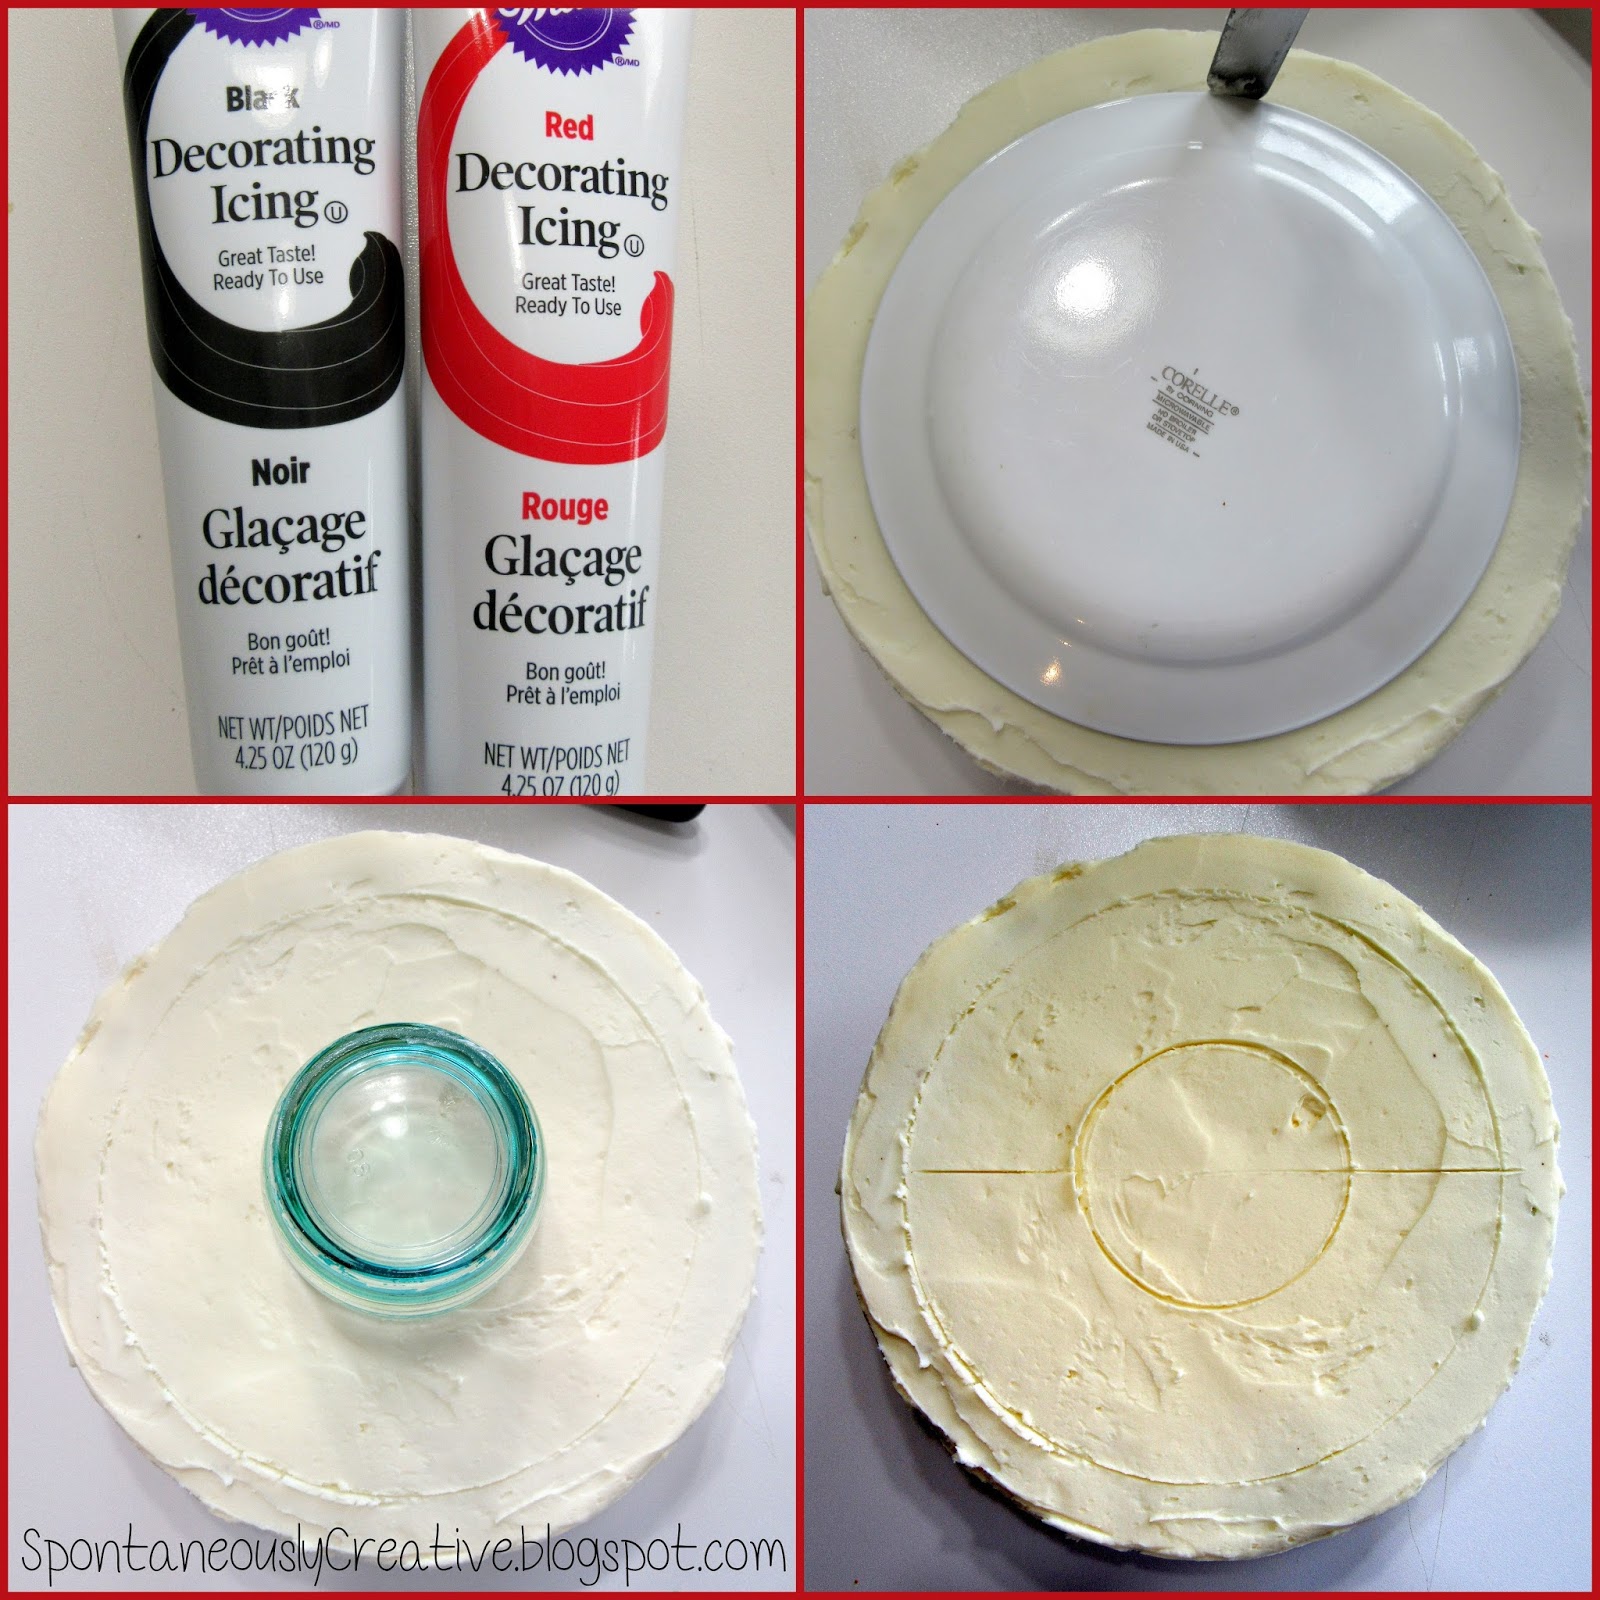
Because the icing is made with butter, it will firm up a bit, which means you can put on a second layer of icing without dragging up crumbs. Once the second coat is on, pop it back into the freezer for another 2-3 minutes. Now for the tricky part, piping a perfect circle. I am completely incapable of such feats, so instead I found an object (a small plate) that was the right size and traced around it with the small spatula. I did the same thing with a small glass and a cap for the inside of the pokeball. Finally, I drew the line through the centre of the pokeball with the offset spatula.
Normally I would tint my own buttercream for the decorating, but this time I decided to give the Wilton prepackaged icing a shot. I screwed on a Wilton 8 tip and went to town. It was actually super easy to use and gave me a decently smooth line, once I got the hang of it. Once the black was all done, I cleaned out the tip and switched it onto the red icing. I piped rows around one side of the Pokeball, then I spread out the icing with the small spatula to make it a solid, smooth color. Cleaning the tip once again, I attached it to a piping bag and filled it with some of the buttercream. I used the same technique with the white as I did with the red. To finish off the cake, I piped balls around the base of the cake to finish off the edge.

Considering I banged the cake out in an hour while Bianca slept and Roman was at camp, I'm pretty pleased with how it turned out. I made this cake the day before we were having the birthday and I was a little disappointed by the way it looked the next morning. The black icing bled into the white icing a lot. I didn't treat this cake any different than I've treated any other cake I've made, so I think it had something to do with the premade icing being made with oil. So if you aren't planning on eating this cake the same day you decorate it, I would recommend taking the time to tint your own icing so you don't wake up to a mess. Luckily, nobody around here cares, particularly not Roman, who was just exited that we were having cake!

No comments:
Post a Comment